You can build and fly either (or both) of the Vostok or Sputnik capsules.
On the right are all the parts.
Half of the capsule body is clear so you can see the Cosmonaut and detail inside.
The Cosmonaut is glued into his chair and into the capsule.
The small capsule glues on at an angle into the open half.
I'm not painting anything inside the capsule. The outside halves will be an opaque olive drab.
A single lead weight is 0.18 oz.
You are given two weights, one for the Vostok, the other for the Sputnik.
Pages
▼
Monday, March 31, 2014
MPC Vostok Build, Part 4, Booster Assemblies
The four booster halves are marked 1, 2, 3, and 4 on the inside.
The fit wasn't good. The tops and bottoms were sanded reducing the open gap.
After glue was applied the numbered halves were joined.
The only way to force a good fit was to use wrapped rubber bands.
Sunday, March 30, 2014
MPC Vostok Build, Part 3B, Engine Mount
My internal body halves were horribly warped!
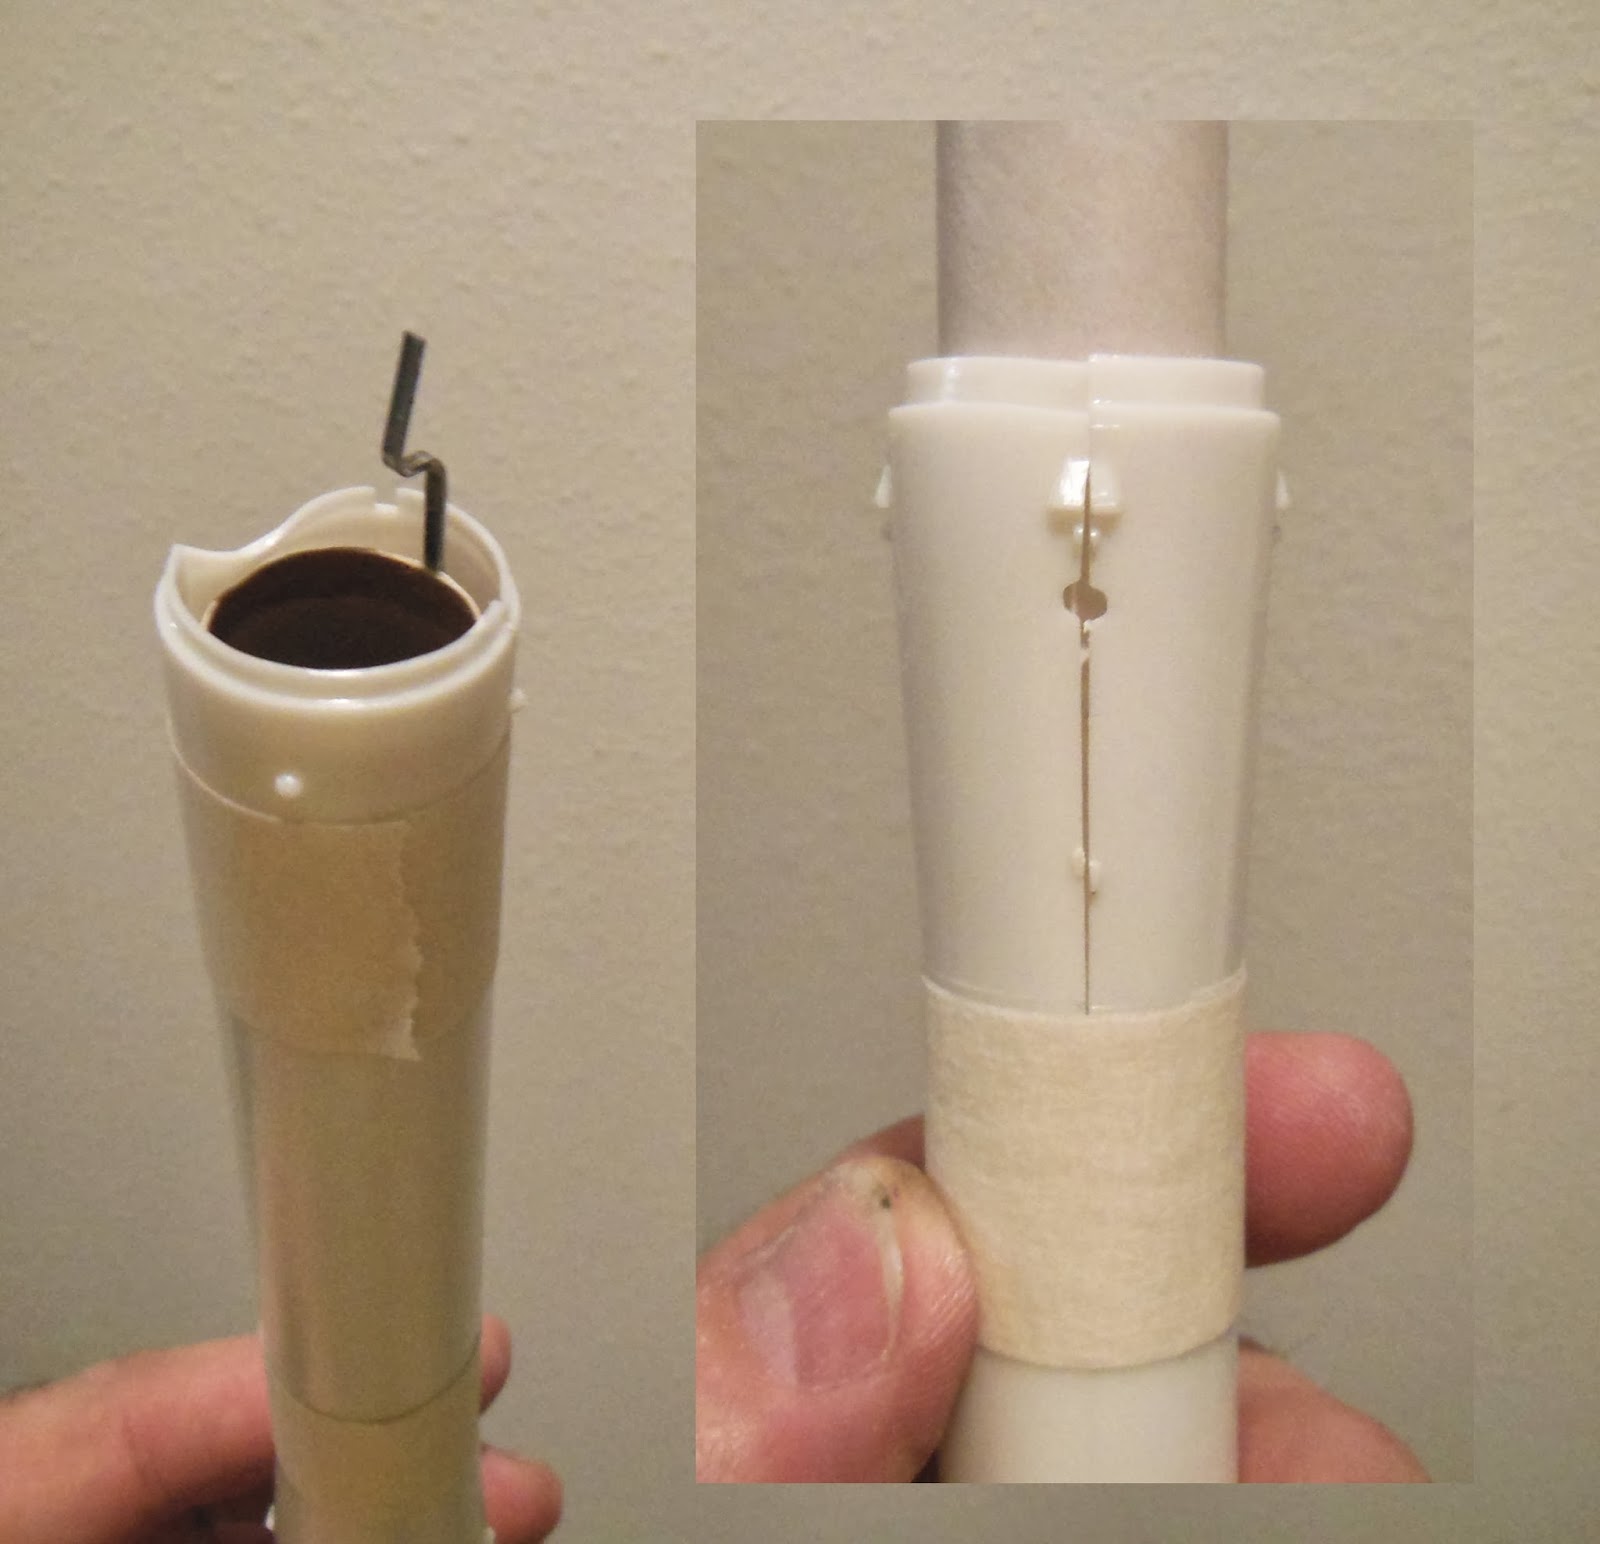
There is no way the engine mount tube would slide through.
Even at the top the fit was bad.
The halves had to be taped together to get this picture. The halves don't have any male and female pins.
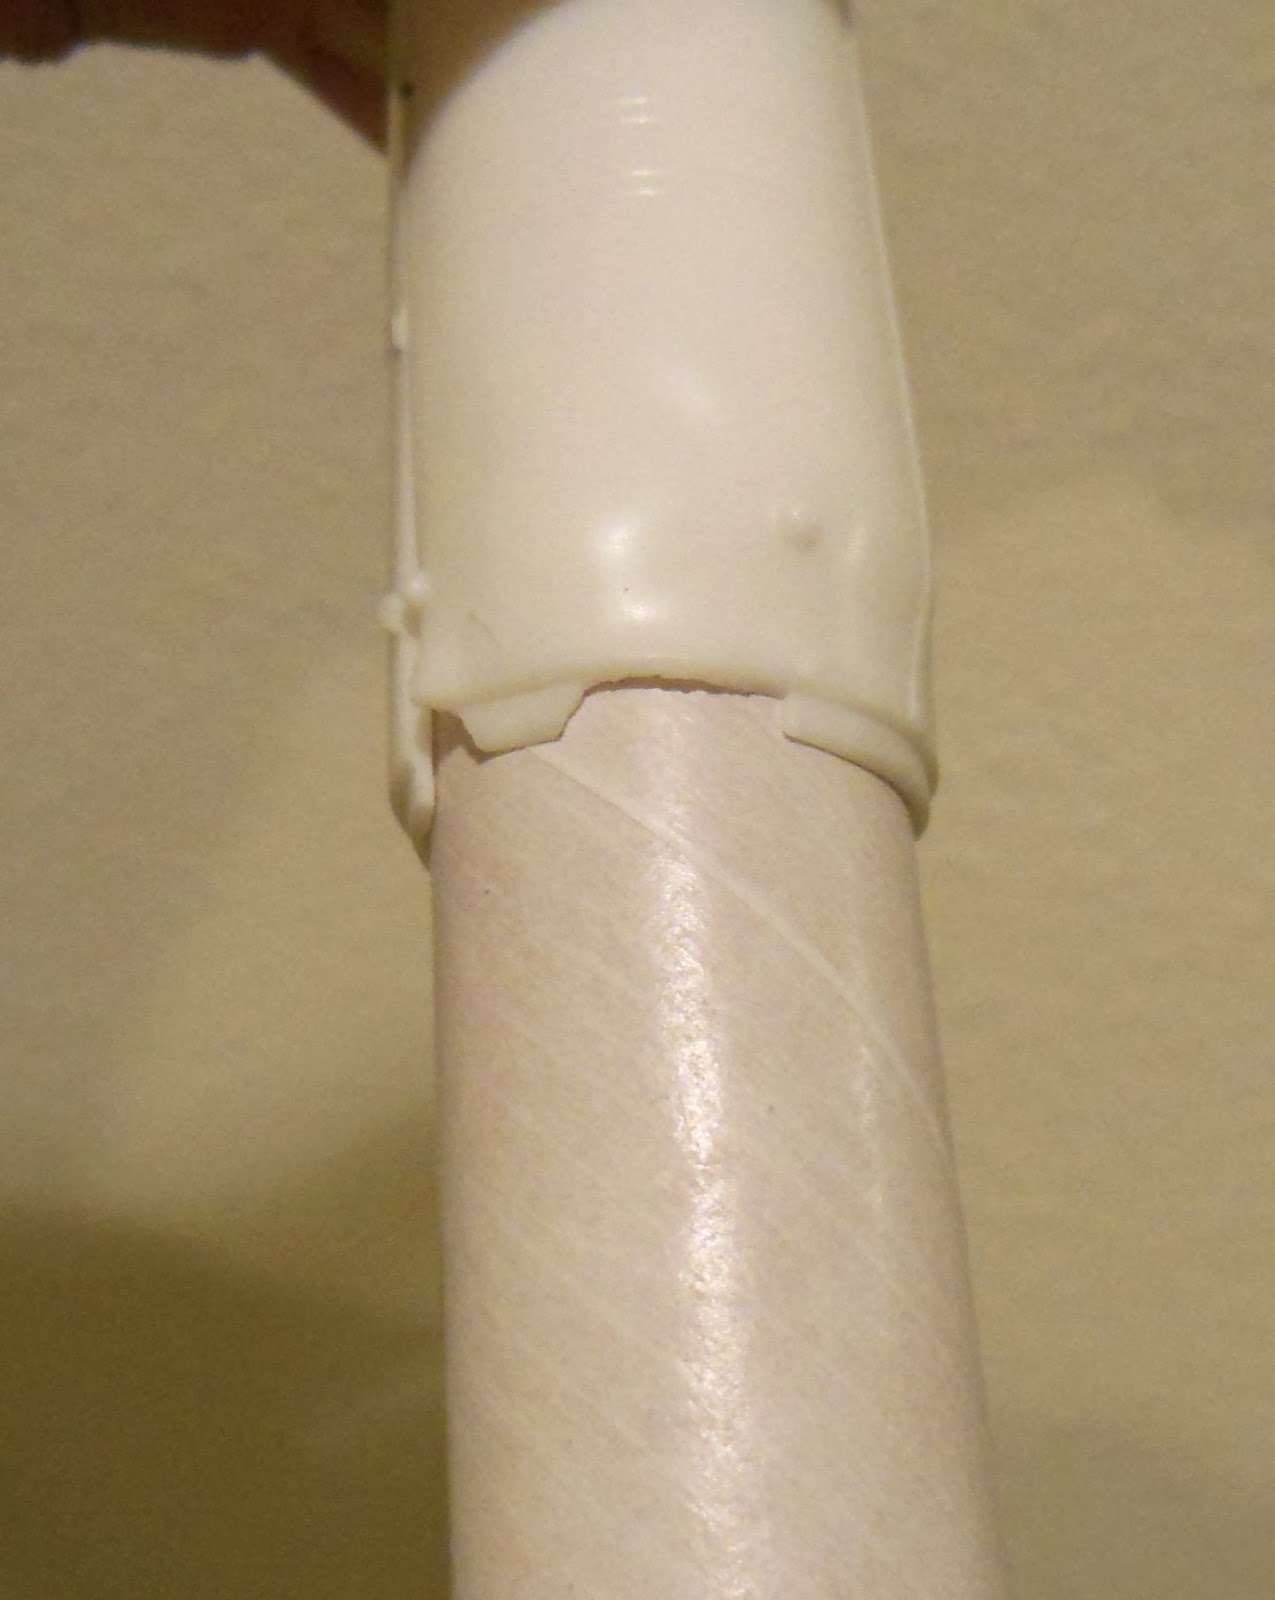
I decided to heat and mold the warped back end of the plastic half.
I honestly didn't know if this would work but I couldn't build the model if the end wasn't round.
Water was brought to a boil then turned down.
The warped end was dipped into the hot water for 5 seconds.
The end was rounded out with a Sharpie pen.
The end result is a usable piece, not perfect but usable.
Luckily the bad joint will be covered by boosters!
The Unfinished!
Did you ever start a model and get so frustrated you set it aside?
It could be a bad design or unusable parts.
I almost gave up on the MPC Vostok!
I've got three rockets that are sitting until I can figure out a few steps that have me stumped.
Two of these models were started on the blog and left unfinished.
The AVI NIKE TOMAHAWK:
This was a model that AVI had in a catalog but I doubt was ever produced. I got the Nike and Tomahawk fin cans and parts from Quest.
There was problems painting the Tomahawk fin can. The mask wasn't good. Any attempt to smooth the paint sands down the raised screw heads. A few weeks back I finally found better fluorescent paints.
The TLP PHOENIX 1.6:
The build went well until I tried to glue on the fin fairings.
This was before I was scanning any kit card stock so I could print more if needed.
I was disappointed there wasn't any decals. I didn't print my own decals back then.
The model isn't big. I was hoping for something larger, like the older Estes Phoenix.
The Q Modeling RAPTOR:
I won this one in a contest.
The card stock adapter didn't turn out well. I'd rather have a balsa adapter.
I didn't know how to install the "parachute shelf" ring in the upper tube section. After it flipped around a dozen times I gave up and cut the tube to install it.
TIP: To install a centering ring "shelf", roll up a magazine or newspaper into a tight cylinder to push the ring in place.
There were plenty of "antennas" made from leftover pieces from the laser cut Q Modeling engine mounts. (The Q Modeling engine mounts are pretty amazing.)
There is no way to easily fill all the pores on the balsa antennas. I ended up sanding off the raised areas then gluing thick card stock squares where they once were.
In the 1970s I quit building an Estes Saturn V.
All the embossed wrap widths were pre-cut. None of them made it all the way around the body tubes!
I rarely give up on models. I'd rather troubleshoot and hope a solution comes to mind.
These will be finished and flown one day, if I ever figure out how to fix the snags.
Saturday, March 29, 2014
MPC Vostok Build, Part 3A, Engine Mount
My kit box didn't have the brown tube so I substituted a yellow Quest engine mount tube.
The engine block is glued in first and the tube is roughed up with sandpaper.
My yellow tube was too wide to fit properly in the 20mm tube.
I ended up cutting a slit down the side and removing a sliver until there was a good sliding fit.
With the slim sliver of tube removed the ends butted up and the fit was good.
I decided to keep the old style engine hook just because it was original.
I kept an engine casing in the mount for support when gluing it in place.
You don't put glue inside the 20mm tube and then slide the engine tube in.
Slide the tube partway in, apply a ring of glue around the yellow tube then slide it into the 20mm tube.
The fit is tight and I can see why you are instructed have you do it this way.
The exposed yellow tube is thin and rough.
I gave it a wrap of 20 lb. copy paper adhered with a glue stick.
Streamer Material? TIPS
From the Rocketry Forum:
Gary Byrum
OldSchoolDood
(The picture at the right is the printed barricade tape. Look for the unprinted tape.)
Another source for streamer material are plastic tablecloths, but you have to cut the streamer strips to size.
The Dollar Store tablecloths aren't the best for this, they are a little too thin.
Buy the tablecloth material at major grocery stores to get the thicker material.
Gary Byrum
OldSchoolDood
"Go to Lowe's and get you a roll of the unprinted Barricade Tape or safety tape. It's 1"- 3" wide about 100 miles long ( jk ) and it's very much the same or about the same stuff Estes uses in it's kits. Can't remember paying more that 5-6 bucks for it and you'll prolly never use it all up in a life time."
(The picture at the right is the printed barricade tape. Look for the unprinted tape.)
Another source for streamer material are plastic tablecloths, but you have to cut the streamer strips to size.
The Dollar Store tablecloths aren't the best for this, they are a little too thin.
Buy the tablecloth material at major grocery stores to get the thicker material.
Friday, March 28, 2014
MPC Vostok Build, Part 2A, Old MPC Instructions
From Anonymous, I received a comment about the interior booster pieces:
"Just finished my build, let me know what you think about the disks and trusses that go into the booster pods, what's the point of these if you can never see them?" on MPC Vostok Build, Part 1 Parts
Obviously, the new instructions don't say to leave those pieces out of a flying version.
You'll never see them inside the boosters in the display or flying versions, but why add the extra weight? Keep the weight off, especially in the rear.
The original instructions are HERE
Enlarge the instructions at the right.
Anytime you see an Asterisk "*" they are directing you to an optional step to be used on the flying model.
If you want to fly it, the internal disks and trusses are left out.
Here's the original instructions for assembly of the capsules.
I left all the parts 9 - 13 inside. You'll want that extra weight in the top end (with the lead weight equivalent) for stability.
The less detailed nozzle plate is used for the flying version.
"Just finished my build, let me know what you think about the disks and trusses that go into the booster pods, what's the point of these if you can never see them?" on MPC Vostok Build, Part 1 Parts
Obviously, the new instructions don't say to leave those pieces out of a flying version.
You'll never see them inside the boosters in the display or flying versions, but why add the extra weight? Keep the weight off, especially in the rear.
The original instructions are HERE
Enlarge the instructions at the right.
Anytime you see an Asterisk "*" they are directing you to an optional step to be used on the flying model.
If you want to fly it, the internal disks and trusses are left out.
Here's the original instructions for assembly of the capsules.
I left all the parts 9 - 13 inside. You'll want that extra weight in the top end (with the lead weight equivalent) for stability.
The less detailed nozzle plate is used for the flying version.
Parachute Reinforcement Disks - Single or Double? TIP
Most kit parachutes are around a 1 mil (1/1,000th of an inch) thick.
Polyethylene sheet parachutes can stretch and tear so reinforcement rings are needed.
Some kits include the cheaper paper rings. If you use a paper ring you should place a ring on the top and the bottom of the parachute corners.
Even doubled up, paper rings are not the best way to go.
Better yet, use a single poly vinyl ring.
You can pick them up at any office supply store.
These are Avery white Reinforcement Labels #5279.
Get the white labels, the clear rings can be hard to see on the backing strip.
One pack of 200 rings will make 33 six-sided parachutes, enough to last anybody for a while.
Without tearing it, how do you tell if a kit supplied rings are paper or plastic?
The poly vinyl rings have a shiny surface. Paper rings usually have a flat finish.
Thursday, March 27, 2014
MPC Vostok Build, Part 2 More Parts
Some interesting extras:
An "If found, return to" label
A generic decal sheet.
Yellow insulation wadding. Many MPC kits would give you a piece of wadding in their kits. This wadding is not bio-degradable and shouldn't be used.
The "fortune cookie" strip of paper explaining the Vostok decal wasn't included in the kit - I never got my my 25 cent credit.
The new Round 2 kit does include the larger flight fins.
The ruler is there for size reference.
The huge 20" parachute that might not eject.
It is very thin Mylar and crispy.
I posted this picture so you could see the print pattern.
Stare at it long enough and be hypnotized.
Brush Color Identification TIP
It never fails, even after you thoroughly clean your brushes they still have some paint color left in them.
Your white touch up turns a light pink when the leftover red on the brush mixes with the new white.
I don't have expensive brushes. I bought a budget selection at a craft store. There were 24 brushes of different sizes.
After the first black was applied the brush was cleaned. I really couldn't see any black but some probably remained in the ferrule.
To save frustration later on each brush was marked with it's first-use color.
Masking tape was wrapped and the brush labeled.
Tuesday, March 25, 2014
MPC Vostok Build, Part 1 Parts
Round 2 has brought back the MPC Vostok and Titan IIIC plastic models HERE. The re-release kit doesn't include any parts for flight.
EDIT: The larger flight fins are included. The two piece molded launch lugs are still on the plastic pieces.
This build is the older version from the 1970s where you could "Build To Fly" or Build To Display".
I'll try to include all information needed for the flying conversion. You should be able to fit a 20mm (or BT-20 tube with a shim) in the hollow middle plastic section.
The AVI folks sent this one to me. I've had it in storage for over 35 years.
The plastic parts, many are broken off the trees .
Most is molded in white, there are some chrome and clear parts.
Parts needed for the flying version:
A large 20" Mylar parachute, 8 shroud lines and unusable tape strips.
How you gonna' fit all that into a 20mm tube?
A Stine "Shock Lock" shock cord attachment
9" long 20mm heavy walled tube
Two lead weights
One for the Vostok, one for the Sputnik capsule, your choice
Thin yellow engine compartment tube
The instructions said there was a brown tube, I couldn't find it and substituted a Quest yellow tube.
Two engine hooks were provided, only one is needed
Four larger for flight fins. Smaller display fins were included.
In the middle are the two interior halves, the 20mm tube slides inside.
Estes Reflector Lil' Hustler Version Finished
Nose Cone Retention in a Payload Section TIP
I wanted to be sure I'd never lose the nose cone off the Reflector build payload section.
In years past I've lost a few nose cones off a payload section when the ejection charge fires.
Centrifugal force can pop off even a seemingly tight nose cone.
I don't normally use a tri-fold mount but it seemed the best choice for this.
The nose cone will be tied to the payload tube by a short shock cord.
As explained in an earlier blog post, glue the shock cord onto the card stock at an angle.
When glued this way it will fold and glue flatter inside the body tube. There will be less SC mount to block the ejection of the parachute.
The tri-fold mount was glued inside the payload tube.
The other end tied to a screw eye glued in the nose cone base.
I could even hook an altimeter to a loop tied into the middle of the shock cord. A little bit of padding on either side and I'll be good to go!
EDIT: Looking at this now, I might be better off using a Kevlar line or thick string to retain the nose cone. If the upper nose cone were to come loose on a strong ejection the elastic could could cause it to snap back and make an Estes smile in the balsa.
I simply want to retain the nose cone so elastic wouldn't be necessary.
Estes Reflector Build Finished
This one is the Reflector design, the Lil' Hustler version will be posted tomorrow.
I like the looks of this one, there is certainly Centuri design influence here.
There were problems along the way:
The "Huge Payload Section" wasn't huge even with the adapter and nose cone shoulders cut back.
Placement of the lug and standoff doesn't allow enough room for the black decal band.
The supplied decals don't allow you to duplicate the fins shown on the face card. There were only four white stripe decals when eight were needed.
The big surprise was the Rustoleum Metallic spray paint!
The Black Night Metallic looks great on the payload section.
Monday, March 24, 2014
Estes Reflector Build, Part 15, Lil' Hustler Version Decals
On the Lil' Hustler version (made from the Reflector kit) I made some very slight changes in the decal placement.
As before, there isn't enough clearance for some white under the black band with the launch lug standoff in the way.
This time I just centered the black band right over the red/white mask line.
The upper roll pattern decal was set back from the end of the body tube to expose a band of white paint. The white strip is the same width as the black band on the top of the decal wrap.
On the trailing edge the overlap was cut off using a light back and forth "sawing" motion. Be careful not to cut through the paint or wood at the edge.
All decal edges got a light coat of clear Pledge brushed on with a Q-tip.
Old Model Rocket Magazine Scans
I'd forgotten about these on the Ninfinger website. HERE
This is probably the entire run of the Model Rocketry magazine from October 1968 to Jan/Feb 1972.
There's great reading and plenty of scale information.
Back then this was the magazine you received as part of your NAR membership.
Issues were usually late and sometimes a month would be skipped.
I bought my first Model Rocketry magazine before I joined the NAR I found it in the magazine rack at a liquor store.
I had a letter published in the November 1971 issue.
I did a plastic model conversion of the Renwal Nike Ajax.
The letter was published before I had a chance to fly it.
I don't remember if it was stable or not!
The editor re-wrote much of the letter.
The drawing I made was on the letters page.
Sunday, March 23, 2014
Estes Reflector Build, Part 14, Decals
The only way to get the black stripe decal to fit is to cut away the clear border under the launch lug standoff.
Cut this before soaking the decal.
Even with the clear border cut back I still had to slice the black stripe on either side of the standoff to make it fit.
The face card and instruction picture show the white stripes on both sides of the four fins. You are only given four when you should have had eight double white stripes!
The vertical white stripes don't fit the face of the fin in the position shown on the face card. For the decal ends to reach the leading and trailing edges of the fins you have to slide them closer to the outside edge.
The top of the decal doesn't match the angle of the leading edge and lays over as shown in the inset picture.
Wait for the decals to dry so they will be a little stiffer for trimming.
Lightly score down the middle of the decal at the leading edge with a new razor blade. Use a light touch, cut just the decal skin and not into the fin paint. Remove the excess overhanging decal.
The clear border is shaved off the bottom of the trailing edge (inset).
Quest Stiletto Build Decal Fix
The Stiletto was missing the two USAF and Star and Bar decals.
I printed up the black USAF pair but won't be adding the Star and Bars. Those require white backgrounds.
TIP: This font is called AMARILLO USAF.
It's used very often on military models. You might find it on the free font websites.
I don't waste the remaining sheet of decal paper . These were added to a sheet of some Vostok and Pigasus kit decals.
Here's one of the decals in place. It did need something to fill that empty space on the intake tube.
Future clear coat will be applied to the edges with a Q-tip.
Saturday, March 22, 2014
Rocketry Deals! TIPS
Most of you already know of these - but for those who don't . . .
Instead of scrolling through pages of Ebay listings -
1. Got to RocketReviews.com HERE
2. Go to the "Features" tab
3. Scroll down to "Deals"
You'll find rocket kit listings in the order of savings by percentage.
Some are Ebay bids, others are Buy It Now and Amazon listings.
Last week I picked up two Estes Equinox models from Amazon for a BIN price of $6.37 each!
Sometimes you have to double check the listings.
There is an Alpha 12 pack for $9.39 - a 92% savings!
It's actually just one model pulled from the 12 pack.
I lean towards any interesting models when they are over 40% off.
BP engines are usually bought at Hobby Lobby with the 40% off coupon HERE
The coupon is good for one item at 40% off.
Occasionally that page will list all rocket items at 30 to 40% off.
My Hobby Lobby purchases are always BP engines. The kit selection is limited.
Then, there's always Craigs List. I know a few guys who have found engines very cheap.
If I run across a Clearance sale I'll list it here on the blog.
That'll happen only after I've placed my order.
A few years ago there were Estes 24 packs of engines for $20.00 from ScoutStuff.com (all gone now) and the more recent Quest clearance at BPHobbies.com HERE
TIP: There are still some great buys at the BP Hobbies Clearance, like the big Quest Aerospace one for $14.46 and the Quest Terrior Orion for $7.02