Pages

Saturday, January 31, 2015

Official SEMROC Announcement


News Release
January 31, 2015
 

eRockets is proud to announce the acquisition of Semroc Astronautics Corporation.
eRockets will relocate Semroc to their facility in Dayton, Ohio, and resume full production of  Semroc flying model rocket kits.
Semroc was originally founded in the 1960’s by Carl McLawhorn to enhance the options for flying model rocket enthusiast.  The remaining family members decided it was going to be impossible to continue the company without Carl and ceased production.
eRockets was founded by Randy Boadway in 2009.  eRockets sells model rocket kits via the internet and ships to customers around the world.  eRockets boast the world’s largest selection of flying model rocket kits with over 700 kits in stock.  eRockets entered an agreement to take over Totally Tubular in 2010 and purchased A2Z Hobbies in 2013.
Randy Boadway will remain at the helm of eRockets and launch them into the next phase by enhancing the experiences of model rocketeers around the world by operating Semroc as a manufacturer.  Semroc will continue to produce some of the highest quality model rocket kit in the marketplace under the Semroc name.  eRockets will continue as an internet retailer while sharing resources like space, administration and shipping facilities with Semroc.
The plan is to have production restart sometime in February with flying model rocket kit re-releases beginning shortly after start up.  Boadway indicated that the first kits produced will be the popular kits where we can get parts through the pipeline quickly.  In its prime Semroc produced over 150 different kits.
We have a good team of people that will be an important part of producing parts and kitting the models at Semroc.   Every member of this new team has a lot of experience building and flying rockets.  Each has already been an inspirational help to the hobby and will provide great incite towards making the Semroc kits even better.
The facility in Dayton, Ohio will provide more space and efficiency that could be provided in North Carolina.  This will also allow for better buying and storage opportunities.
Our thanks goes out to Bruce McLawhorn, Sheryl McLawhorn and the late Carl McLawhorn for creating such an exceptional company and product of Semroc.
 
eRockets can be found at www.eRockets.biz
Semroc will soon be available again at www.semroc.com
Questions may be addressed to erockets@rocketmail.com

TLP Pershing #K046 Build, Part 25, More Scale Data!

Thanks to links from Eero Fluge, I have a good scale drawing of the Pershing! This is from the January 1970 issue of  Model Rocketry magazine -
CLICK HERE

Looks like I'm going to have to remake the fin vane pads. I was pretty much guessing and going by what I could see in the Estes instructions.
I might also do the rear fins again, thicker this time.
Interesting too is the rounded tip on the nose cone.

There might not be a Pershing build post for the next few days! The cruise used up many of the posts I had in draft form and now I'm going to remake the fins and fin vane pads. I'm also busy with land shows.
There should be posts, but they will be on other rocketry subjects. 
Just give me a few days to get the Pershing back on track.

The Big Fix, Crimped 3 Ply Card Stock Fin


My new carded downscale Black Brant VB landed hard on the basketball court asphalt.
One red fin was crimped on the tip.

I thought about steaming it, but was concerned it might smear the printer ink on the outside layer.

The fin was set flat on a clean countertop.
Some white glue (no yellow glue here, the yellow could discolor the red print) as applied and allowed to soak in for a moment.

A Sharpie pen barrel was pressed and rolled (don't rub, roll over the glue) over the wrinkles, flattening them.
Here's the repaired fin.
The wet white glue softened the crimp bends allowing them to be pressed flat. The glue also strengthened the bent fin tip.
Not perfect, but ready for another flight.

Want to build your own carded Black Brant VB?
Patreon members can email me at: oddlrockets@bellsouth.net
Request the Black Brant VB PDF art. 

Friday, January 30, 2015

TLP Pershing #K046 Build, Part 24, Rear Fin Shaping


The upper and lower tapers are sanded first concentrating on just the edge.
The blackened edge gives more contrast making it easier to sand the knife edge evenly.
So far I've only sanded a taper about 3/16" off the leading and trailing edges.

Now sand towards the penciled center line. Don't thin the black edge! You'll be constantly checking its thickness. Keep the width consistent from top to bottom.
You'll end up sanding off some of the pencil line and the outside edge will be thinner than the root edge. This is typical of many real rockets and missiles.
I've drawn the pencil line down to show how the sanding removes the wood.


The other side is sanded.
The center line will end up back in the middle and should straighten out. It might take fine sanding under a strong light source to clean up the line.
The center line wedge shape is easy to see near the outside edge, not as sharp as the root edge.

On the left is the diamond shaped root edge, the inset shows the small outside edge.
The ink down the leading and trailing edges is removed with a few light passes of 400 grit.

Each fin takes about an hour to get right.
Anyone can get this result with practice. You've just got to go slow -
Sand a little, check the ink line width, sand a little, check the ink line width.

Asking Permission Might Be A Good Start!

If you follow the blog, you might recognize this rocket.
It's my two engine cluster model called the Big Girtha. It was adapted from a Quest Big Betty kit.

I took this picture before it was launched at the Tampa TTRA monthly.
Then I saw it in a EBAY listing. Maybe I should be flattered, but I'm not.

A vendor was selling his 808 "Spy" cameras using my picture. Farther down the Ebay listing is a link to my YouTube video from the flight.

I didn't buy and build the rocket, buy the camera, fly it, edit the video and post it for somebody else to make a profit. Build your own model, fly your camera and post your pictures.

Just because you can "Right Click", "Copy and Paste" doesn't mean you own or have the right to profit from somebody else's work. Don't assume "Oh, he's one of us, he won't care!" This is a business and part of my income.
I wrote the vendor twice and he did pull the pictures and video link.

Thursday, January 29, 2015

TLP Pershing #K046 Build, Part 23, Rear Fin Shaping

The rear fins on the Pershing are tapered.
The instructions show the center line of the taper in one drawing but don't mention to shape them.

I've been looking online for more scale data but didn't come up with much. The face card picture shows the fins flat and squared. I'll take extra time on the fins and get it closer.
The 1/8" stock is thinner than actual scale.


The balsa would be very weak at the thin tapered edges so I cut more out of 1/8" basswood.
The 1/8" thick balsa fin weighed .02 oz.
The new, stronger 1/8" basswood fin was .08 oz.
My shaping method is described in more detail in a Apogee Peak Of Flight newsletter article:
CLICK HERE

The outside edges of the fins were "sealed" with CA glue applied with a Q-tip. This prevents the ink from a marker from soaking into the wood. After the CA coat, the outside edges of the fins are then marked with a wide point permanent marker. This gives you a high contrast to better gauge the taper thickness when forming the "diamond" shape.
After shaping the fin tapers the remaining black ink is easily sanded off.
The marker is quickly passed over the edge. Go quick using just enough ink to darken the outside edges. Don't mark the root edge.

Crepe Wadding Update

Wadding alternatives come up on the forums and on rocketry FaceBook pages. I've done quite a few blog posts about cheaper wadding in the past.

Lonnie B recently wrote:
"I finally made use of the bag of yellow crepe paper wadding you gave me a couple of years ago. I was getting fed up with how my new 'chutes were quickly getting burned, even with extra sheets of conventional wadding, so I tried yours and it was fantastic! It made a perfect seal that better protected the 'chute. I would love to purchase/find/make more."

He added the link on an old blog post is no longer valid. (I've gone back and fixed the link.)
Here's the new link to Crepe Paper wadding SHEETS -
CLICK HERE
Notice I specified SHEETS. These are 20" X 7.5' sheets. This is not the party rolls you find at the Dollar Store. Party rolls do work as wadding but are not very wide.
(Note: Some party rolls might not be flame resistant! Test them to see before using them in your rockets. You don't want to have flaming paper raining down on the field!)

I prefer cutting 4" squares, smaller than the 4.5" treated toilet tissue squares from Estes. Crepe Paper wadding is stiffer than the Estes and is easier to pack when it is slightly smaller.
TIP: With the crepe paper wadding (and the stiff Quest style) you crush up the sheets into a small ball then reopen it before going in the rocket. This puts many creases in the paper and softens it up making for easier packing and a better seal.

The colored crepe paper is easy to find on the field. Usually the first piece (closest to the top of the engine) is burnt and not reusable. The pieces right above it look like new and can be used again.

If you buy crepe wadding from the CrepePaperStore.com you should buy more than one package or the shipping charges will offset any savings over buying Estes or Quest wadding.

Right now, the crepe packages are $1.12 each.
Buy 5 packages for $5.60
Add shipping at $8.05 (Florida destination)
Total for 5 packs is $13.65
You can get more than 100, 4" squares from each package
Pictured above is the Canary Yellow color crepe paper.

Estes list price for wadding is $5.49 or 7 cents a square! (No shipping charges added)
Cut your own Crepe Wadding (with shipping charges) is under 3 cents a square!
(Even less if you buy more packages to offset the shipping charges.)

Wednesday, January 28, 2015

Featherweight or Tumble Recovery?


There are a few small "Featherweight" / Tumble" models out there.
Above is the Quark and Mini Mosquito from Estes.
An early featherweight rocket kit was the Estes Streak introduced in the early 1960s.
The 13mm Mini Brute Mosquito was introduced in 1972 and had featherweight recovery.
The Estes Quark was introduced in 1997.

The 1971 Estes catalog yellow pages describes Featherweight Recovery as:
"The model is designed for extra light weight (under 1/4 oz.) and has a blunt nose. When the engine is ejected from the rocket, the model is so light compared to it's size that it lands safely.
The lightweight, aerodynamically unstable spent engine casing tumbles back separately."

What used to be described as "Featherweight Recovery" is now "Tumble Recovery".
Problem is, they don't really tumble.

Here's some of my favorite review quotes about the "featherweight" recovery of the Quark from RocketReviews.com:

"I heard it stab into the ground right next to second base."
"Dangerous rocket, flew 100+ altitude and nosed into ground twice."
"Became a 5" long lawn dart and buried itself in the soft dirt and suffered no damage."
"It doesn't tumble and will bury itself in soft ground. If it weren't for the white fins we may not have found it in the short grass." 
"The Quark had lawn darted under power into the soft turf. We laughed and decided it was a better rocket to display than fly."
"Considering the lawn dart like recovery I would guess that getting hit in the head with the pointy end off the Quark would feel like getting whacked with a golf ball. It's quite a thrill to hear the stereo "THUNK THUNK" of the Quark and it's engine landing on either side of you. Wear a hat!"
"And like others say it does not tumble, it embeds. I saw it lift off....silent..then THUNK and it landed next to me. Wear a helmet when launching :-)"
"It even LOOKS like a lawn dart. Form follows function, I guess."

The Quark doesn't have a blunt nose cone. Not a good design feature for a feather weight lawn dart!
My Estes Mini Mosquito doesn't tumble down. It also noses in after the ejection charge goes off.
Reviews of the Estes 220 Swift  - CLICK HEREsay it also nose dives in.

One of the few featherweight kits that didn't nose in was the Centuri Lil' Herc. It ejected it's engine and actually tumbled down!

You can't see it in the catalog picture but there were small washers glued onto the ends of the trailing fins. Sort of like the Estes Scout, it was stable going up and unstable coming down.

TLP Pershing #K046 Build, Part 22, Front Fin Plates

In this TLP kit the fin plates are 1/16" thick balsa bent and glued around the contour of the body tube. I wanted my plates thicker and flat, closer to the Estes Pershing plates.
I cut new fin plates pieces from 1/8" and 1/16" thick balsa. I don't have  scale data and couldn't any online. A search brought up few pictures so I guessed at the approximate shape.
The left of the picture shows the parts, the right side shows them glued up.
The bottom side strips will be part of the tube contour curve.


220 grit was wrapped around the BT-100 and the plates sanded to fit the curvature of the tube.
The left side of the picture shows the plate and fin from the rear, the right inset picture is the front view.

The front of the plate is sanded at an angle as shown.
Without real measurements I know this isn't scale, but it's closer than the flat plates would be.
This Pershing kit is more of a sport scale model anyway.

Tuesday, January 27, 2015

TLP Pershing #K046 Build, Part 21, Face Card Photo


The three shroud seams take extra time to fill.
On the face card you can see a shadow in the middle area, probably the tab of shroud #2.
The instructions show where decals and trim will go.
The face card shows a bold Press Roman serif style. The instructions show an Ariel or Universe style, san serif.

I know there were different color treatments in the Pershing rounds. I'll have to do some searches to see which style font is correct.
EDIT: After some searches and found some paint schemes I haven't seen before. But, there isn't much about the correct "U. S. ARMY" font. I don't have this one in my Alway book, as this is a missile.
Does anybody know the correct font information?

Estes Yellow Pages


Fred Shector (Shredvector on TRF) reminded everybody that all the old Technical Reports (TR-1, TR-2, etc.) are still available for FREE on the Estes website - CLICK HERE

In the TRF thread, some were saying they missed the "Yellow Pages" technical section in the newer Estes catalogs.
A new version listed under "Model Rocket Technical Manual" is available for download as a PDF - CLICK HERE
This new White Pages version is pretty current, the last revision listed as 2012.

Like the rest of us, I spent many hours studying the old Yellow Pages in the center of the Estes catalog. I hadn't found it hidden in the Estes website.
It's nice to know all the information is still there (for free!) for new flyers.

Monday, January 26, 2015

Dusk Launch, Schoolyard Soccer Field, January 25, 2015

A launch at dusk? 
I never launch at sunset. But the winds were calm and temps cool.
I learned a few things. The burst feature on my camera doesn't work when the light is low. It is fun to see all the sparks at launch and ejection.
These pictures look like I launched in the middle of the day. The camera adjusts for available light. Trust me, it was getting dark.

I just glued a new BT-5 in the previously cato-ed SPUDNIK.
The potato was loaded with a A10-3t. Boost turned it to the east, 20 degrees from vertical. But as before, not good enough to ever make a kit out of it. Estimated altitude? Maybe 125'.


I'm ready to give up on the MPC CADET CRUISER.
With an Estes B6-4 it was unstable - again! You can see the trajectory after it left the launch rod. You'd think this simple 4FNC design would would fly straight and true.
The skywriting altitude was about 50 feet and the rocket was already on the ground at ejection.
It may have a lot to do with the engine sticking 3/4" out the back of the main air frame. Nose weight? I don't know if it is worth wasting more engines on it! Maybe the PIG on the body tube should have told me something.


Before the last launch, I was having some igniter problems. I was using an old Quest Tiger Tail igniter.
The Odd'l Rockets UP! CUP didn't launch at first with a Quest Q2G2. The igniter popped and fell out of the engine. A Q2G2 fail?
Two boys had stopped tossing their football and yelled over: "You need some help with that?" I said: "Thanks, I just had a bad igniter."
He called back: "Okay. . . Well, I can show you how to do it!" Sure kid, I was launching these things before you were a gleam in your father's eye.
After the two marginal launches, go with a sure thing. The UP! CUP was stable with lots of noise and sparks. Estes C6-3 and altitude? 300 feet est.


It was really getting dark at about 6:30 p.m.
The Quest VIPER was prepped with a Quest A6-4.
The blurry inset picture shows the sparks bouncing off the blast deflector.
Estimated altitude would be around 225 feet.
It was dark and this would be a good finish to a quick launch - until I got back to the launcher.


Enlarge the picture and look close.
The upper half of the launch rod is gone!
I didn't want to leave without it. A schoolkid might get injured stepping on it.

I started walking the area in a grid around the launch area. It might have been  taken up with the rocket and dropped at ejection.
After ten minutes of searching I walked back to the launcher area and saw it.
Enlarge the picture and see if you can find it where I did.
Three out of four successes, not too bad.

TLP Pershing #K046 Build, Part 20, Tunnels Contour

TIP: Sometimes you get a better fit sanding the underside curve on a smaller body tube than what is used in the kit.
The only large (smaller) tube I had was on my Estes V2. (That V2 will get repainted someday.)
A smaller diameter tube takes more balsa off of the underside center making a better fit on the larger kit tube.


The end bevels were sanded after the underside curve was done.

The 1/4" mark was made with my engineers angle.


Use a block to sand the end bevels.
With the curve underneath I didn't sand the bevels to a knife edge.
The inset picture shows the final shape.

Sunday, January 25, 2015

TLP Pershing #K046 Build, Part 19, Tunnels, Before and After

The next two posts cover shaping the upper, flat tunnels.

On the left is the fit before sanding the underside contour.
The instructions give dimensions but don't mention fitting it to the body tube.
The inset picture shows the tunnel after sanding the curve. The fit is much better and will require little filling.

Here's another before and after.

Before sanding, the outside edges on the underside get a quick swipe with a Sharpie.
Make the mark fast, you don't want a lot of ink soaking into the balsa and showing through the final paint coats.

The inset picture shows whats left of the ink after sanding the curve.
The black ink (left after sanding) shows if the curve is consistent and straight from top to bottom.

MRC FX Engines

On TRF, a question came up about the MRC FX Engines.

MRC (or Model Rectifier Corporation) make model trains and RC cars. Years back they got into the model rockets business.
Their first catalog was pretty standard stuff: CLICK HERE
They did offer a few new plastic nose cone shapes, and a "Bat" fin can. Launchers and controllers look like re-designed and improved Estes components.

The MRC Concept II catalog was more interesting: CLICK HERE
The new FX engines and models were listed there. Check out the new rail launcher and older "Quest-like" igniters with the glass bead.
I understand Bill Stine did much of the design work for the Concept II series.

"Experience the thrill and added realism of pre-aft-lift-off smoke!
FX Engines are a low thrust-long burning dense smoke producing engine that are used to create  pre lift off smoke for added realism.
Igniting FX engines first, your model will sit on the launch pad and billow dense white smoke for as long as 8 seconds prior to lift-off.
They produce only a slight momentary thrust insufficient to lift the model and the emit a dense white smoke."


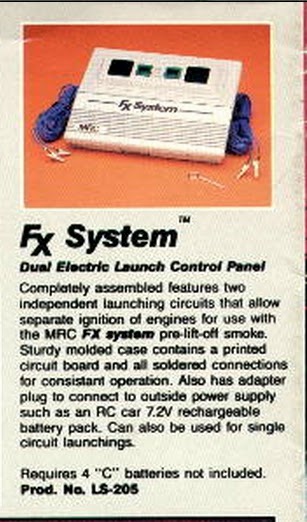
The FX engines required the use of the MRC Dual Electric Launch Controller.
There were to ignition buttons, the first for the FX engines, then the second for the standard central thrusting engine.

Saturday, January 24, 2015

TLP Pershing #K046 Build, Part 18, Nose Cone Weight


Two large washers are provided for nose weight. These are glued together.
On the left you can see a raised lip on the inside circle. I lightly filed down the raised edges for better flat glue contact.


The instructions recommend a "quality white glue" to glue them together. You would think epoxy, but I went with the directions.  Clothes pins held them as the glue dried.
Following the instructions: 
The screw eye was screwed in and removed.
The washers were glued to the base of the nose cone shoulder.
Glue was squirted into the hole and the screw eye replaced.
The 1/2" recess in the center got filled with white glue. Let dry thoroughly.
Be ready - that center pool of white glue takes a LONG time to dry.

New Products Reply From Estes John Boren

From John Boren (JumpJet on TRF): 
"Sorry I haven't posted in this thread yet but I couldn't find it and since I seldom go to the Watering Hole section it was by chance I found this thread since it was linked in another thread.

As you can see my original question or statement if you wish to call it that instead, isn't an easy one to answer or for a company to act on. There are some common wants but for the most part everyone wants something different as their number one thing, which is common no matter what the topic is. I see more engines and parts are pretty much at the top of the list. I've flown engines here that I WISH would have made it to market, but for one reason or another they didn't. Estes isn't in the parts business so you won't see everything we use in our products sold separately. Places like BMS and Semroc supply most of this kind of stuff anyway.

By the way this is me asking the question not Estes asking me to ask the question. I am a modeler first of foremost so I pretty much would like to see just about everything everyone has mentioned but I'm also the one and only R&D guy here and what I design has to first and for most be in the best business practice for Estes and not my personal want. 

Here are a few items I can comment on - 

Centuri Super Kits: I knew Carl was doing them so I stayed away from them, since there's plenty of other stuff to do.
More Card Stock: I use card stock in many of my designs and there's more of it to come.
More Scale: There's more to come
Limited production runs: This is what most of the other rocket companies do. A hundred or two hundred kits is fine for them but we have to do several thousand at a time.
More Bring Backs: I'd love too, but they really don't sale any better then new stuff, so why do  YES. in most cases this might be better then a simple bring back.
Higher Skill Level kits: For many years Estes didn't have any skill level 4 and skill level 5 kits, now we do and there are more to come.

38mm retainer: A fellow club member tested a rapid prototype one I designed, it worked great. This won't be coming to market.
RC Gliders: I wish, and I've created a few that I've posted here in the past for my personally use but were also used for testing of radio gear that could be used by Estes.
Gooney Birds: I created a whole new series of these but we instead made other short BT60 models like the Estes Jet Liner
Smaller kits for 29mm: It's on my personal to do list.
 I've got two in testing.
Cluster Model kit: I would like to do at least one kit since we now have the Pro Series Launch Controller.
More Electronic Stuff: Yes
A3-6T : We tried, can no longer get 6 seconds of delay in the case with the black powder available 
Rock Sim: I don't use any type of stability software to design my models with. After the fact I do use Rock Sim to prove the margin of stability of the design for Corporate.
Rubber Shock Cords: LONG LIVE RUBBER SHOCK CORDS, Down with Kevlar. Places like Apogee welcome your purchase of their Kevlar. Kevlar burns and breaks just like rubber, plus it zippers.

By the way posting positive stuff on the Estes Face Book page is the best way to maybe get more of what your looking for since more Corporate people will see these posts then just I who visit the forums.
I would also ask that you leave reviews on the Estes web site on the products we sale. The New Conquest I designed has yet to have a single comment posted and it." 

John Boren

Most interesting for me is More Scale, Bring Backs, Info on the A3-6t engine and Rubber Shock Cords. Regarding the A3-6t: I had heard black powder takes up more room in the casing now so longer delays aren't always possible.

Friday, January 23, 2015

Q2G2 Igniters Available Again?

Quest has all the engine bulk packs in stock with the Q2G2 igniters. Starter sets (Quest launchers are in stock) are also listed.
CLICK HERE
Separate six packs of the Q2G2 igniters are not yet available.

As I understand it, the Q2G2 igniters (old style with the black pyrogen tip) are included with Quest engines in the single, three, six, twelve and twenty-five engine bulk packs.
Separate six packs of igniters alone are not yet listed on the website. New Quest "Starters" (clear tip?) will be in the separate 6 igniter packages.
I could be wrong on this, time will tell.

Bob Jablonski (Starlight and County Line Hobbies) received some new Quest Q2G2 igniters on a recent order direct from Quest.
He says they look just like the old Q2G2s.

TLP Pershing #K046 Build, Part 17, More Primer Sanding on the Shroud


Here's the big shroud after the first primer sand.
From the top down you can see the white centering rings.

The ring below the beige filler is the area of most concern. That's the one you could possibly sand through. Just be aware of that area and be careful when sanding around it.


Lightly depress the seams to make sure all are glued down.
I found two areas where the seams opened up.

Some white glue was sneaked under the crack and spread with a X-Acto knife blade.
The inset picture shows the seam burnished down with the back end of a Sharpie.
This will require another coat of filler/primer and sanding.


A small horizontal crack showed up after the first white coat.
Glue was slid under with the tip of a knife blade as before.
The glued crack was lightly sanded and another primer/filler coat followed.
The inset picture shows the shroud after sanding the second primer/filler coat.

Water Rockets Parachute Deploy Video


From Air Command Rockets - 
Check out this this video about how water rockets are built to "eject" a parachute.
Pretty interesting stuff, well worth a look.
CLICK HERE

The way they join bottle segments and make the smooth transition nose section is brilliant!
I like the transparent parachute section, it reminds me of the old Estes Phantom. 

Thursday, January 22, 2015

TLP Pershing #K046 Build, Part 16, Primer Sand on the Shroud

While the instructions don't say anything about filling the steps between the shrouds, the instructions do say to coat the 110 lb. card stock shrouds with CA glue to strengthen them.
Think ahead - The CWF filler is water based and won't stick to the CA sealed cardstock.
I waited until the shroud seams were well filled before applying the thin CA glue. If you wait to apply the CA glue coat, the shrouds will be more flexible and require careful sanding.

Here's one of the two shroud seams after a third coat and sanding of the CWF.
At's pretty smooth now and the transition "step" isn't as noticeable.
Thin CA was applied overall with Q-tips. Onto the Duplicolor primer/filler.

Here's I'm sanding the dried primer first with the Norton 220 grit sand paper.
I'm using the primer filler to take care of any remaining seams.
Again - BE VERY CAREFUL SANDING THE SHROUDS OVER THE INTERIOR RINGS AND TUBE ENDS.
Even after the CA coat there is some flex in the shroud. You could still thin the shroud right over the stiff centering rings.


At the top end of the tube my shroud end was tight and flared out slightly.
I sanded down the raised top. This sanded off a small bit of card stock and the white edge was re-coated with thin CA.