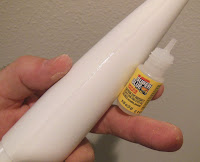
This is a LONG blow molded nose cone, 8" exposed from shoulder edge to tip.
The nozzle is molded on at the base.
The molding seams were pretty clean on this one, but will still need some filling.
The raised seam was reduced about half way down with 220 grit on a block. The remaining "trench" will be filled with medium CA glue.
Run a bead of medium CA down the seam using the ridge as a guide for the glue nozzle.
Only apply down one side seam and set up so the wet glue line can dry facing up. Keep the nose cone in a horizontal position, this glue will run!
When totally dry, apply a bead line of glue down the other side seam.
A heavy bead of CA glue will take a while to dry.
After the glue is dry, sand to surface with 220 grit on a block.
It's easy to cut the nozzle off the back of the nose cone.
The cut notches running around the nozzle are wide and the knife stays in easily. As always, don't try to cut through with one pass. Use several lighter cut passes.
The plastic wall thickness is not consistent. Be ready, your knife could cut through when you may not expect it.
I couldn't find this step in the directions, it's on the first page to the right of the parts drawing.


No comments:
Post a Comment