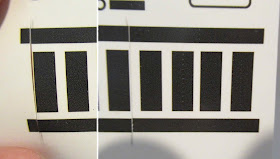
The intake/jet tube gets a black and white rolled decal.
At the bottom of the decal sheet are two rectangles, one is an extra.
Cut off the bottom third of the sheet, spray it gloss white. You are making a white, waterslide decal.
The inset picture shows that the box outline is still visible after spraying the white.
This shows my first decal draw, the same width used in the original Bandit kit, to fit a BT-55 tube. The lower intake tube is now a BT-48 diameter.
This shows my first decal draw, the same width used in the original Bandit kit, to fit a BT-55 tube. The lower intake tube is now a BT-48 diameter.
From the original wrap size Bandit decal sheet -
Cut the left side as the picture shows,
The right vertical rectangle cut is four from the end.
My re-drawn decal sheet doesn't require any fancy cutting. All the decals are drawn to the correct size.
TIP: Place the "EXPIRIMENTAL" decal first. One goes on either side. Then place the white wrap.
I set the white wrap too far back which didn't leave enough space for the EXPIRIMENTAL decal.
Wait for the white decal to dry before adding the black overlay.
The black ink isn't totally opaque, you can see some of the white underneath. Oh well, it's a clone.
Be sure the nose cone/body tube joint is between two letters.
Let the decal totally dry before cutting through the decal at the joint.


No comments:
Post a Comment