Pages

Friday, April 11, 2025

Estes Advanced Target Drone, Kit #1913, Build, Part 11, White Decals?

This model design had large white area decals.
TIP: There is a way to make white decal backings. It's not perfect, but it does work.
Spray painted white decals are set down first as the first layer and left to dry.
The second home print color decals layer are set down over the white spray paint decals.

I spray gloss white paint on a clear decal paper. Try to get complete coverage on the entire sheet. No clear overcoat is needed. The white paint film will seal and transfer onto the model after soaking in water - like a regular water slide decal.


Here is the first drawing of the white decal templates. Revisions have since been made.

These are printed on plain copy paper, cut out and traced onto the sprayed white decal sheet.
Using a knife and straightedge, Cut out the shapes.

This is the second sheet of color overlay decals.
They are set over the white decals already on the model.

The PDF is available to Patreon subscribers.
Email me at oddlrockets@bellsouth.net
and ask for the ATV decal PDF.

Thursday, April 10, 2025

Estes Advanced Target Drone, Kit #1913, Build, Part 10, Paint!


White undercoats - 

Spray, let dry and sand any rough spots.
With paint on you can see the fillet ridges. Sand them down a bit then check them after the next undercoat.


Only one color before decals!
This is Ace Gloss Banner Red.


Spray the inside areas of the intakes first, then concentrate on the outside surfaces.
You won't be able to get full coverage all the way inside.

Wednesday, April 9, 2025

Estes Advanced Target Drone, Kit #1913, Build, Part 9, Gluing The Intakes


The outside edges of the intake shroud have been glued to the top rudder and underside ventral fin.


Notice how the slot edges over the long wings bow out. An arc has formed along the slot sides.

Use the flat edge of a ruler to press in and straighten out the slight arc.

Apply a slight amount of glue to start, not a full fillet.
Press the arc straight with the straightedge and remove. Check to see if the glue hasn't spread outside a fillet area. Remove any errant glue with a Q-tip. 


Here's a straighter slot edge with the first glue dried. Follow with a full glue fillet.

Tuesday, April 8, 2025

Estes Advanced Target Drone, Kit #1913, Build, Part 8, Lug Position & Shroud Fit


The instructions show the the front of the launch lug even with the leading edge of the wing fin. This would put the lug beyond the back edge of the intake.

I decided to glue the lug a bit forward so it would be hidden under the intake shroud. 


A dry fit shows the lug better hidden under the intake.


You'll have more control if you glue one side of the intake at a time.

Look at the top inside edge of the intake and you can see the pencil marks I drew to show where the glue will go.

It doesn't take much glue to set the intake edges. Draw a bead of glue, smooth and remove excess with a fingertip.

TIP: Notice in the above picture, the printing is on the inside. When you can, keep the printing out of sight. Some printing can show through color coats.

Here's a good fit of the intake against the root edge of the top rudder fin. 
I haven't glued the slot joint yet.

Monday, April 7, 2025

Estes Advanced Target Drone, Kit #1913, Build, Part 7, Fixing The Intake Slot


On a new print of the intake shrouds, 

I punched a round hole at the front of the intake slot to match the rounded leading edge of the wing fins.
I used the rotary punch.


The folds are indicated by a dashed line.
I used the round tip of a butter knife to emboss the line and start the fold.

The very tip of the knife should be smooth with no serrations.

TIP: Make the embossed lines before cutting the outside lines of the intake. It's easier to do the embossing now.

Here you can see the embossed lines.
Pre-embossing gives you a sharp, clean fold.


My Sharpie barrel was used to make a sharp crease.

Sunday, April 6, 2025

R.O.C.K. Monthly Launch, April 5, 2025

Weather forecast was for 20 mph wind gusts and 90 degrees! I almost didn't go - It wasn't that bad,  rockets were prepped with A and B motors.
I'm glad my car had all wheel drive as the wild hogs really tore up the field. It was a bumpy ride in!


First test flight of the ROBOT design.
I was concerned about stability, but it was fine with a B6-4 motor. Rear eject worked, but - 


The winds took it into the trees!
I chalked it up as a loss, there were a few others rockets caught in the high pines to the West side of the field.

To my surprise - John and Tom got it down with the extension pole! No damage, ready for more tests. I may add some nose weight before using a heavier C6-5 motor.


The upscale BT-50 STAR SEEKER had a first flight with an A3-4t engine.
Vertical boost, reefed chute to about 250 feet.
I expected to see a fin torn off at touchdown, there is a very short root edge on this one. No damage! 
I usually prep a MicroMaxx model for each club launch, just to show the kids how small rockets can be.

This is the OOP Fliskit MMX SATURN V. Note the conical stability at the low end. No launch pic for this one, MMX are too  fast to capture.
I usually ask for extra eyes on these small builds as the launches are fast -  This one is slower and the black cone on the back is easy to follow through boost.
Altitude was probably 50' with streamer eject. No damage.


Still being built on this blog - 
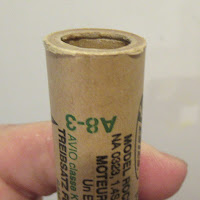
The Estes ATV (Avanced Target Drone) clone had a first flight using an A8-3.

Textbook launch and recovery. Altitude estimated at 225'.


Always a Goony favorite - 

The NIKE GOON flys again! This is it's seventh launch.
An Estes B6-4 got it to 250 feet.

The home print decals are starting to yellow - 


My favorite launch of the day goes to Cory Skinner.

This is his build of the Oviedo Water Tower.
The legs of the tower are carbon fiber, the upper tube was a Nestle's chocolate milk can. Other detail parts are 3D printed.

Powered by an E30-4 motor, the flight was clean and true.

Hot and a bit windy - good a good day!
Five launches, five recoveries and no damage.

Saturday, April 5, 2025

Estes Advanced Target Drone, Kit #1913, Build, Part 6, Fin Gluing & Intake Fit

 
There are four fins, the two longest are the "wings".

The large rudder fin is glued on the top,
The smaller ventral fin to the bottom. 

Note the fin line was sanded for better adhesion. The pencil line was redrawn after sanding down the filler/primer.


The wing fins followed. 
The trailing edge is 5/8" from the rear of the tube.

All four fins are glued on at 90 degrees, or standard four fin spacing.


I tried a test fit of the intake shroud.
Look close at the squared front edge. The wing fins have a rounded leading edge, the intake shroud slot is square!
I'll fix that in the next print.

Friday, April 4, 2025

Estes Advanced Target Drone, Kit #1913, Build, Part 5, Engine Mount Gluing & Filler Primer

The engine mount is glued into the main airframe tube.
The end of the mount is even with the end of the BT-50 tube.

I used the flat face of my sanding block to push in the mount.


The fins grain and body tube seams got the usual CWF coat and sanding. 

Just the leading edge of the four fins was rounded.


The fins and launch lug were sprayed with filler/primer.

After it dried, the fins were flipped over and the other side sprayed. 

The nose cone and body tube were also sprayed with filler/primer.

The yellow Apogee nose cones do need some undercoats so the yellow tint won't show through the final color.

Thursday, April 3, 2025

New Kit? Robot!

Had some inspiration last night - 

I've been playing around with this idea for a while. 
This is the first build of the ROBOT.
I wanted it to reflect the wind-up tin robot toys from the 1950s and 60s.

18mm powered, much like the Odd'l Rockets Little Green Man and Pigasus.
It is different with a rear eject of a 12" parachute.
The robot arms are bent to the front on the left, and turned back on the right side. This should give it some spin stabilization. 
Note I wrote "should".

The fins are based on a "track" for movement much like the Robot from Lost In Space. I borrowed the idea of the multi-fin design from the pre-production art of the Estes R2D2: CLICK HERE

In initial sketches, I couldn't get the head right! That was until I remembered Rosie the Robot maid from the Jetson's. The side set body tube works well.

New designs go through many changes before production, no balsa filling or color for now. I've learned not to spend a lot of time finishing a test model. Will it be a kit? 
Now comes the flight testing.

Wednesday, April 2, 2025

Estes Advanced Target Drone, Kit #1913, Build, Part 4, Engine Mount

The 20/50 rings were rough. I sanded the flat sides with some 400 grit on a block.

On the right - a 1/8" notch was cut for the engine hook relief. 

On the other side of the engine hook notch, a smaller notch was cut for the Kevlar line.


Notice the Kevlar line under the top bend of the engine hook.

The upper centering ring also goes over the top bend and the engine hook slit. This locks and strengthens the engine mount.


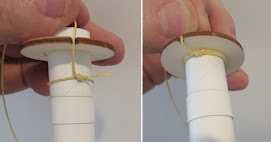
Tie a small square knot. There isn't much room between the BT-20 and BT-50 tubes. Keep the knot small.

On the right, I've tucked the loose end under the looped Kevlar line into the glue fillet.


A engine block is glued into the top of the mount against the upper bend of the engine hook.

Tuesday, April 1, 2025

Estes Advanced Target Drone, Kit #1913, Build, Part 3, Figuring Out The Decals


The original kit decals had a lot of white area.

To check the fit of the online scan, I set a white decal outline on the traced wing pattern.
This was copied and drawn with the other sized decals.

I haven't decided yet whether to print decals on a white decal sheet or:
Spray a clear decal sheet with white paint and cut out the pieces. 

Thee is AIR FORCE, blue numbers and the stars and bas that will be place over the white paint decals.

I'll probably use the white paint decals. Red paint (underneath) would will show through the thin white decal sheet. The white will look pink!

The stars and bars white areas (far left) were simplified in a second drawn version.