Friday, April 4, 2025

Estes Advanced Target Drone, Kit #1913, Build, Part 5, Engine Mount Gluing & Filler Primer

The engine mount is glued into the main airframe tube.
The end of the mount is even with the end of the BT-50 tube.

I used the flat face of my sanding block to push in the mount.


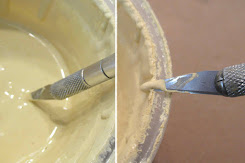
The fins grain and body tube seams got the usual CWF coat and sanding. 

Just the leading edge of the four fins was rounded.


The fins and launch lug were sprayed with filler/primer.

After it dried, the fins were flipped over and the other side sprayed. 

The nose cone and body tube were also sprayed with filler/primer.

The yellow Apogee nose cones do need some undercoats so the yellow tint won't show through the final color.

Thursday, April 3, 2025

New Kit? Robot!

Had some inspiration last night - 

I've been playing around with this idea for a while. 
This is the first build of the ROBOT.
I wanted it to reflect the wind-up tin robot toys from the 1950s and 60s.

18mm powered, much like the Odd'l Rockets Little Green Man and Pigasus.
It is different with a rear eject of a 12" parachute.
The robot arms are bent to the front on the left, and turned back on the right side. This should give it some spin stabilization. 
Note I wrote "should".

The fins are based on a "track" for movement much like the Robot from Lost In Space. I borrowed the idea of the multi-fin design from the pre-production art of the Estes R2D2: CLICK HERE

In initial sketches, I couldn't get the head right! That was until I remembered Rosie the Robot maid from the Jetson's. The side set body tube works well.

New designs go through many changes before production, no balsa filling or color for now. I've learned not to spend a lot of time finishing a test model. Will it be a kit? 
Now comes the flight testing.

Wednesday, April 2, 2025

Estes Advanced Target Drone, Kit #1913, Build, Part 4, Engine Mount

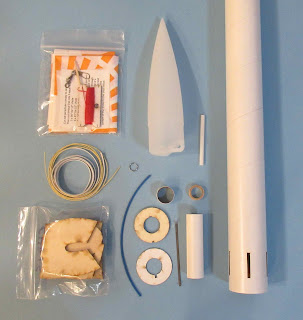
The 20/50 rings were rough. I sanded the flat sides with some 400 grit on a block.

On the right - a 1/8" notch was cut for the engine hook relief. 

On the other side of the engine hook notch, a smaller notch was cut for the Kevlar line.


Notice the Kevlar line under the top bend of the engine hook.

The upper centering ring also goes over the top bend and the engine hook slit. This locks and strengthens the engine mount.


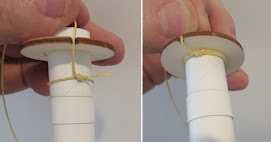
Tie a small square knot. There isn't much room between the BT-20 and BT-50 tubes. Keep the knot small.

On the right, I've tucked the loose end under the looped Kevlar line into the glue fillet.


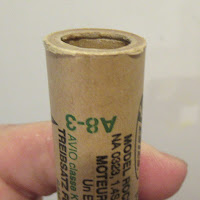
A engine block is glued into the top of the mount against the upper bend of the engine hook.

Tuesday, April 1, 2025

Estes Advanced Target Drone, Kit #1913, Build, Part 3, Figuring Out The Decals


The original kit decals had a lot of white area.

To check the fit of the online scan, I set a white decal outline on the traced wing pattern.
This was copied and drawn with the other sized decals.

I haven't decided yet whether to print decals on a white decal sheet or:
Spray a clear decal sheet with white paint and cut out the pieces. 

Thee is AIR FORCE, blue numbers and the stars and bas that will be place over the white paint decals.

I'll probably use the white paint decals. Red paint (underneath) would will show through the thin white decal sheet. The white will look pink!

The stars and bars white areas (far left) were simplified in a second drawn version.