Pages

Sunday, June 30, 2024

Enerjet by Aerotech Initiator Build, Part 6, Engine Mount


Before gluing the plywood centering rings in place,
Check the fit of the fins in the fin lock rings.

(This picture is from an earlier build and shows the previous fibre centering rings.)


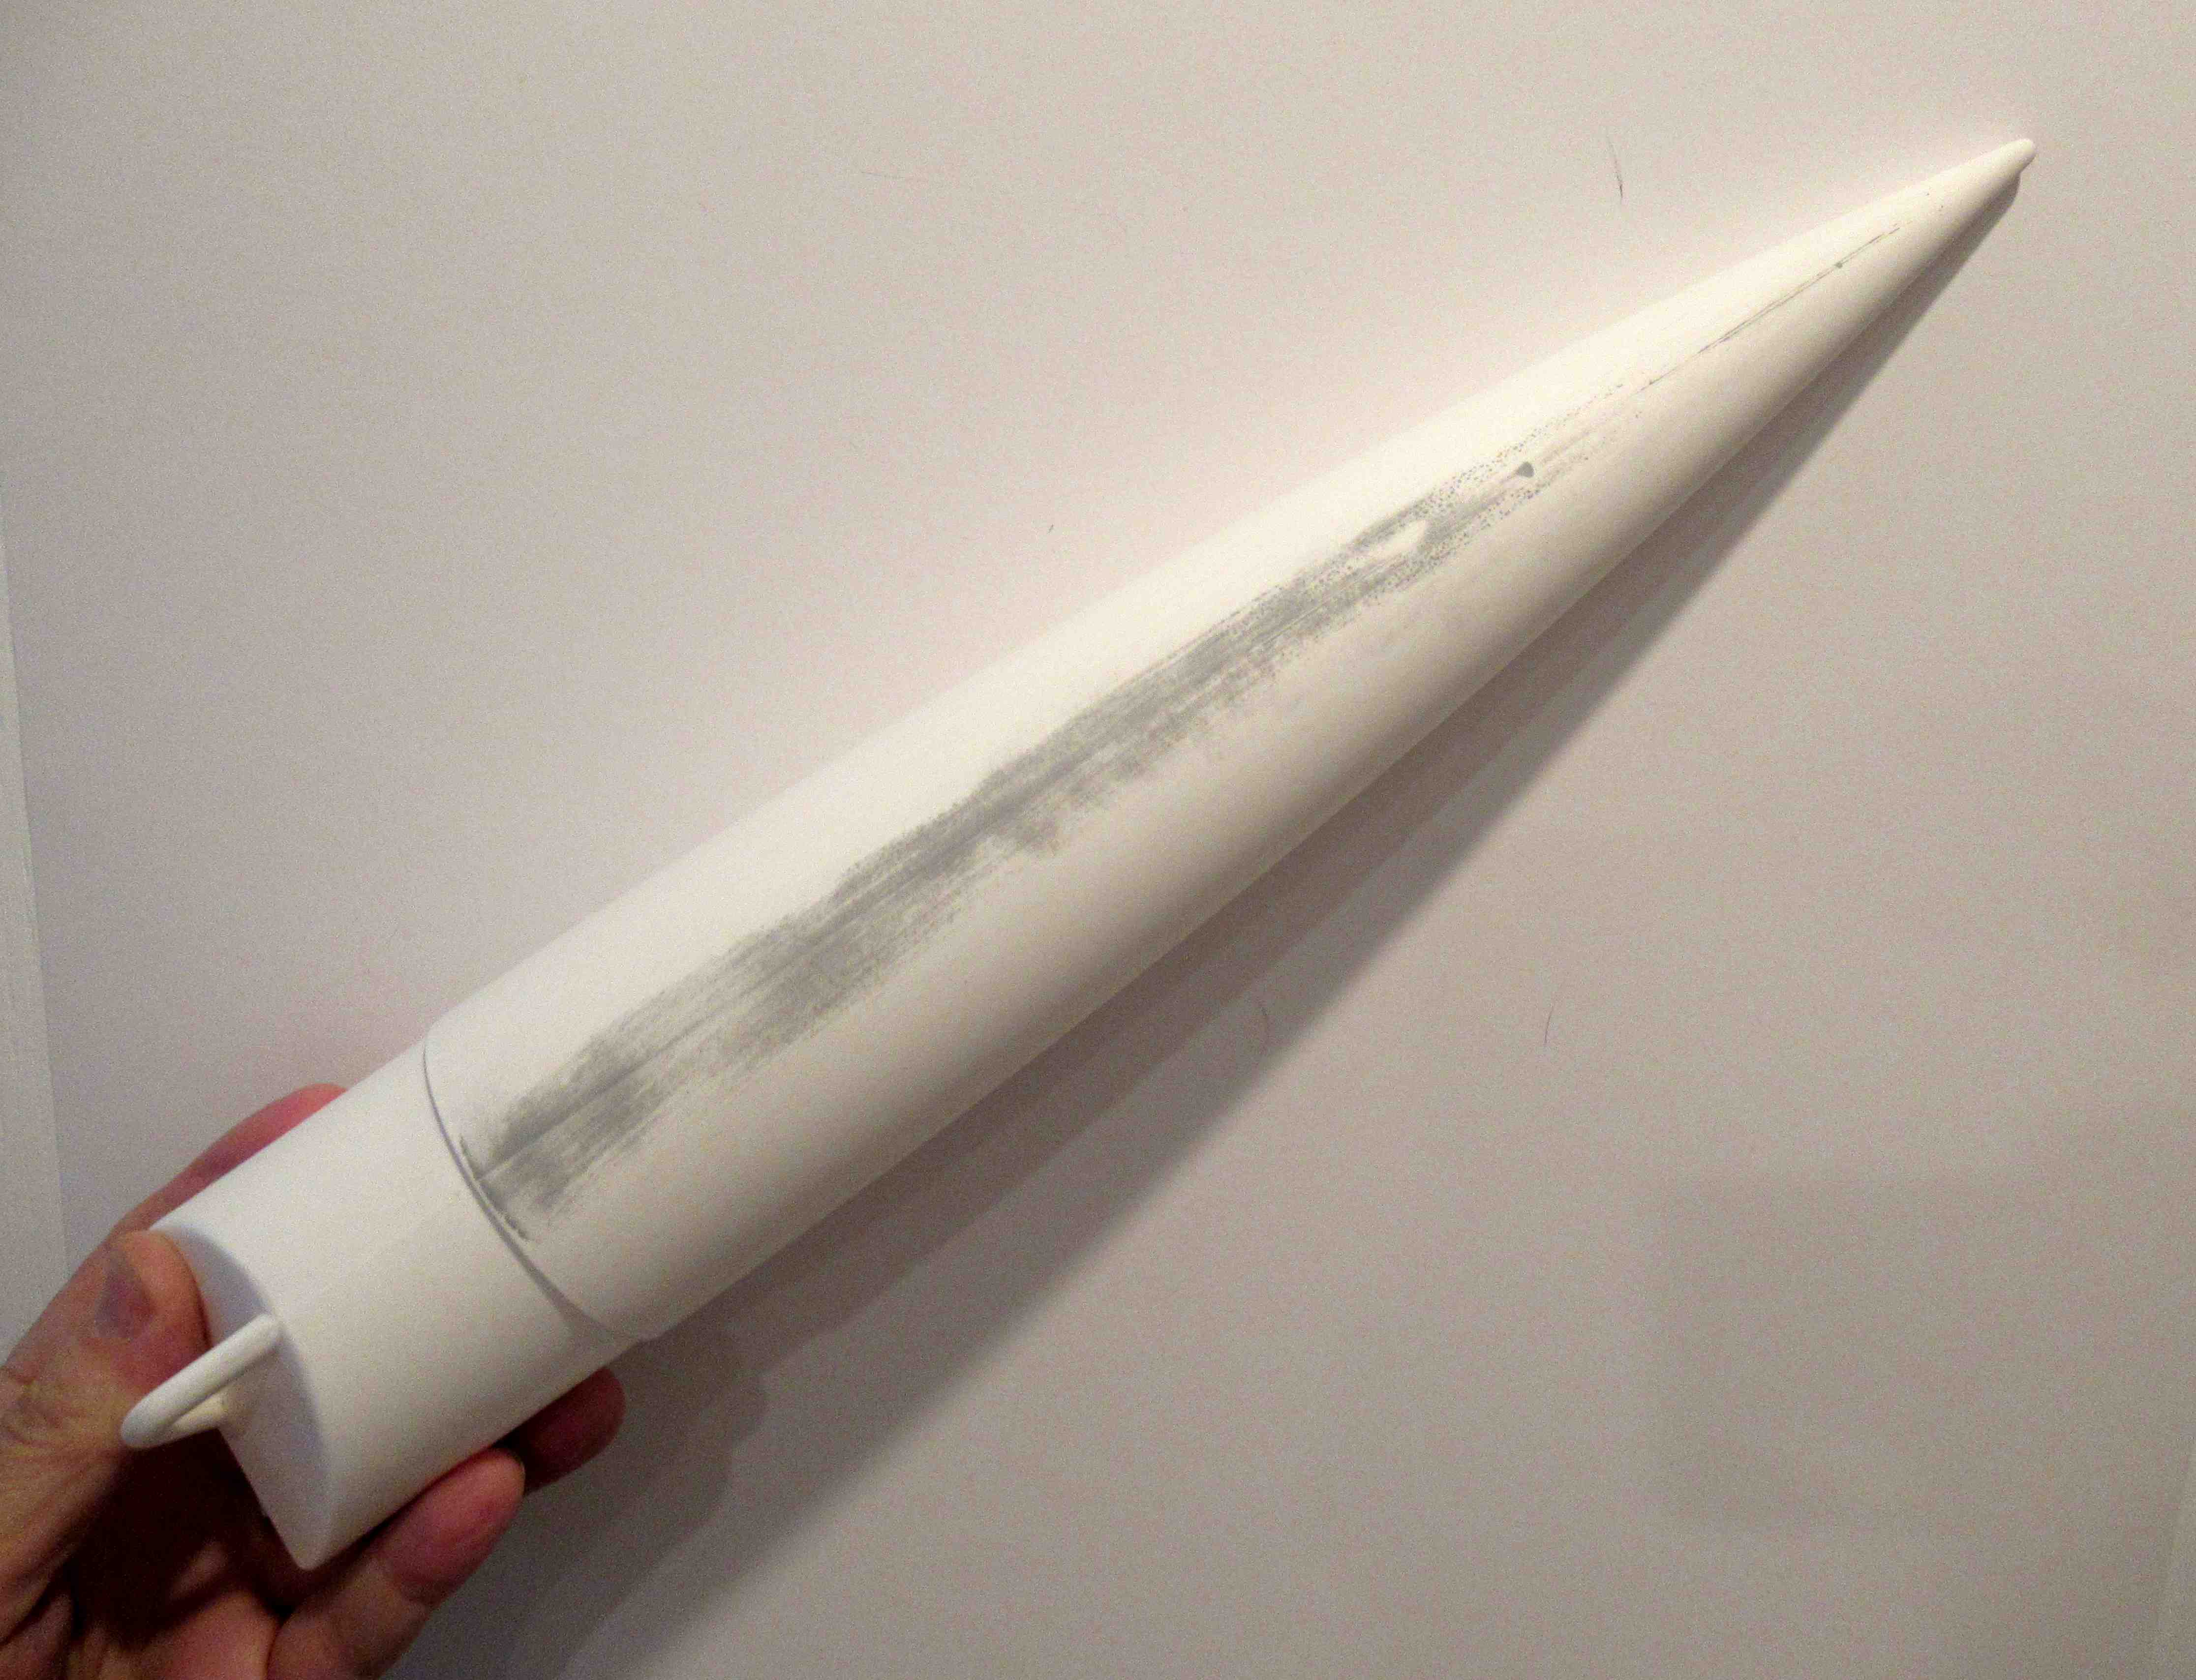
Before gluing the rings in place,
Double check that the fin is running straight down the tube.
The two rings on the far end are just slid on the tube to keep track with five builds going on.


The cooling mesh baffle is stretched out to 6" in length.
The mesh is slid into the top of the motor mount tube. 


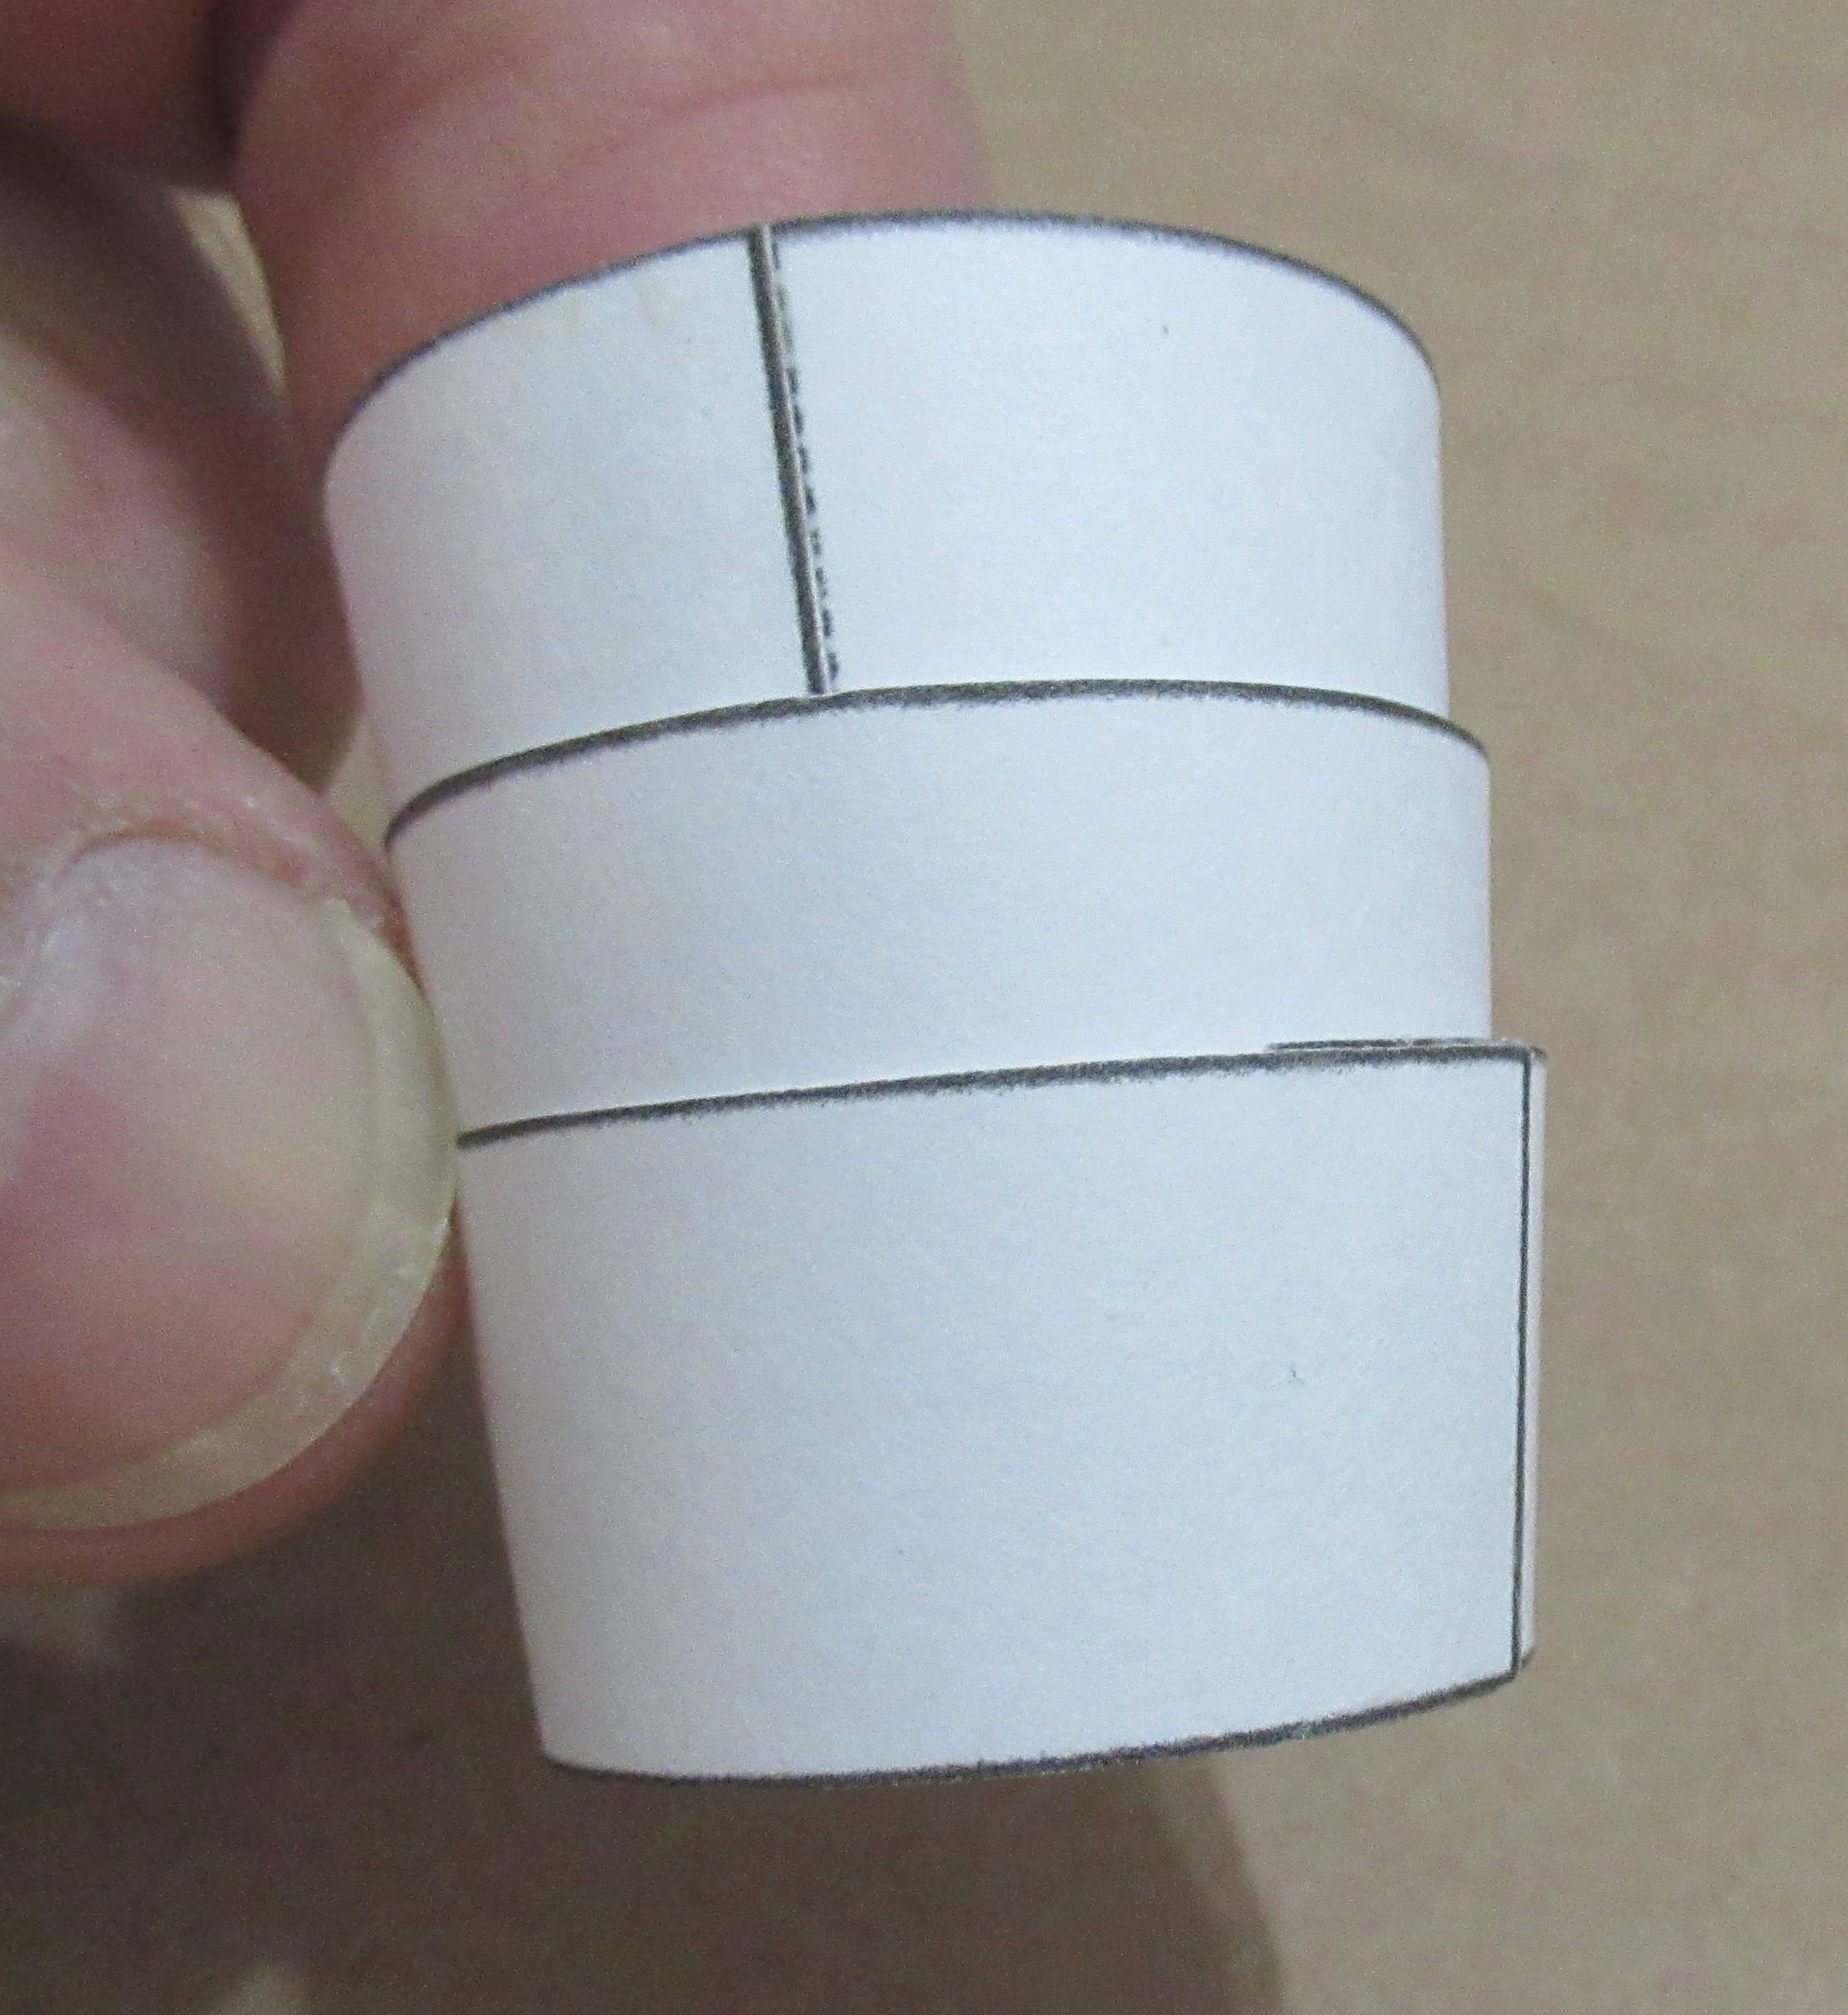
The top edge of the tube is slit so the baffle shoulder piece can slide in. 
Four 1/4" slits are made, spaced 90 degrees apart. Notice the pencil line at 1/4" down from the top of the tube.
Using a single edge razor blade, you can cut two 1/4" lines directly opposite to each other. 
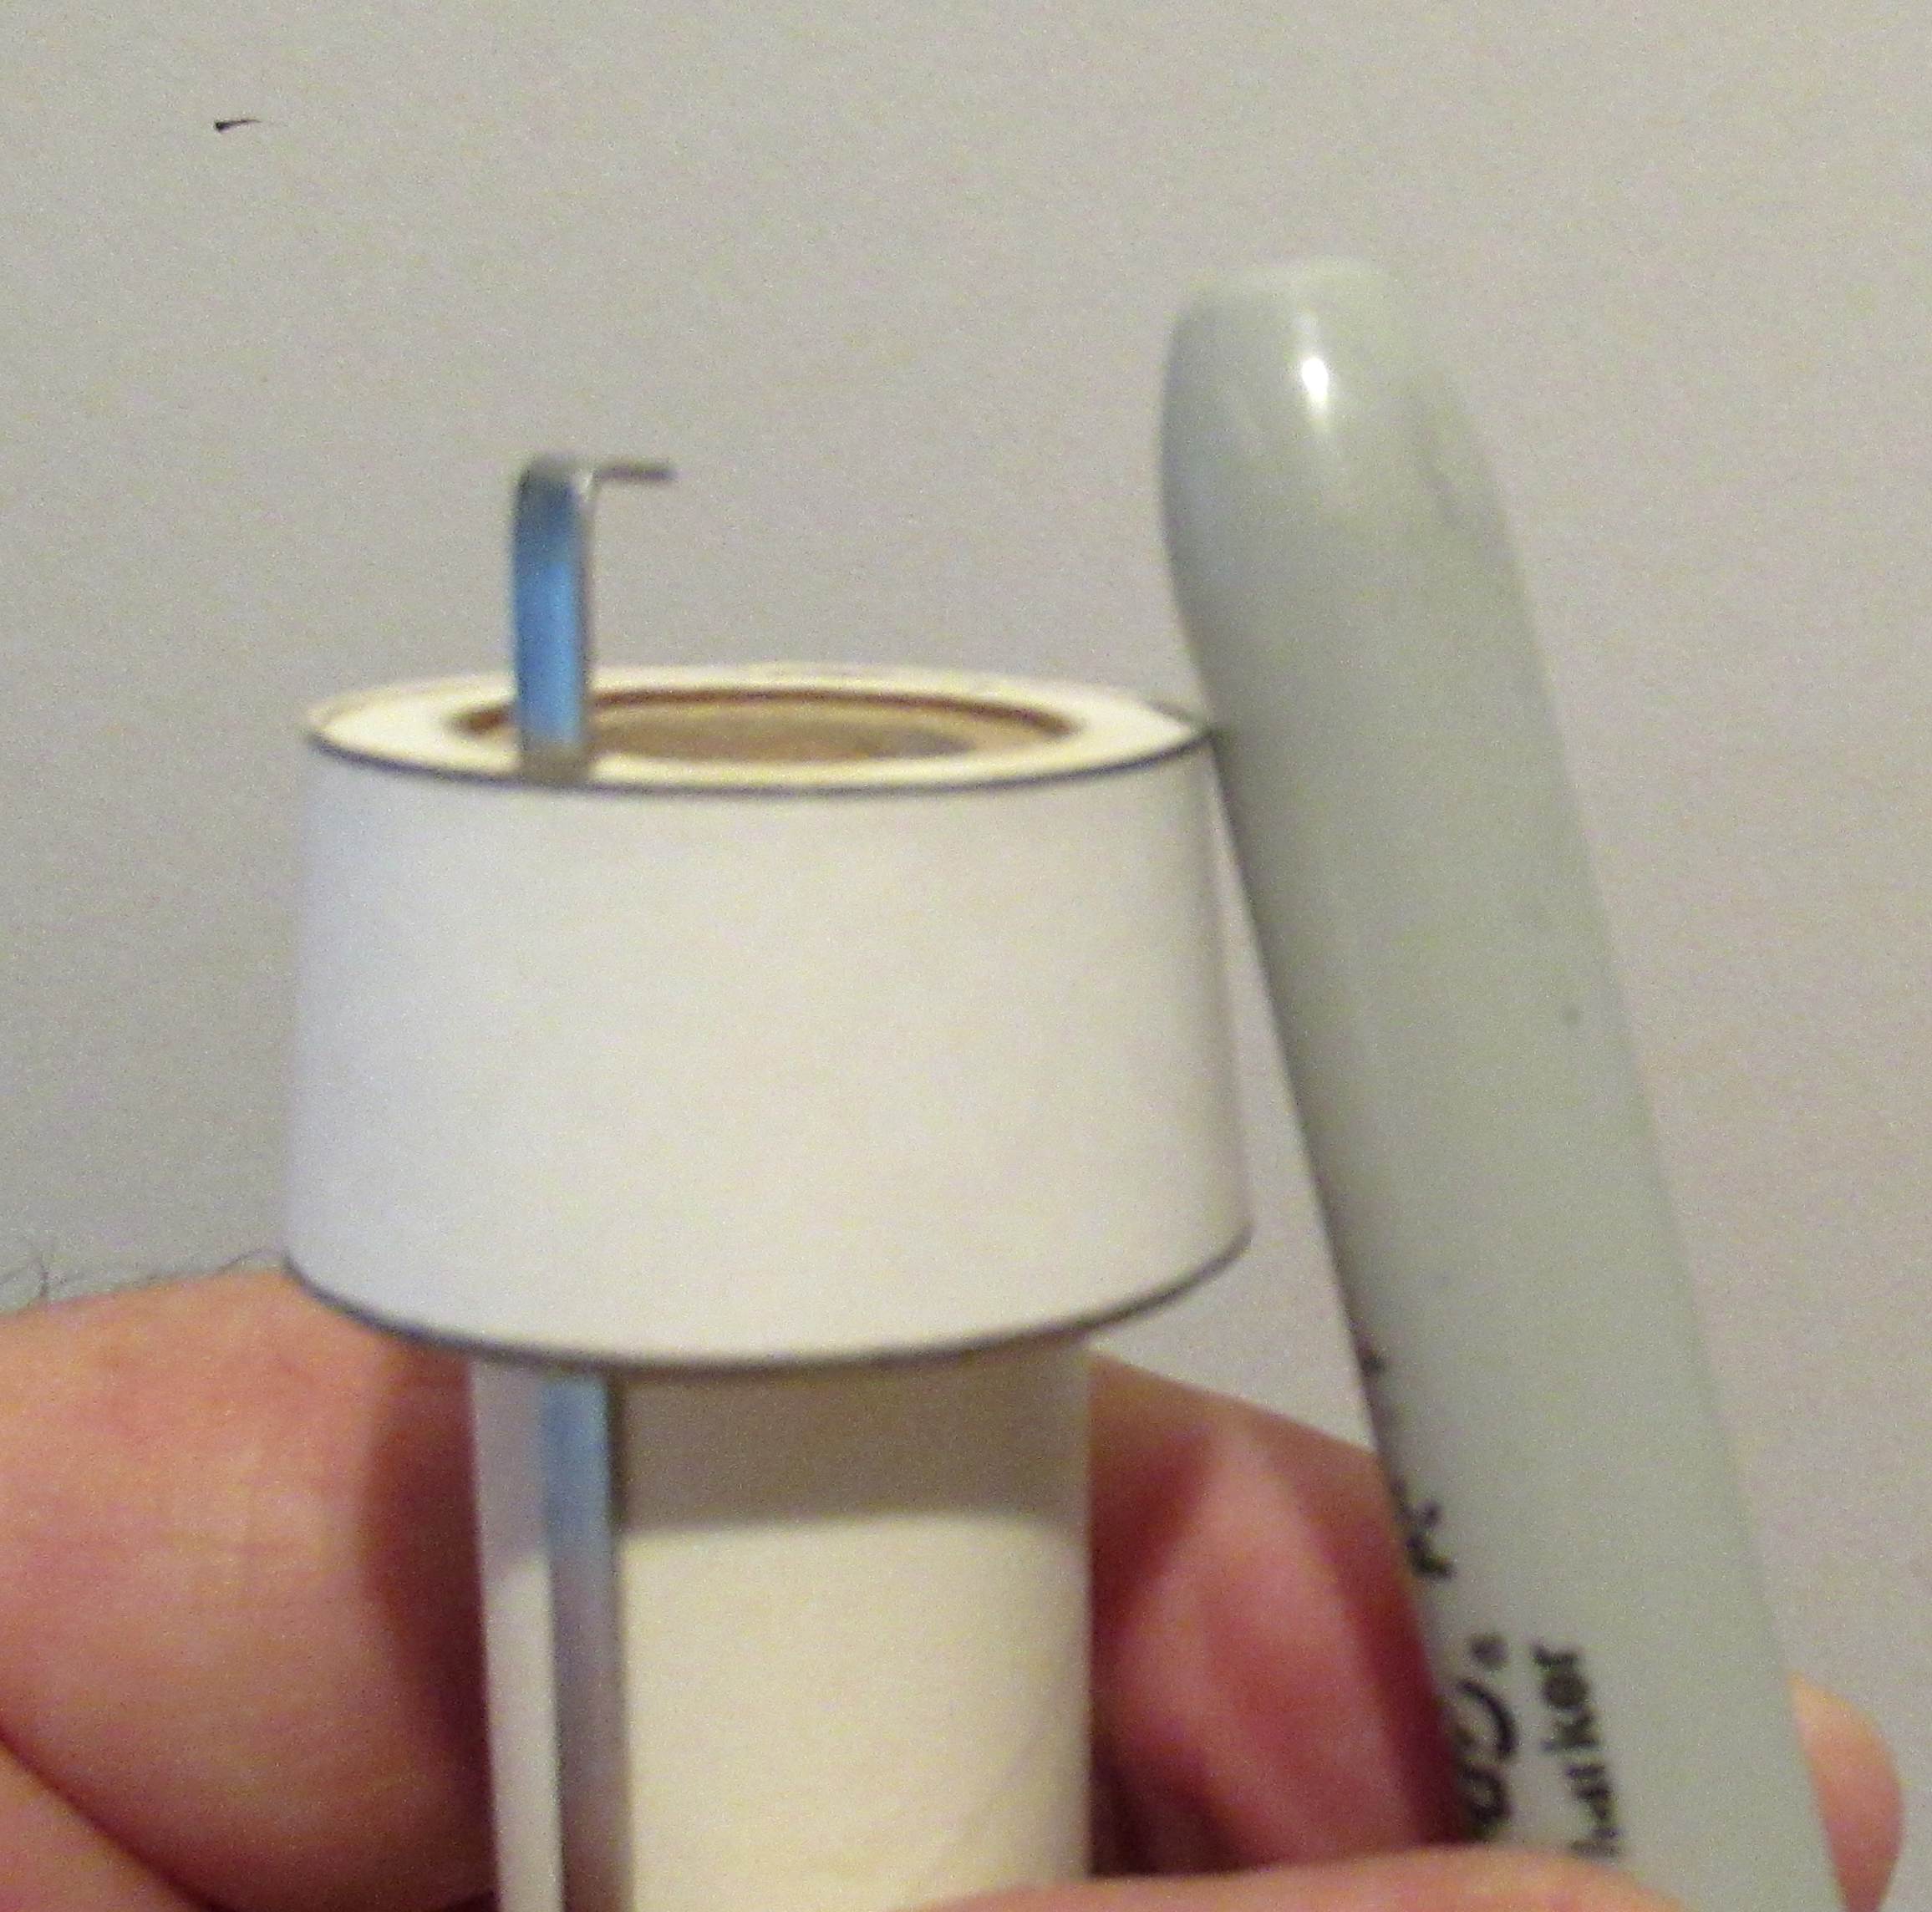
Glue the shoulder piece in with medium CA glue.

The screw eye is screwed in the top hole of the shoulder.

Saturday, June 29, 2024

Enerjet by Aerotech Initiator Build, Part 5, Engine Mount

The kit now includes an aluminum engine retainer. There are some revisions to the instructions to fit the retainer.

The measurements on the Revised Location Guide were printed incorrectly. Use a ruler to mark the tube at 1 1/2" and 3 9/16" from the rear. Note the rear 1 1/2" mark is the position of the front edge of the rear fin-lock ring. The 3 9/16" mark is the position of the back edge of the front fin-lock ring.


The fit of the fin-lock rings was too tight on the motor mount tube. 
It took quite a bit of shaving with a hobby knife to widen the inside diameter of the ring. The plastic is very strong.
Here I'm smoothing the inside surface with some 220 grit sandpaper around a 24mm tube.


To mark the tube positions, 
A one of the plywood centering rings was slid down the tube. A pencil traced around the ring. 

The instructions mention "fibre" rings but the kits have upgraded to plywood rings.

There is a pencil line already down the tube. I used it to line up the older engine hook recess. There is no engine hook needed now with the upgrade retainer ring.

Don't glue the rings on yet - 

Friday, June 28, 2024

Enerjet by Aerotech Initiator Build, Part 4, Body Tube Bubbles


Body tubes are not what they once were. 
This is not blaming Aerotech or Quest. 
The supplier - Euclid/Paramount make the tubes for all vendors. When Paramount bought Euclid, the quality dropped. 

There were a few raised air bubbles that will show thru on the finished model. They don't show in the photograph but you can feel the raised area with a fingertip. I marked the raised areas with pencil.
I had mixed results using the technique shown here.
I slit the outer white layer with a sharp knife.

A bead of medium super glue was run over the slit. A few seconds for the CA glue to run into and spread out under the slit.
Before it set up, the excess was wiped off.


As the glue dried, 
A Sharpie barrel was quickly rolled back and forth over the glued slit. 


Here you can see where the glue has seeped under and around the slit.
This closed up the bubble pulling the raised center area down and onto the tube.

Most all of the bubbles and slits will disappear when filler/primer is sprayed then sanded. A few of the bubbles needed a second treatment with the Super Glue.

Thursday, June 27, 2024

Enerjet by Aerotech Initiator Build, Part 3, Parts Prep, Nose Cone & Body Tube


The tip of the nose cone has a small bit o molding flash (left side)

On the right side the tip has been sanded and rolled off. Start with 220 grit and go progressively to 400 grit.


The nose cone molding seam was filled with plastic model  putty.
You can also lay a bead of medium Super Glue down the recesses. Be careful, the glue can run.
Sand down the filler bead of glue again with 220 grit working down to 400 grit.


The main body tube wrap seam was filled with CWF and sanded to surface.
Follow up with a spray of filler/primer and sanding with 400 grit.

There is more on the body tubes in the next post.

Tuesday, June 25, 2024

Enerjet by Aerotech Initiator Build, Part 2, Parts Prep, Fins


The leading edge tips are uneven. 
Here's the before and after.

It's easiest to check the tip shape from the other side.


There is a mold nub where the fin was broken off the molding tree.

This root edge should sit flat against the motor mount tube so sand it off.


Here's the underside of the trailing edge. 
The center mold line should be sanded smooth.

Monday, June 24, 2024

Enerjet by Aerotech Initiator Build, Part 1, Parts


Above is all the parts. Everything seems to be great quality.

The parts of interest:
Heavy walled tube 2.6" diameter.
24mm & 29 mm Aluminum Motor Retainer
Ejection Cooling Mesh
"Launch Lug" Rail Guides
Fin Lock Rings
Molded Plastic Fins (Thru-The-Wall)


The instructions and self adhesive decal sheet are tightly rolled up in the main body tube.

TIP: You may not be able to reach and pull them out. Lightly tap the tube on your open palm and they will work their way down and out.

Sunday, June 23, 2024

Enerjet by Aerotech Initiator Build, Background


I'll be building quite a few of the Enerjet by Aerotech kits. 
First up is their starter set model, the Initiator.


Bob Sanford designed the Initiator when he worked at Enertek. 
I understand it is based on the old Centuri Starfire model rocket. The R&D team was looking for a design that company president Lee Piester would like. Mr. Piester designed the Starfire when he was president of Centuri.

Enertek was sold to Gary Rosenfield and Aerotech was established. 
The Initiator and other Enertek designs are still being produced.


Bob Sanford commented with the correct history:
"AeroTech was established in 1981. Enertek did not begin until 1987 and closed in 1988.
One of the Enertek investors bought up the assets and IP of Enertek after it closed and contributed them to ISP (AeroTech's parent company at the time) in exchange for stock.
The only Enertek designs that were ever directly manufactured were the Initiator and Strong ARM (With some changes from the originals). The Enertek Astra 2000 was released at a smaller size by Quest and named the Striker AGM.


From the install last October, 
A giant Initiator greets rocket enthusiasts at the Aerotech facility in Cedar City, Utah.

Saturday, June 22, 2024

New Aerotech Builds


The Wac Corporal paint will have to wait - 
Every time I'd go out to spray around 2:30 p.m. there was rain!
That and allowing 48 hours between fully dried, sandable undercoats.

This arrived today - 
Two BIG boxes. 


Where there is multiples, 
One will be show grade, the others will be for flight.

The show builds have filled tube and nose cone seams.
More time goes into the show builds.

Flight models aren't quite so detailed.


In the second smaller box were five Initiator kits. 
Two of these will be show models, three are built to be flown.
The last Grunt build is show.

How did I get a job building for vendors? I asked if they needed some finished models. Build coverage on the blog also helped get my name out there. 

I'll start on the Initiators tomorrow.

Thursday, June 20, 2024

Semroc Wac Corporal Build, Waiting For Paint To Dry


I'll get back to the final white undercoat today on the Semroc Wac Corporal.
Here's the fin areas after the second white undercoat and some light sanding. It'll still take one more light undercoat before sanding and color.


Too many Odd'l Rockets kit orders pushed this build to the back burner.

Also - expecting a major kit build for Aerotech/Quest in the mail. 13 MPR builds in all!

Tuesday, June 18, 2024

Semroc Wac Corporal Build, Waiting For Paint To Dry

This shouldn't really count as a build step -
I'm stuck waiting for the second white undercoat to dry on the Wac Corporal.

Finishing up a big Odd'l Rockets order for ERockets. 
Spent most of the afternoon machining ADEPTOR camera tripod adapters.

I'm about halfway through a kit order for Apogee.

Monday, June 17, 2024

Semroc Wac Corporal Build, Part 14, Watching Paint Dry


I see too many posts on the rocketry forums and Facebook about paint problems.
"Did this ever happen to you?" followed by a picture of a rocket with wrinkled paint.


Back to the current Wac Corporal build - 
Before another spray coat, I'm waiting a full 48 hours for the first white undercoat to dry. The rough areas have been sanded. 

READ and follow THE DIRECTIONS on the can!
Most cans say: Re-spray within one hour or after 48 hours.

Paint dries faster on balsa fins and Kraft paper tubes. 
Balsa and paper tubes "breathe!" and can dry through both inside and outside surfaces.
Plastic nose cones require much more time to dry.
Plastic is "sealed" and dries slower from the outside surface in. 

To prevent blushing of the finish, spray when humidity is the lowest.
Check this address: https://www.timeanddate.com/weather
Type in your city and check the afternoon hours for the lowest humidity.

I'm not saying these tips will prevent all paint problems.
But, it may help with some concerns.

Rustoleum 2X paint is problematic, especially the Gloss White. Random cans can spray pigment (a rough, cottage cheese) that has settled on the bottom of the can. Shaking helps but may not break up all the settled pigment.

Sunday, June 16, 2024

Semroc Wac Corporal Build, Part 13, White Undercoat & Sanding


It never fails -

I think I've done a good job making smooth fillets. I think I've picked up all the excess glue before it has dried.
The first white undercoat usually brings attention to all the flaws.

On the left is an uneven glue fillet.
On the right is after careful sanding with some older 4000 grit. 
You can sand yellow wood glue.


A before and after of the flue fillets on the upper launch lug.

Sand under a bright light. Sanding dulls the gloss white. Low areas that need more sanding will still be glossy.


Here's a noticeable glue booger near the leading edge of a fin.
On the right is after sanding to surface. 

In 48 hours, another white undercoat and probably some more sanding.

Saturday, June 15, 2024

Semroc Wac Corporal Build, Part 12, Tunnel & Launch Lugs


The tunnel is glued in line with the fin, opposite the engine hook position.

In the old Estes Wac Corporal kit, the open ended tunnel covered the long launch lug. It had to be glued between the fins.


Two short lugs are used in the Semroc kit.

Both are glued in line, directly over the engine hook. 
The lower lug is glued right above the tail cone/body tube joint. 

The upper lug is glued 4" above the end of the body tube.

I could have used Titebond Quick and Thick to do the lug fillets. Instead, I went old school - it took four glue fillet passes to get rid of the glue bubbles.

Thursday, June 13, 2024

Semroc Wac Corporal Build, Part 11, Fitting The Fins


There was still some uneven areas around the tail cone/body tube joint.

Wedge shaped pieces of masking tape were cut to keep another shot of filler/primer of the root edge gluing areas.


The filler/primer was sanded down.

Each fin was individually fit to the tail cone and body tube.
Look close and you can see a small gap at the rear and just below the top of the tail cone.


Here's the same fin after fitting. The gaps are gone. 

For a reference I marked the fin at the shroud/body tube joint with pencil.

Wednesday, June 12, 2024

Semroc Wac Corporal Build, Part 10, Fitting The Tail Cone


I'm using my old Fin Tool (Sorry, they aren't available) to mark the body tube. I want the shroud joint seam hidden under a fin root edge. In this case the seam and engine hook are on opposite sides.


The shroud is glued onto the lower ring and the first ring of the two center rings.
Lightly form the shroud edge by "molding" it into the wet glue underneath. For now, I'm only molding the low, smaller side.

Dry fit the engine mount into the tube.

TIP: Slide in a turn the mount and shroud until you find the best fit against the tube.
Mark the best position with a pencil mark on the tube.

Now you can apply some glue inside the tube and around the exposed middle centering ring. Slide in and turn the mount until the pencil mark lines up with the shroud joint.


Form the wider shroud edge as before, rolling the burnisher over the tube and shroud joint.
This will make for less filling later on.


The raised shroud overlap can be sanded down a bit. Just lower the thickness a little, not too deep.

Tuesday, June 11, 2024

Semroc Wac Corporal Build, Part 9, Fitting The Tail Cone


The kit supplies one tail cone shroud printed on cardstock. I rarely get a good fit onto both tube diameters with one shroud.
I scan and copy at least three of them onto 110 lb. cardstock. Assemble all three - one of them should have the best fit.

Do plenty of dry test fittings for a smoother final look.
One shroud on the left is a poor dry fit, both ends are a bit wide.

On the right, one of the other shrouds and a better fit. Both the middle centering rings have been dry pressed into the wide end. The second ring is outside the shroud top and gives you an open edge for gluing and a slip fit of the ST-11 main tube. 


The lower ring is glued in place, even with the end of the motor mount tube.

I use the flat face of my sanding block to press the ring even.
TIP: There was still a very slight gap in the small end of the shroud. I wanted to increase the outside diameter of the low ring.

I applied a thin line of wood glue. Smooth and even it out using a fingertip on both sides of the glue ring.

After it dries, run a finger around the ring and you'll feel high and low areas. Some 400 grit will take down the high spots.

Monday, June 10, 2024

Semroc Wac Corporal Build, Part 8, Second Coat Of Primer/Filler


Normally, one coat of CWF then sanding - 
and a spray of primer/filler and sanding,
takes care of the balsa grain. Not today.

Before sanding the filler/primer I had to rub some CWF into the remaining visible grain.

Keep this CWF rubbed in filler thin and close to he surface.


After sanding down the filler/primer, you could see the remaining high spots left from the initial fin shaping. I wanted the surface to have a nice, rounded profile.

Sanding did take down the raised areas but also cut int the CWF underneath and into the balsa.

This will need another sealing shot of filler/primer and sanding.

The root edge was masked off again using tapered pieces of masking tape.

Onto some scrap cardboard to spray one side.
That long masking tape strip has the sticky side facing up to hold the fins for spraying.

Spray one side and let dry.
flip over the fins and spray the other side.