Tuesday, May 17, 2022

A Typical Day at Odd'l Rockets, Part 2


Continuation of May 11, 2022 at Odd'l Headquarters- 
I boxed up a pretty good sized order for ERockets.
Well, a good sized order for me anyway.

I weighed and measured the box. Randy was emailed and a label was sent. This was dropped off at a nearby UPS Store.


Back home again - 
Four Quest Sport models (Two show, two flying versions) got their parachutes tied in and stickers were applied. 


Starting on the next Quest builds - four new Icarus kits.
The only drag on this build is each rocket has two parachutes - eight chutes in total. Quest chutes have to be cut out and assembled.

I don't mind making parachutes - but eight in one sitting? Oh well, dive in!


Earlier in the afternoon I shot the Mars Snooper II build with a final white undercoat. Things look good, it's now ready for the gloss red. Well, after the white paint sets up for 48 hours.


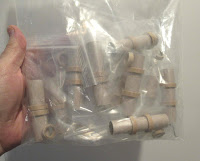
Eight additional Break-Away kits were bagged up in addition to the ones that went out in a vendor order. I always make extras trying to cover upcoming orders.

It's 1:00 a.m. - Post the next day's blog entry.
Time for bed!

Monday, May 16, 2022

A Typical Day at Odd'l Rockets, Part 1


Rocketry is now a full time job! 
Here's all my Rocketry activity from May 11, 2022.
After answering rocketry emails and Facebook, I start on kit production and model building about 1:00 p.m.

Humidity is lowest at about 1:30 p.m.
The landing legs for the Mars Snooper II got a shot of gloss white.


I've got to bag up some Break-Away kits for a vendor order.
Couplers are cut by hand. A taper is sanded into the ends for an easier slip into the tube sections.
Today, over 100 couplers were cut and sanded.
Reinforcement pieces are marked and cut from coupler segments. 
I probably cut 150 pieces. Five are needed for each kit.

I learned early on - make extras. If you have an order for eight kits, make enough pieces for 20 kits. You won't have to deal with as much prep when that next order comes in.


The couplers get a single punch for the Kevlar line ties.


I bagged about 20 Break-Away kit engine mounts.
I use my Odd'l Rockets heavy walled BT-20 tubes in my engine mounts. Every 20/50 ring needs an interior peel to fit the slightly wider diameter tube.
More of one typical day tomorrow . . .

Sunday, May 15, 2022

New Way Mars Snooper II, Comparing Snoopers


Here's my two builds. The red Snooper II is a little taller at 22.3".
The original Snooper catalog picture shows the entire engine assembly black. I liked the look of the Semroc repro kit face card that showed white vanes. The higher contrast makes them easier to see.
The upper section blue and white tall point is a difficult mask - and you've got to mask three sides! 
I never cared for the older yellow Snooper name decal, but it's nostalgic. The fin numbers on the catalog model were probably borrowed from the Constellation decal sheet.


The biggest differences are the engine assemblies lowered upper fins and the landing gear dowels.

For comparison, here's a closeup of the shrouds and vanes. On the left, three shrouds and eight 1/16" thick balsa vanes. On the right, two shrouds and thick card stock vanes.

Saturday, May 14, 2022

New Way Mars Snooper II, Build Finished


The Mars Snooper II was a simplified version of the original Estes kit. The redesign had a more modern look.

One less shroud and the long launch lug didn't have to be fitted through three shrouds.


In the original Snooper design, The engine vanes were balsa. I had to fill those before gluing up the three shroud shroud engine assembly.
The Snooper II has heavy cardstock vanes. Thinner but easier to assemble.

You could probably add springs to the landing leg pod tubes. The older QModeling upscale kit had spring loaded landing gear. Spring loaded legs might prevent a dowel break on a hard landing.


The mid section decal. 
There is another name decal on the opposite side.


The upper section is clear, except for a roll pattern decal above the adapter.

Friday, May 13, 2022

New Way Mars Snooper II, Build, Part 17, Decals


These decals are different - all white ink.

The MARS SNOOPER name decal is shown in the pictures reading "down". I prefer name decals to be reading up.

The diagonal lines are tricky to center.

For consistency from fin to fin, I made a tracing template and drew a center line. Holes were punched at the ends to see the line decals underneath.

While I did use my eyes for alignment, I could double check the lines with the punched template.


Look down the centerline of the fins to be sure the lines are straight.


Smaller lines go up on the outside fins.

Thursday, May 12, 2022

New Way Mars Snooper II, Build, Part 16, Red Paint and Landing Gear Gluing

Don't glue in the nacelle nose cones yet!
Check out the third picture below

I usually pull the nose cones and adapters out of the tubes about 1/16". This allows paint to get into the shoulder a bit and insures coverage if the nose cone isn't slid all the way in.

This is a tough model to spray evenly. Notice the right side of the pod root edge. Spray the inside recessed areas first then shoot the model overall. 


A piece of paper towel was rolled up and slipped into the open end of the pod. 

This kept paint out for a better glue joint of the landing gear centering rings.

No need to glue the pod nose cone in place yet.
The picture on the left shows the model turned upside down. 

With the landing gear centering ring spaced 1/8" from the bottom of the tube, the top ring (right picture) ends up close enough to the top for an easy glue fillet using a Q-tip.


A glue fillet is applied with a Q-tip around the lower ring joint.

After the inside top ring gets a glue fillet, the nose cone is glued in using Beacon Fabri-Tac.

Wednesday, May 11, 2022

New Way Mars Snooper II, Build, Part 15, White Undercoats, Prepping For Red


After all the filling and prep -

The assembled model is ready for the gloss white undercoats.


The instructions have you glue in the landing legs before the red is shot. The legs are gloss white, the rest of the model is gloss red.

I chose to leave the white legs off and glue them in after the red was sprayed. The instructions show how to do an after assembly mask. But, gluing the legs in after painting will make an easier and cleaner build.


After the white was sprayed, I still found some glue blobs and a rough area around the lower launch lug.

The first white coats show all the areas that need some light sanding.


Look close directly under the root edge of the fin. You can almost make out the fin alignment line under the paint. Here it isn't that noticeable under the shadow of the fin.


I don't care for printing on the outside surface of shrouds.
The original kit shrouds had fin location lines and wordage that was wider than the root edge thickness of the fins! If the final color of the model were a light color, you might see the inked words at the root edge.