Showing posts with label E Flutter-By. Show all posts

Saturday, January 4, 2014

Centuri Flutter-By - More Finished!

I ended up adding the Centuri logo decal like on the catalog model. 
That chrome trim really caught the light in this picture!

That's really all the model needs, just like the catalog picture.
Less is more here. Keep it sleek, not goofy!


Here's the twins!

One has a red lower section, the other is in orange.
I bought two Flutter-By kits in the recent Estes Clearance Sale.
Sometimes I'll build two models at the same time. When building simultaneously it doesn't really take twice as long, especially with small simple models. You've already got all the tools out for the first build anyway.

Interesting to note:
According to the Estes website the reissue Flutter-By is 7.7" tall.
My finished models are just under 8 1/8" tall.
I don't think the nosecone in my two kits is the one first used in the reissue version.
The original Centuri kit was only 6.75" tall.

Centuri Flutter-By Finished


I did want to use chrome trim. In the early 1970s, many Centuri models had a wrap of chrome. The Groove Tube, Bandito, Excaliber and even the Saturn V had it. Chrome trim was a great finishing touch!

Sorry, that decal design is ugly!
I'd mentioned before about it looking like a bad scan. The line weight is much thicker than the original Centuri kit decal.
The butterfly-moth's eyes aren't right, the open areas on the letter "B" are almost filled in. The hand drawn letters are clumsy.
I could re-draw and clean it up, but I really didn't like the looks of it in the first place.
If any decal is used it'll simply be the Centuri decal set on one fin.

Friday, January 3, 2014

Centuri Flutter-By Build, Part 9, Paint & Trim


The instructions say to use bright silver on the upper half.
If you've ever used silver on a rocket you know that fingerprints show through and the finish quickly turns  dull.
Looking at the Centuri catalog page on Ninfinger's site it almost looks like a light blue was used.
I decided to compromise and use aluminum.
I still have some chrome Monokote for the trim piece that wasn't included in the Estes kit.


The lower half was easy enough, just make sure to mask off the green coupler.

Any paint left on the metal hook will probably blister up from the heat of  the engine flame. I scrape the paint off the engine hook with the backside of a knife blade. Think of it as some chrome trim on a car.


The Monokote chrome trim piece was .9" tall and 3.2" wide.
The upper edge followed the top end of the body tube. The joining seam was centered right above the launch lug.

Thursday, January 2, 2014

Centuri Flutter-By Build, Part 8, Fin Gluing & Masking?

I wanted to mark the back of the root edge to line it up with the rear of the interior body tube.
The right side of the picture shows the first attempt.
Because the fins are two different shapes they can be hard to line up.

The inset picture shows the second try, this time I got it right.
The fin position on the body tube is critical, the model could wobble if it isn't right.

Be ready, with only half of a root edge to glue on, the lower fins won't want to stay on the tube.
Here's how everything lines up.
With the lower fins are glued to the interior tube it looks like the root edge fits both body tubes.
The upper two fins don't touch the interior tube, there is a gap!
The original Centuri design had all four fins against the stepped body tubes.

The instructions show a shorter launch lug. The supplied lug is as long as the root edge of the fin.
The instructions say nothing about masking.
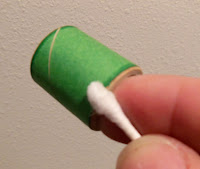
I slipped a short scrap length of BT-50 over the interior coupler, you don't want paint on the green coupler!
You could use masking tape but this is just simpler.

Both halves were separated and got a white undercoat.

Wednesday, January 1, 2014

Centuri Flutter-By Build, Part 7, Filling the Fin Edges


After sanding off the paper from the sides there will be a raised paper lip around the edges.
Lightly sand off the lip with 400 grit.

The open balsa edges will need to be filled.
Brush on thinned CWF keeping the filler just on the exposed balsa.

There will be some overlap onto the sides.
here in the inset picture I'm wiping off the filler. You don't want to be sanding the papered flat sides, that'll raise too many paper fibers.


After sanding all parts got a coat of gray primer / filler and sanding.
I used 20 lb. copy paper to cover the fins. Without sealing with the primer coat the fins sides would look rough.

Tuesday, December 31, 2013

Centuri Flutter-By Build, Part 6, Paper Laminating Fins


After the fins have dried overnight in a heavy book, the edges get a coat of medium CA.
The CA insures the edges stay down during trimming. It also hardens up the edges for smoother sanding.


Cut all the corners form the fin edge out.
This also makes for easier sanding, the edges can flex when bent by the sanding block.


Cut the sides closer to the fin edges.


Finally,
Sand off the paper edges with 220 grit on a sanding block.
Sand off only the paper folded over the sides, don't sand into the wood.
Don't sand the rounded leading edge.

Centuri Flutter-By Build, Part 5, Paper Laminating Fins


Turn over the fin and apply glue stick to the other side.

With the wood fin leading edge so close to the centerline you can see why the glue overlapped the middle. You can't get close or under the leading edge now.
Here's where most people have trouble with papering fins - the rounded leading edge.
Take an extra moment to roll the paper over the rounded leading edge before smoothing the paper on the other side of the fin.
Be sure the paper is tight and smooth over the leading edge.

Then continue smoothing the paper into the glue on the open flat side.


Burnish the second side.
Press the fins in a heavy book and allow to dry overnight.

You could also paper the launch lug if you want to.
Sometimes that's easier than filling the lug seams with CWF.
Just take your time and be sure the paper covering is smooth.

Monday, December 30, 2013

Centuri Flutter-By Build, Part 4, Paper Laminating Fins

Instead of the strakes the fins will be reinforced with paper lamination.
Mentioned earlier, this is the way the original kit  fins were strengthened.

Only the leading edges of the fins were rounded.
Trace around the fins, then add a second line about 1/2" outside the fin border. This second line insures coverage and keeps the glue on the paper and off your work area.

Cut the four tracings with scissors just outside the wider 1/2" pencil border.

Apply a smooth glue stick coat. Just glue one side for now.
Be sure the edges are well coated.
Go beyond the center line. Once the fin is set down you won't be able to get glue close to the leading edge.

Set the fin down with the rounded leading edge slightly away from the center line to allow a roll over of the paper.
I've switched over to a clean hard surface, the back side of a hard cover book. The corrugated cardboard I was working on won't allow smooth burnishing.

Turn over the fin and burnish with a smooth tool. work from the center out making sure the leading edge is smooth with no wrinkles or raised areas.

While the glue stick gives you some working time before setting up, you should work quickly.
Go to the next post and continue with the other side.

Centuri Flutter-By Build, Part 3, Engine Mount

There is no mention of a relief notch on the inside of the adapter.
You should cut one or the engine mount tube will be distorted where it presses down over the engine hook.

TIP: Don't cut the notch over the seam. The ring will want to de-laminate if the seam ends are cut.


The centering ring will have to slip into the outer BT-50 tube.
Round off the edges with some 220 grit.


The green layer is thin and may start to peel up on the edges.
Brush on a coat of CA on the edges.
Lightly sand smooth with 400 grit.
Here's the finished engine mount.

TIP: I also cut the notch for the engine hook so the exposed motor tube seam wouldn't go underneath the hook.
Now I can fill and sand the seam without the hook in the way.

Sunday, December 29, 2013

Centuri Flutter-By Build, Part 2, Fins

In the original Centuri kit, the four Flutter-By fins were the same.
The two fins on the left are used in the bottom half. The tab on the root edge glues to the smaller diameter engine mount tube.
On the right are the upper section fins with no root edge tab.
All four fins have strake positioning lines burnt into one side of the fins.

Below are the reinforcement strakes, not part of the Centuri kit.


The strake lines are burnt halfway through the wood!
Why would you reinforce a fin that has a line cut halfway through it?

Check the old Centuri instructions at www.oldrocketplans.com HERE
The instructions mention an "Optional Strengthening Technique" in Step 6. This is simply gluing copy paper over the fin. I'll be explaining the technique coming up in a blog post.
The instructions on oldrocketplans say the fins were 1/16" thick. I don't remember them being that thin. These fins are 3/32" thick.
I'm fortunate to fly on grass fields. The paper laminated fins should be plenty strong landing on grass.
Besides, I don't like the looks of the strakes.


After the burnt edges are sanded off, stack the fins as best you can and round the outside corner. Sand this round with all fins at the same time for consistency.

Round only the leading edges on all the fins.

Saturday, December 28, 2013

Centuri Flutter-By Build, Part 1, Parts

Here's some back story on the Flutter-By from the Semroc Spartan kit instructions:
"The Stellar Spartan was the second in the Centuri Stellar Line. Originally planned for mass merchandising, the line was later changed to mail-order only, then dropped. The Spartan was an early prototype for the later Screaming Eagle which replaced it. Leftover parts from the Spartan were used for a few years on the Flutter-By until they were gone."
Looking at the Spartan fin profile, you can see it's the same fin.

The "Flutter-By" - not a very macho rocket name.
I had an original Centuri Flutter-By in the mid 1970s.
As I remember, it performed well with A8-3 engine's.


I bought two Flutter-Bys in the recent Estes Clearance Sale.
I put off buying the re-issued kit because the price was too high.
Up until the sale the retail price was $14.29!!!
High - considering how few parts are in the bag.
In the picture above notice the laser cut lines for fin strake positions.

Parts of interest:
The nose cone is longer than the Centuri version. The original was a Centuri PNC-80, 2" long. This nose cone is 3 1/4" tall.
The drawn lines on the decal are thick compared to the original kit.
It's missing the chrome trim included in some Centuri kits at the time.

I'll be referring to this one as a Centuri Flutter-By.
I won't be using the strakes and will try to make it look a little more like the Centuri catalog picture seen HERE.