Showing posts with label E Guardian. Show all posts

Thursday, September 11, 2014

Estes Guardian Finished


Estes does show this decor as the suggested "Paint Scheme" but doesn't tell you much information on how to pull it off.
The average builder probably wouldn't take the time for all the complex masking.
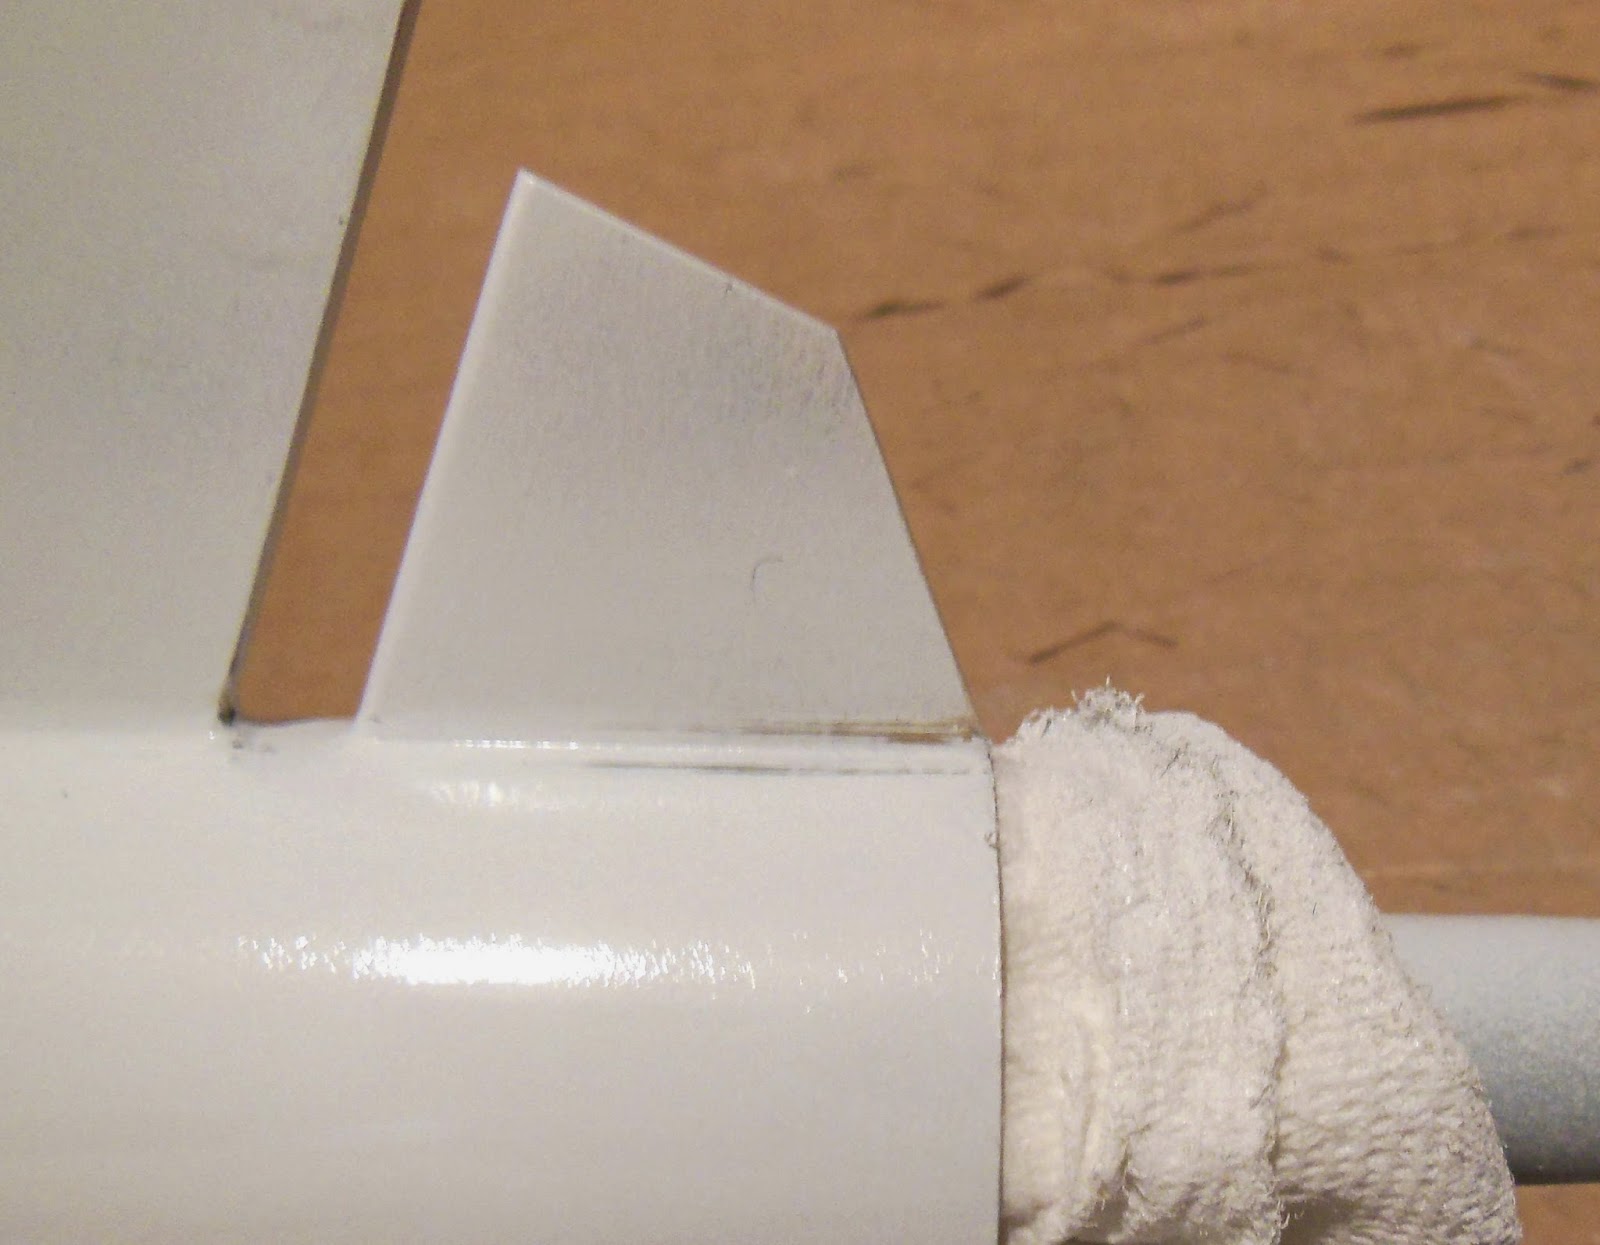
I thought the Monokote trim would be the way to go, that's what it looks like Estes did on the face card.  
Even using the Monokote trim it takes a few hours.


I've always liked the looks of the Guardian and the catalog paint scheme. It was about time I tackled it.
While the instructions said to use light gray for the upper section I used white to match the face card.
I thought aluminum paint would look better than a darker gray on the fins.

Wednesday, September 10, 2014

Estes Guardian Build, Part 12, Payload Section?

I built two Guardians, one was normal with the closed adapter and small payload section.

The upper section of the second Guardian is shown at the left.
The base was removed from the adapter. This gave me a functioning larger payload section, something I could fit an altimeter in.
The regular Guardian payload section is too small. Tying the shock cord through to the nose cone gave me extra inside length. The shock cord goes through the bottom of the adapter and ties to the attachment lug on the nose cone base.

I did tie more elastic onto the shock cord.
Inset picture: The latch on the parachute snap swivel was slipped through the knot joining the two pieces of shock cord.
The model will still break apart right below the adapter base.

Tuesday, September 9, 2014

Estes Guardian Build, Part 11, Lower Trim Placement


The black trim pieces overlapped the root edge fillet slightly.

All the trim pieces were hard to set down. There are too many edges and tips to line up. The pieces were set down, lifted, aligned and set down again. This took too long to get close.


The forward blue pieces went down easier, probably because I had practice with all the previous pieces.
Here I've already set the piece onto the fin and removed it to trim a bit off the root edge. the blue can't overlap onto the root edge.
The black overlaps disappear, the blue wouldn't.
On the face card picture you could see a slight separation between the blue and black trim pieces. I overlapped the blue over black to allow for shrinkage.
The only decor in the kit is the Guardian name and faded blue stripe.
There is some clear area surrounding the two name strips.
I cut off the clear border areas close to the name and stripe. This will make the sticker less noticeable on the finished model.

Monday, September 8, 2014

Estes Guardian Build, Part 10, Re-Spray and Lower Trim Template


I ended up masking respraying the fin that had the black on it.
Most of the fin would be covered with trim Monokote but when I tried to remove the black over spray it dulled the aluminum paint.


A piece of copier paper was cut to the size of the black piece.
I should be able to use the same piece for the facing sides by flipping it over.


The template piece was set on the black trim and cut.
I didn't cut six pieces out at once. Each piece was cut and set individually.

Sunday, September 7, 2014

Estes Guardian Build, Part 9, Lower Body Silver and Black Paint

I tried to paint the fins with Rustoleum Metallic but with the heat and humidity it dried dull. I went with Rusto aluminum.

The body tube is to be painted black. Here's how I masked off the fins.
First the root edges got a mask with Scotch tape. You can see the black marker line at the root edge.
Copy paper was folded over and taped down covering the rest of the fins.

The mask turned out well except for a light bleed on one side of a fin.
I used a damp Mr. Clean sponge to remove most of the black.
I won't use the magic sponge again on a metallic paint!
The sponge did remove the black paint but dulled the aluminum paint. The sponge works better on solid, non metallic colors.
I had to re-spray that one side of the fin.


I was happy with the mask.
The lines are sharp and clean even over the top of the rounded leading edge.

Saturday, September 6, 2014

Estes Guardian Build, Part 8, Blue Trim Monokote


The back end of the black trim was trimmed off a new razor blade.

Be very careful when getting near the rounded fillet corners. It's easy to round off the corners if the Monokote isn't all the way into the fillet joint.

The blue piece is cut by simply flipping over the original template used for the black pieces.
The blue piece isn't cut wide, you won't be trimming off the overhand afterwards.

Instead of going from the center out, I found it easier to set down the side corner tip first.
The blue overlaps the black slightly.


Here's the finished upper section.
This takes time, it's not an easy trim to line up!
The tips wouldn't stay down over the rounded leading edges.
I don't have any of the trim solvent so I used some medium CA to stick the tips down.
  1. A drop of medium CA was set down on some scrap card stock.
  2. A toothpick was touched in the CA drop. 
  3. This small bit of CA was set under the lifted corner.
  4. Any excess was picked up with a paper towel.
  5. The tip was pressed into the CA by rolling over it with a Q-tip. 

Friday, September 5, 2014

Estes Guardian Build, Part 7, Upper Black Trim Monokote

I didn't want to mask and spray this one. For the average builder getting the model to look like the face card would be very hard.
I decided to use Trim Monokote. Looking at the face card, it looks like the Estes people did too.


Paper was pressed and creased into two of the root edges of upper facing fins.
The fin shape was traced from the back.


This gave me a rough shape to make a template.
The center of the pattern was also marked.


Mark the center between the fins with pencil.
The black Monokote Trim piece will be set down first, then the blue.


Before setting it down the center of the black piece was also marked.

Line up the center marks and just "touch" the center of the black piece down. After you are sure the top is in line, press the black piece down from the center to the root edge joint.

Chances are, you will not get it right the first time. Don't press the piece down permanently until you are sure.
I cut the pieces slightly wide and will trim off the overhang afterwards.

Thursday, September 4, 2014

Estes Guardian Build, Part 6, Fillet Smoothing

I've been asked how to get fillets smooth and even.

On the right are the Titebond M&TG fillets after spraying with the white undercoat. There is some roughness and ridges.

This is a white undercoat I can now wet (actually damp sand) the fillets.
400 grit was wrapped around a Q-tip end for cushioned sanding.


After sanding the sides, be sure to go around the front edge of the fin / tube joint. this is where most of the glue "boogers" will show up under the color coats.

When sanding off the fillet glue ridges, just sand off the top, don't go too deep.

Here's how the sanded fillets look. All I've done is knock down the top of the glue ridges. Some of the paint is filling the remaining dips.
Your color coats are your last "fill" after CWF sanding, then primer sanding.
Another shot off white and the color coats follow.


Keep a close eye on your sanding. Sand and check, sand and check.
Here I've sanded too far and almost went into the balsa!

Wednesday, September 3, 2014

Estes Guardian Build, Part 5, Rear Fin Gluing

The smaller rear fins were glued on first.
After the first fin was glued on a thin masking tape strip was set down to line up the leading edges of the other two.

The large front fins were glued on with the rear trailing edge at the top of the tape strip.
Two craft strips (Popsicle sticks) were set on either side of the fins to assure they were both straight and in line with each other.
Clothes pins held the fins on while the glue dried.


Fillets were hard to smooth out in the small area between the two fins.
A Q-tip got in where a fingertip couldn't.

Tuesday, September 2, 2014

Estes Guardian Build, Part 4, Tube Marking Guides

I'm building two Guardians at the same time.
One kit had a rough white body tube with wide seams. The other kit had the standard brown tubes.

On the left is the rougher white tube after it was sprayed with primer/filler. If you enlarge the picture you can see the raised fibers from the sanding before the primer was sprayed.
After sanding the primer to surface the "fuzzies" were gone.

The kit marking guides were off.
The ends off the upper BT-50 tube wrap didn't come close to matching up. The B-55 tube wrap was closer but still not great.

Before anybody thinks: "He's sprayed the body tubes with primer and now the outside diameter larger."
Even on new bare tubes the guides were short.


The upper fins were glued onto the BT-50 even with the back end of the tube.

Monday, September 1, 2014

Estes Guardian Build, Part 3, Plastic Parts Prep

After sanding down the molding seams on the adapter, some white Squadron Putty was set in the remaining seam.

NOTE: I've read that the Squadron putty won't work on blow-molded nose cones. The blow molded nose cones are the softer plastic.
This putty works fine on the harder styrene plastics.

It dries quickly. 400 grit was used to sand to surface.


The wall thickness at the base of the nose cone was inconsistent.
In the picture you can see how much thicker the right side is.

220 grit on a block was used to even out the nose cone base wall.


The tip of the nose cone was a little squared off.

On the left is the before.
On the right is the same nose cone tip after rounding. The flow and shape is much better.

Sunday, August 31, 2014

Estes Guardian Build, Part 2, Plastic Parts Prep

Before gluing in the nose cone shoulder, sand the base of the nose cone flat. Square the nose cone base now for a better fit against the body tube end.
Also sand the end of the body tube square.

Apply plastic glue and set the shoulder in place.
Before the glue dries, slide the nose cone into the body tube  and turn against the body tube to be sure it is square.


I didn't cut out the entire recess in the attachment lug.
Files were used so the ends would be round.

If you were to cut the corners with a knife you risk cutting through the attachment lug.
TIP: The rounded sides are also less wear on the shock cord.
There are closed shoulders on both sides of the 50/55 adapter.
TIP: For a larger payload section the small end of the adapter shoulder was cut off with a razor saw.
This opens up the top of the adapter and gives you enough room for an altimeter.
I could also run the shock cord through the base of the adapter and through the payload tube and tie onto the nose cone lug.
This would tie the nose cone to the body (no chance of losing it at ejection) and you can tie the altimeter onto a loop in the shock cord.
The model will still break below the adapter at ejection.

Saturday, August 30, 2014

Estes Guardian Build, Part 1, Parts

I've never built an Estes Guardian.
Somewhere in the Ebay buys I ended up with two.

Both kits had white tubes.
You can see the bent tube on the right. I have some extra BT-55 and will cut a new one.

The 50/55 adapter is the same one used for the  Bullpup kit tail cone.
The shock cord is too short, only 18" long.
One kit has balsa fins, the other laser cut Tung wood.
All other parts are standard.


This bent tube had small spirals. The second kit had a very rough BT-55 with wide spirals, the worst I've ever seen in an Estes kit.
The parachute is 12", yellow and black in the "spiderweb" pattern.
The shock cord is too short, only 18" long.
While the face card shows a very colorful model, you are only given a white nameplate decal that fades into blue.


The paint pattern is a very tough mask. I doubt few builders have tried to do it.
I'll tackle it using a combination of paint and trim Monokote.
The face card picture looks like Estes used trim Monokote on the blue fin centers.