Showing posts with label E Hex-3. Show all posts

Thursday, March 11, 2021

Estes Hex-3, #7263, Finished


This was a fun, a bit easier than a normal 3FNC wood and tube rocket.

The fit and finish are very good.
When gluing the wedge fins on, simply cover the white areas with the splayed fin tabs and you should get  good alignment.

When this kit was first introduced I thought it looked like a blue/green version of the old Estes Porta-Pad. I made a Flying Porta Pad.
To see the finished model: CLICK HERE

The Hex-3 seems structurally stronger than my Flying Porta Pad. The F.P.P. only lasted for five launches. The Hex-3 should fare better.

Wednesday, March 10, 2021

Estes Hex-3, #7263, Build, Part 6, Base & Fin Gluing


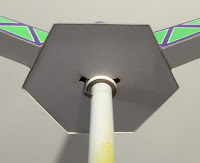
With the angled edge on the bottom plate - 
The plate ends up slightly recessed inside the hex body edge.

This allows you to apply a small glue fillet all the way around.
Use white glue - it'll dry clear.


There is a little edge along the inside bottom of the fins allowing easier placement. Set the edge under the bottom and roll the fin up.
Do some dry fits to see how the tbs will cover the white area.

With the tabs glued and covering the white area, apply some pressure towards the top to close off any gaps.


Some white glue was applied around the open top and smoothed out.
This glue coat protects the top from the hot ejection charge.

A sharpened dowel was turned inside the launch lug ends to round them out and clear the edges.

This is a good practice for all models. There is nothing worse than a rocket stuck on the launch rod while the engine burns.

Tuesday, March 9, 2021

Estes Hex-3, #7263, Build, Part 5, Fitting The Base, Gluing The Engine Mount

The instructions imply that the base plate is glued onto the rear edges of the main body shroud. I prefer to glue the plate just inside the edges. Don't glue the base plate on yet.

GOTCHA: The instructions say to glue on the base, then slide the engine mount in from the top. In a dry fit, I couldn't get the upper engine mount centering ring through the top hole of the shroud. I decided to glue the engine mount (a friction fit) in from the wide shroud bottom  - then glue on the base plate. 
All this is shown three pictures below:


Using no glue - test fit the base plate in the shroud.
The instructions don't mention, 
Sand an angle on the edges of the base plate. Make the angle is about the same as the sides of the main body shroud.


A test fit showed the corners needed a little more angled sanding to allow an easy fit just inside the body skin edge.


A line of glue was set around the upper ring of the engine mount.

The mount ring was pressed into the top end of the shroud. Center the engine mount.
Now, while the glue is still wet . . .


You can mold the bends to a rounder shape around the top of the centering ring.

Burnish them into more of a rounded shape around the engine mount tube. You only have to round off the top upper edge at the fold creases.

Monday, March 8, 2021

Estes Hex-3, #7263, Build, Part 4, Gluing Up The Cardstock


TIP: When gluing up a pre-finished model like this, use white glue, not yellow glue. Some glue might end up on an outside surface, visible on the finished model. White glue dries clear, yellow glue dries yellow.

Here's the bottom outside tip of the fins. 

Be sure the bottoms of the tab flaps are even as shown on the right, not as shown on the left.


I found long tweezers really help to hold the tabs together until the glue starts to set.


That launch lug hole in the center body skin is difficult to cut with a knife.
Use your leather punch to cut out the hole. Cut the straight sides of the lug slot with a knife. 
TIP: The instructions usually have you set glue on the extended short glue tab. Sometimes glue squeezes outside the body.
I like to set glue on the inside edge, opposite the tab side. on the center right, I've marked the glue area with pencil.
Give this a try, you might feel it gives you more control. After you apply the glue to the opposite side, you can smooth it out with a fingertip right up to the edge of the shroud.


Press the dry tab into the glue on the other side. 

I've set a dowel inside the body shroud to give me a hard surface for burnishing.
Rub a dowel down the gluing area tab while pressing against the dowel on the inside.

Many builders use too much glue when adhering card stock. Apply glue, smooth out and remove excess with a finger. 

Sunday, March 7, 2021

Estes Hex-3, #7263, Build, Part 3, Scoring The Fins

The instructions say to fold the fin lines over a straight edge. I don't see how this could be successful unless you have a very thick straightedge.

You'll get much cleaner folds if you pre-emboss the fold lines.

I did my usual embossing before the fins flats were cut off the full sheet. Trust me, it's easier to emboss when the fins are still on the sheet.

I used the un-serrated, smooth thin tip of a butter knife. Set a straight edge down the line, allowing a little space for the thickness of the knife. 
TIP: If you emboss over corrugated cardboard, be sure the inside ribs of the cardboard run parallel to the lines you are embossing. 


This is the back, unprinted side of a fin.
Look close and you can see the embossed lines.


Don't just do a single, sharp fold
Work up to a sharp fold line. Coax the tab folds little by little and finish with a sharp crease with a burnisher.

Saturday, March 6, 2021

Estes Hex-3, #7263, Build, Part 2, Engine Mount


I like to sand the centering ring ends flat. From the manufacturer, the edges are cut at a slight angle. 
TIP: If you ever build a kit where the rear centering ring is seen, even with the end of the main airframe tube, you'll want them flat. The finished look will be cleaner.


The wrap around marking guide fits! A perfect match.

After you mark and extend the the pencil lines down the tube,
set the tube on the large base plate to get an idea how it fits.


The split ring usually goes on the bottom of the engine mount. The open split allows movement of the engine hook.
On the left side picture, I used some masking tape to hold the split closed until the glue dries.

On this model, the open ring allows passage of the launch rod.
On the right side you can see the top edge of the launch lug through the open slot. 


Here's the finished engine mount - 
The low end of the launch lug rests against the Mylar retention ring. The upper end of the lug is cut to sit under the upper ring.

Friday, March 5, 2021

Estes Hex-3, #7263, Build, Part 1, Parts


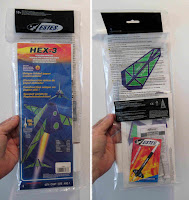
This was one kit I didn't pick up in the recent Cyber Monday sale. I was tempted.
I actually won this kit at a drawing at the December L.A.S.E.R. club launch. I thought it would be a good blog build, I'm sure many bought this rocket in the recent Cyber Monday sale.

The kit bag seems flat except for the BT-20 motor tube.


Only 100' altitude? Small field flyers have a place when launch areas are hard to find. The rocket is short with a lot of drag.


All the kit parts - 
When setting up the parts layout for the picture, the split centering ring should have been set at the top of the motor mount tube, the opposite of where it would normally be placed.

I didn't put together the reason behind the kit name until now - the "Hex" is the six sided center body, the "3" is the three wedge shaped fins.


The card stock base seems thicker than a standard centering ring.

I always thought the fin and body cardstock would be thicker than 110 lb. It feels like 110 lb. but this kit card stock has a shiny finish. The glossy coat makes it feel thicker and stiffer.