Wednesday, September 30, 2020

New BT-5 Sized DECALS for Patreon Supporters!


Here's the last set of wrap-around roll patterns and detail decals sized to fit a BT-5 tube. These were inspired by Estes and  Centuri style kit decals.

The decals have were printed and test fitted for a near perfect fit on a standard BT-5 tube.

The new decal sheet is available to Patreon member/supporters. Email me at: oddlrockets@bellsouth.net and ask for the BT-20 decal sheet.


Rocket Shelves

On the Facebook Estes Model Rockets page, Gerry Sieracki asked: 
"How did/would you protect your rockets when moving several states away?"

David Scigs answered and posted a picture of his rocket and plane room:
"I am wrestling with the same dilemma, I have a ton of rockets and airplanes built. Looking to move from the West Coast to TN in 4 to 5 years. I have a lot of careful packing to do. I hate to just get rid of these classics."


My response:
Sort of looks like my rocket room, but yours is better organized! I've drilled small holes halfway into the shelves and stuck in short 1/8" rods. I either slide the models down on the launch rods, or into the open engine mounts. That's probably because I grew up near the Earthquake Capitol of the World" and had a few rockets shaken off the shelves.
I was dating a girl for a few months, had her over for a house tour. When she didn't run screaming after seeing the rocket room I thought: "She might be a keeper!" In the end she didn't work out. We went to a club launch and after 20 minutes she asked: "How long do you normally stay at these things?"

Tuesday, September 29, 2020

Estes Colonial Viper #1310, Finished


I always like to stretch in my clone builds. The decal draw was a big chore, but in the end worth the effort.
The only thing I didn't do was paint a silver ring around the end of the nose cone. The original kit nose cone had a molded ring for a color separation paint line. I may go back and mask it. The masking tape strip would have to be cut in an arc to fit the curve of the nose cone.

The picture to the right shows the underside. Compared to all the decals on the top side, not much to see.

This is a stocky model, lots of tubes and details on the back end. Some launch reports talk about "coning" during boost. I hope there is enough weight in the nose for a stable flight.

Monday, September 28, 2020

Estes Colonial Viper #1310, Part 15, Gloss? Paint & Decals

I did spray gloss white paint, but with the Florida humidity, most all surfaces came up as a flat finish.

TIP: You can improve the gloss of a flat "humidity" finish with careful use of automotive polishing compound. Use polishing compound - rubbing compound would bee too rough. 

Watch your fingernails! They can easily scratch the balsa surfaces. The picture shows the lower half of  the upper fin after polishing with some rubbing compound. It's not a full shiny gloss, but enough shine I can accept.

The decals are now available to Patreon supporters as a PDF for home printing. You could print these on self adhesive paper (stickers, like in the original kit) or on water slide decal paper. 

Email me at: oddlrockets@bellsouth.net and ask for the Colonial Viper PDF Decals. This decal draw is not an exact copy of the Estes kit decals. 

Here's the back end with all the engine decals in place.

Notice the red bars set on the tubes extend and line up with the fin decals. I did go back to the decal draw and make the widths consistent between the pieced decals.

TIP: Set the engine wrap decals first, then match up the red line on the wing decals.


The long red stripe continues down the top of the main body tube and over the nose cone.

This requires a close cut with no clear area over the tube edge and in the nose cone shoulder. 

TIP: This is one of the few areas where I use Future clear coat. I only use it to seal the cut edges with a light wipe using a Q-tip.


Even though the canopy decal looks like one full decal, 
I'd recommend cutting it into three separate pieces. 

Apply the two top windows first, then the two side pairs. Try to get a good white spacing between all the windows.

The rear, top center window was drawn too long. It has been shortened in a decal revision.  

Here we go - One of the joys of home print decals. 
This area cracked an flaked off when I was trying to slide it around.

I don't know if I'll replace it or not.

Sunday, September 27, 2020

Estes Colonial Viper #1310, Part 14, Canopy Forming


I redrew the canopy and added some very small gluing tabs, see the picture below. 

You will need to emboss the dashed folding lines. I still like using the tip of a dull butter knife and a straightedge.

The folds should be sharp and straight.

I used my long, straight tweezers and set the side right down the fold line.

My burnisher was run over the dashed line while the tweezers held the dashed line straight.

Shape the canopy making the longer sides as straight as possible. The sides will want to curve out. 

Glue the balsa post piece down the center.
On the left, notice I concentrated on gluing only one side of the back edge at a time.
It's much easier to match up the angle right side after the left side is glued in place.  


I doesn't require much glue to adhere card stock pieces. You can always add a fillet afterwards.

I had to pinch in the sides and hold the shape until the glue set up. 
TIP: Another reason to use less glue on cardstock like this - you won't have to hold it as long.

Saturday, September 26, 2020

Estes Colonial Viper #1310, Part 13, Laser Cannons, Launch Lug & Trim


For a better fit on the wing extension pieces, I sanded a contour into the wing extension pieces.

Wrap some 400 grit around the large 3/16" diameter end and sand a concave dip into the edge. 

The picture on the right shows a dry test fit.


The cannon assembly should end up even with the back end of the extension piece. Note the line of glue on the 3/16" rear lug.

View from the back to double check the orientation off the assembly.


The instructions have you glue the launch lug 3" up from the rear end of the model. This may have something to do with the C/G considering the 1/2 oz. of clay in the nose.

I glued my launch lug so it will be covered by the long rectangle piece. Look close and you can find it in the picture.


It took a few tires to get the card stock piece in the correct position and angle. Once it was set down dry, pencil lines were traced on the outside edges.

I use very little glue along the edges for initial bonding. Fillets were added after this dried. That thin line on the inside laminate was left over from a earlier 110 lb. stock print. It'll be inside and not seen. 


Here's the card stock rectangle glued in place with the launch lug hidden underneath.

Friday, September 25, 2020

Funny Picture


This sort of reminds me of my Mother saying:

"Who took the good scissors?"

I think every household had three pairs of scissors. 
One set was tight and sharp - the "good" scissors.
The two other pair were dull and had a set screw that wouldn't stay tightened.

Our household had at least three X-Acto knives, all with dull blades.

Estes Colonial Viper #1310, Part 12, Fin Gluing


I used the alignment guides to mark the tubes for the fins. This was just a visual pencil mark, centered in the guide slots.


The fin was set on the pencil line and the leading edge marked. 


The pencil line was sanded off and the tube roughed up for better glue adhesion. 
I'm sanding right up to the leading edge pencil mark shown in the previous step.


I set a line of glue down the root edge of the fins and set them on the pencil line - then slid the alignment guide on over the fins.
If I were to slide the glued fins into the alignment guide slots, glue could end up where I don't want it to.

It's interesting, the lower wing fins emanate straight from the center of the BT-52 tubes just like a standard three or four fin model. 

Thursday, September 24, 2020

Upcoming Build . . .


I just got the email:

I'll be building a Saturn 1B Show Model for Estes! 
My plan is to produce a "Build Book" (like the older Saturn V) available to Patreon supporters. 

The actual build should start next week but won't appear on the blog until Estes releases the kit for sale.
No more thin vacu-form fins! This new version also has updated detail wraps. 
This is a 1/100th scale model, the same scale as the big Saturn V. 

The picture above is from a previous release, I don't have an available picture of the new boxed kit.

Estes Colonial Viper #1310, Part 11, Tube Fillets

Mentioned earlier, the instructions have you set a line of glue down the top engine tube. Slide the glued tube through the alignment guide, then turn the tube and line of glue to make contact with the interior tube.

I used very little glue to adhere the outside BT-52 tube, deciding to make fillets only on the top side in the area that will be covered by the card stock rectangular strips.

Why not fillet on all sides? Fillets in deep, tight corners are difficult to get smooth. You always end up with bubbles.  


Here's the bottom of the model.

I'm not doing fillets here in the tube joints, just on the top where they will be covered by the card stock strips.


I went through this many Q-tips while applying glue and smoothing out the fillets!

Wednesday, September 23, 2020

Fixed Blog?


It looks like they've "fixed" the blog! It's still not easy to position text and pictures, but you can now comment, access and search all the old posts! Progress - to a point.

Estes Colonial Viper #1310, Part 10, Gluing Together The Four Tubes


The alignment template is cut out. Cut the inside circle arcs first, then all the straight lines with a straight edge.


The older instructions say to lay a glue line down the short tubes, slide them through the alignment guide, then rotate the tube and glue line onto the center tube.

That might leave a glue mess. I like to have more control without leaving glue boogers everywhere.

To start, draw a line down the three short tubes. Sand away the primer right down the line. Re-draw the line.

I'm using very little glue at present, just enough to tack the tubes together. Adjustments might need to be made when the templates are slipped on.
You can glue the bottom two engine tubes on now, without using the guides. They are all even in the back and lay flat with the BT-50 center tube.


Here's the three engine tubes in place using the two alignment guides. 

So far I've used very little glue to set the outside three tubes. More will be added in the next post.


Tuesday, September 22, 2020

Estes Colonial Viper #1310, Part 9, Tube Prepping


 I mentioned earlier how there wasn't much difference in the diameter of the BT-50 and BT-52 tubes. 

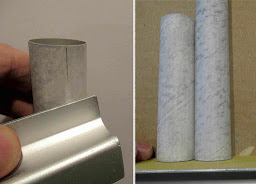
In the right side picture, the BT-50 H slides right into the BT-52.


I ordered the BT-52 tube from Balsa Machining Service. Instead of shipping in a long box (the tubes are 24" long!) I told Bill he could cut the tube into smaller segments, send in a smaller box and save on shipping costs. Bill asked if he could rough cut the tube using a band saw. I said: "Sure!"

It was very easy to sand the ends clean and even with some 220 grit on a block. 

The inside of the three outside tubes can be seen on the finished model. On the left, some CWF has been rubbed into the interior seams with a fingertip to keep the fill light and close to the interior wall. You only have to fill about 1" in from the ends.

On the right, the interior filler is sanded down with 400 grit wrapped around an engine casing.


Here's the filled tube - 
You can see the CWF filler in the interior seam.

After that, the interior lip and edge got a wipe of CA on a Q-tip. Light sanding with 400 grit smoothed it out. 

Monday, September 21, 2020

Estes Colonial Viper #1310, Part 8, Decal & Template Drawing

The decal scan at Jim Z's site is usable but not as sharp as I would like. The original kit provided die-cut stickers, I wanted to use water slide decals.

I spent more time redrawing these decals than any other project to date. There's a lot of detail in the engine wraps.

The decals are now available to Patreon supporters as a PDF for home printing.
Email me at oddlrockets@bellsouth.net and ask for the Colonial Viper Decal PDF.
The templates shown below are also part of the PDF package.

You could print these on self adhesive paper (stickers, like in the original kit) or on water slide decal paper. 

This is not an exact copy of the Estes kit decals. I made a few subtle changes so I could identify them. These decals are for Single Builds Only - Not for sale or to be used in commercial kit production.

Note there is two canopy decals so you can do a double layer of the black if desired.
EDIT: As it turned out, the single layer canopy looked fine set over the gloss white painted canopy. The double layer is available if your decal print isn't dark enough.

The picture posted above right is the second of three revised decal draws. After the decals were placed on the model, a third edit followed to better fit the assembled parts.

The templates were also redrawn.

At the bottom of the fin template is the rudder piece. In the old Estes kit, the balsa grain ran parallel to the root edge, not the leading edge. I drew the rudder fin with the stronger grain orientation. 
In the old Estes instructions, they explain: 
"You may notice that the grain direction of the upright fin is not parallel with the leading edge . . . By running the grain direction parallel to the body, the fin will most likely break off rather than transmitting shock to the body. Since it is much easier to glue the fin back in place than to rebuild the rocket body, the fin was designed in this manner."

Say what? 
Any hard landing could break off a fin. There is so much extra stuff at the tail end of this rocket, it seems very stocky and strong. There are two other fins that could touch down first. Granted, the trailing edges of the other wing fins taper away from the body. I'll take my chances with the grain running down the leading edge of the fin. 

There are some extra canopy pieces. When folding and forming card stock, the first try never seems to be right. I made a few adjustments to the sides curves for a better fit on the BT-50 body tube.


The alignment guides were also drawn.
Print on 110 lb. card stock and back with a second piece of card stock before cutting out.

Sunday, September 20, 2020

Estes Colonial Viper #1310, Part 7, Laser Cannons


The laser cannons are made up of a 1" long 3/16" launch lug, a 1 3/16" long 1/8" lug and a 1" length of 1/8" dowel.

On the bottom of the picture is a glued-up finished laser cannon.


Draw a line down the dowels and lugs. It's not easy to keep them in line during gluing.

Use the pencil lines to get everything straight.


Mark the depth for the 3/16" lug on the 1/8" lug.

Match up the center lines and the three pieces should end up in a straight line.


Here's the two finished laser cannons.

Keeping Flat Finishes Clean!


On Facebook,. Tao Zero Rocketry posted this picture:

"Chas Russel brings up the Pod Bay Door's "Uprated Saturn 1B" for its first flight." 

Notice the white gloves.
Once at a club launch, somebody let me know: "Your rocket isn't scale unless it has a gloss finish!"

If I were entering a NAR Scale Competition, my entry would have a flat finish. 
For sport flying? I use gloss finishes. Flat finishes get dirty very quickly. That's why Chas Russel is wearing the gloves!

Saturday, September 19, 2020

New Blog Format Bugs


I've had two emails regarding problems with the blog. I can only assume this is a bug in the new display mode.

Up until this morning you could click on a picture and see an enlargement.
That doesn't seem to be working now. There are other issues, very frustrating! Even dropping in the image on the right was problematic.

I have sent a comment to the Blogger people. 
I assume they are hearing from many others. Fingers crossed for a quick fix!

Estes Colonial Viper #1310, Part 6, Wing Cutting & Gluing


The wing fins are three pieces. Note the grain on the two mirrored pieces.

The wing extension pieces is glued into the notch in the front piece.


I didn't glue the extension piece in yet, I wanted to sand the root edges flat without the extension piece in the way.


Setting the wing on the flat sanding block shows the bottom root edge wasn't flat. Now the root edge is trued up.

The the extension is glued in place.

Notice the pencil line in the instruction picture above. The bottom of the extension piece should be parallel to the root edge of the fin.


The wing and rudder pieces got a coat of CWF.

The picture on the left shows some balsa warping when only one side has the water based CWF coat. Don't panic - Painting the other side will straighten it things out after the filler dries.