Showing posts with label E AMRAAM. Show all posts

Monday, June 30, 2025

Estes AMRAAM AIM-120 Downscale, Build, Part 14, Finished


There are PLENTY of small decals on the model.

It's confusing trying to apply them using the Estes instructions. I did my best, some placements are a good guess. 

Online pictures of the real missile don't show the AMRAAM name. It might be Estes took some liberties like they did with the old Honest John kit. The name Honest John never appeared on the actual missile.


Here's the upper end. 
I hope it's stable! There's 1/2 oz. of nose weight in the nose cone.


And the Back end - 

No tail cone, it's a semi-scale build at best.

Sunday, June 29, 2025

Estes AMRAAM AIM-120 Downscale, Build, Part 13, Decals


Applying a light color home print decal over gray paint will end up a much darker color.
You'll need a white underlay.
Black decals don't need any white underneath.


You can either:
Use a white decal strip under the light colored decal or - 
Spray gloss white onto a clear decal sheet.


TIP: Cut a strip of the white sheet, the same width of the colored band.

Lay the white underlay strip down first as a regular water slide decal and let dry.

Apply the yellow strip decal directly over and on top of the white band. 
I didn't find it necessary to use the white strip under the brown decals. They were darker and didn't show much difference over the light gray paint. 

Set the strips down a little long, and trim against the root edge of the conduit with a single edge razor blade.

Saturday, June 28, 2025

Estes AMRAAM AIM-120 Downscale, Build, Part 12, Shock Cord & Parachute

The elastic shock cord was tied to the lug at the bottom of the nose cone shoulder. Notice the tail was not cut off.

When packing the chute, the short shock cord tail can get wedged between the nose cone shoulder and the end of the body tube.

TIP: On this style nose cone - Push the shock cord tail inside the open holes beneath the tie off lug.


The parachute shroud lines were tied to a shock cord loop a few inches away from the nose cone. 


I used the Target bag parachute shown in an earlier blog post.

Friday, June 27, 2025

Estes AMRAAM AIM-120 Downscale, Build, Part 11, Gray Paint & Decal Print


Here's the lower half, painted with Ace Hardware Light Gray.


The upper half, also in Light Gray.

There are still some glue boogers that need to be sanded.
Another final light gray coat will follow.

The nose cone is painted white.
I drew up decals for the downscale BT-50 size.

The decal sheet is only available to Patreon supporters.
Email me at oddlrockets@bellsouth.net and ask for the AMRAAM decals.
The home print PDF also includes fin patterns and a parts list.

The picture shows an early version of the decal sheet. I've made changes so the decal positions match the Estes sheet.

Thursday, June 26, 2025

Estes AMRAAM AIM-120 Downscale, Build, Part 10, Fillets & White Undercoats

I know, I'm bouncing between builds! I'm sure you have two or three rockets in progress at one time.


Even though I had a fairly tight fit, there were still bubbles in the conduit glue fillets!


There isn't much space between the fins and conduit for a glue fillet.

I applied a line of wood glue to a Q-tip and spread the fillet drop by drop. 


White undercoats have been sprayed.

After the paint dried, those fillets between the fins and conduits weren't that smooth. The rough areas required some sanding with 400 grit before additional white coats.

Thursday, June 19, 2025

Estes AMRAAM AIM-120 Downscale, Build, Part 9, Launch Lug & Conduit Gluing


It'll be hard to reach the root edges once the wide conduit/tunnel is glued on. There isn't much room for glue fillets.

I decided to lightly smooth the dried glue fillets with 400 grit wrapped around a Q-tip for cushioned sanding. Go easy, it is possible to sand a shallow groove in the balsa. You are just knocking down any roughness.


I applied two fine lines of wood glue so there wouldn't be much squeeze out when pressed in place.. 


The lugs were set down and positioned using long tweezers.


I won't be applying glue fillets to the launch lugs. Sometimes trying to fill the bubbles of dried glue isn't worth the time.

The narrow glue lines were positioned so there wouldn't be any visible glue when the lugs were pressed in place.

The conduit/tunnel was centered between two fins on the opposite side of the engine hook and launch lugs. The older Estes instructions showed the tunnel on the same side of the engine hook. I thought it would be more interesting in launch photos with the tunnel facing out.

Wednesday, June 18, 2025

Estes AMRAAM AIM-120 Downscale, Build, Part 8, Gluing On The Eight Fins


The lower fins are glued on with the trailing edges even with the end of the body tube.


Standard, 90 degree spacing with the engine hook centered between two fins. 

Sight across the bottom to be sure the opposing fins are in line.


The upper fins are 8.20" from the bottom of the model.


A wrap of masking tape was rolled around the tube to line up the trailing edge corners.

Be careful not to glue the masking tape to the fins or body tube.

Tuesday, June 17, 2025

Estes AMRAAM AIM-120 Downscale, Build, Part 7, Fin Grain Filling & Reuse Sandpaper TIP


STEP 1
On the left, a lower fin with a brushed on coat of thinned CWF.

On the right, another fin after sanding smooth with 400 grit. 90% of the grain is now filled.

STEP 2
Here's the front and rear fins after sanding down the Duplicolor  filler/primer that followed the CWF. The grain is 100% filled.

Balsa grain filling can be a simple two-step process. After spraying with color coats there shouldn't be any visible grain.


Saving Money!
TIPS: You don't have to throw away sandpaper when if gets loaded up with filler/primer.

Buy a soft brass brush, I got mine from Home Depot.
Brush off the gunk with the brush under running water. Use a circular brushing motion. 


Here's the same three pieces of 400 grit, 
ready to go again!

I wouldn't recommend wet sanding on balsa and Kraft body tubes. Both will absorb water and swell up.

Monday, June 16, 2025

Estes AMRAAM AIM-120 Downscale, Build, Part 6, Engine Mount Assembly & TIPS


Many kits have you glue 20/50 centering rings at 1/2" from each end of the engine mount tube. That doesn't really give enough flex for a spring steel engine hook.

The mount shown here is flipped over with the hook pointing up.

TIP: I've found the best position for the low, bottom ring to be 7/8" from the bottom of the engine tube. This allows enough flex to slide in a motor.


TIP: This is a brilliant way to lock in the Kevlar line comes from the older Semroc kits.

The Kevlar line gets a small overhand knot.
This is slipped under the upper bend of the engine hook.

In the picture, the upper centering ring has not been glued in place yet.


The upper centering ring is slid up and glued on slightly over the Kevlar loop.
The centering ring also locks the upper bend of the engine hook in place.

TIPIn all my new builds, I am incorporating heat shrink tubing over the Kevlar line for extra protection. The heat shrink tubing idea comes from Rick Randoll of New Way Rockets.

Sunday, June 15, 2025

Estes AMRAAM AIM-120 Downscale, Build, Part 5, Making The Conduit


Here's a blow-up of the front of the tunnel.

The tunnel shape is flatter than I thought, not just a half circle.


Here's what I came up with, as close to the front taper as I could make it.


This is the back end and will be even with the end of the tube.

The small inset picture shows the cross section shape.

Saturday, June 14, 2025

Estes AMRAAM AIM-120 Downscale, Build, Part 4, Making The Conduit

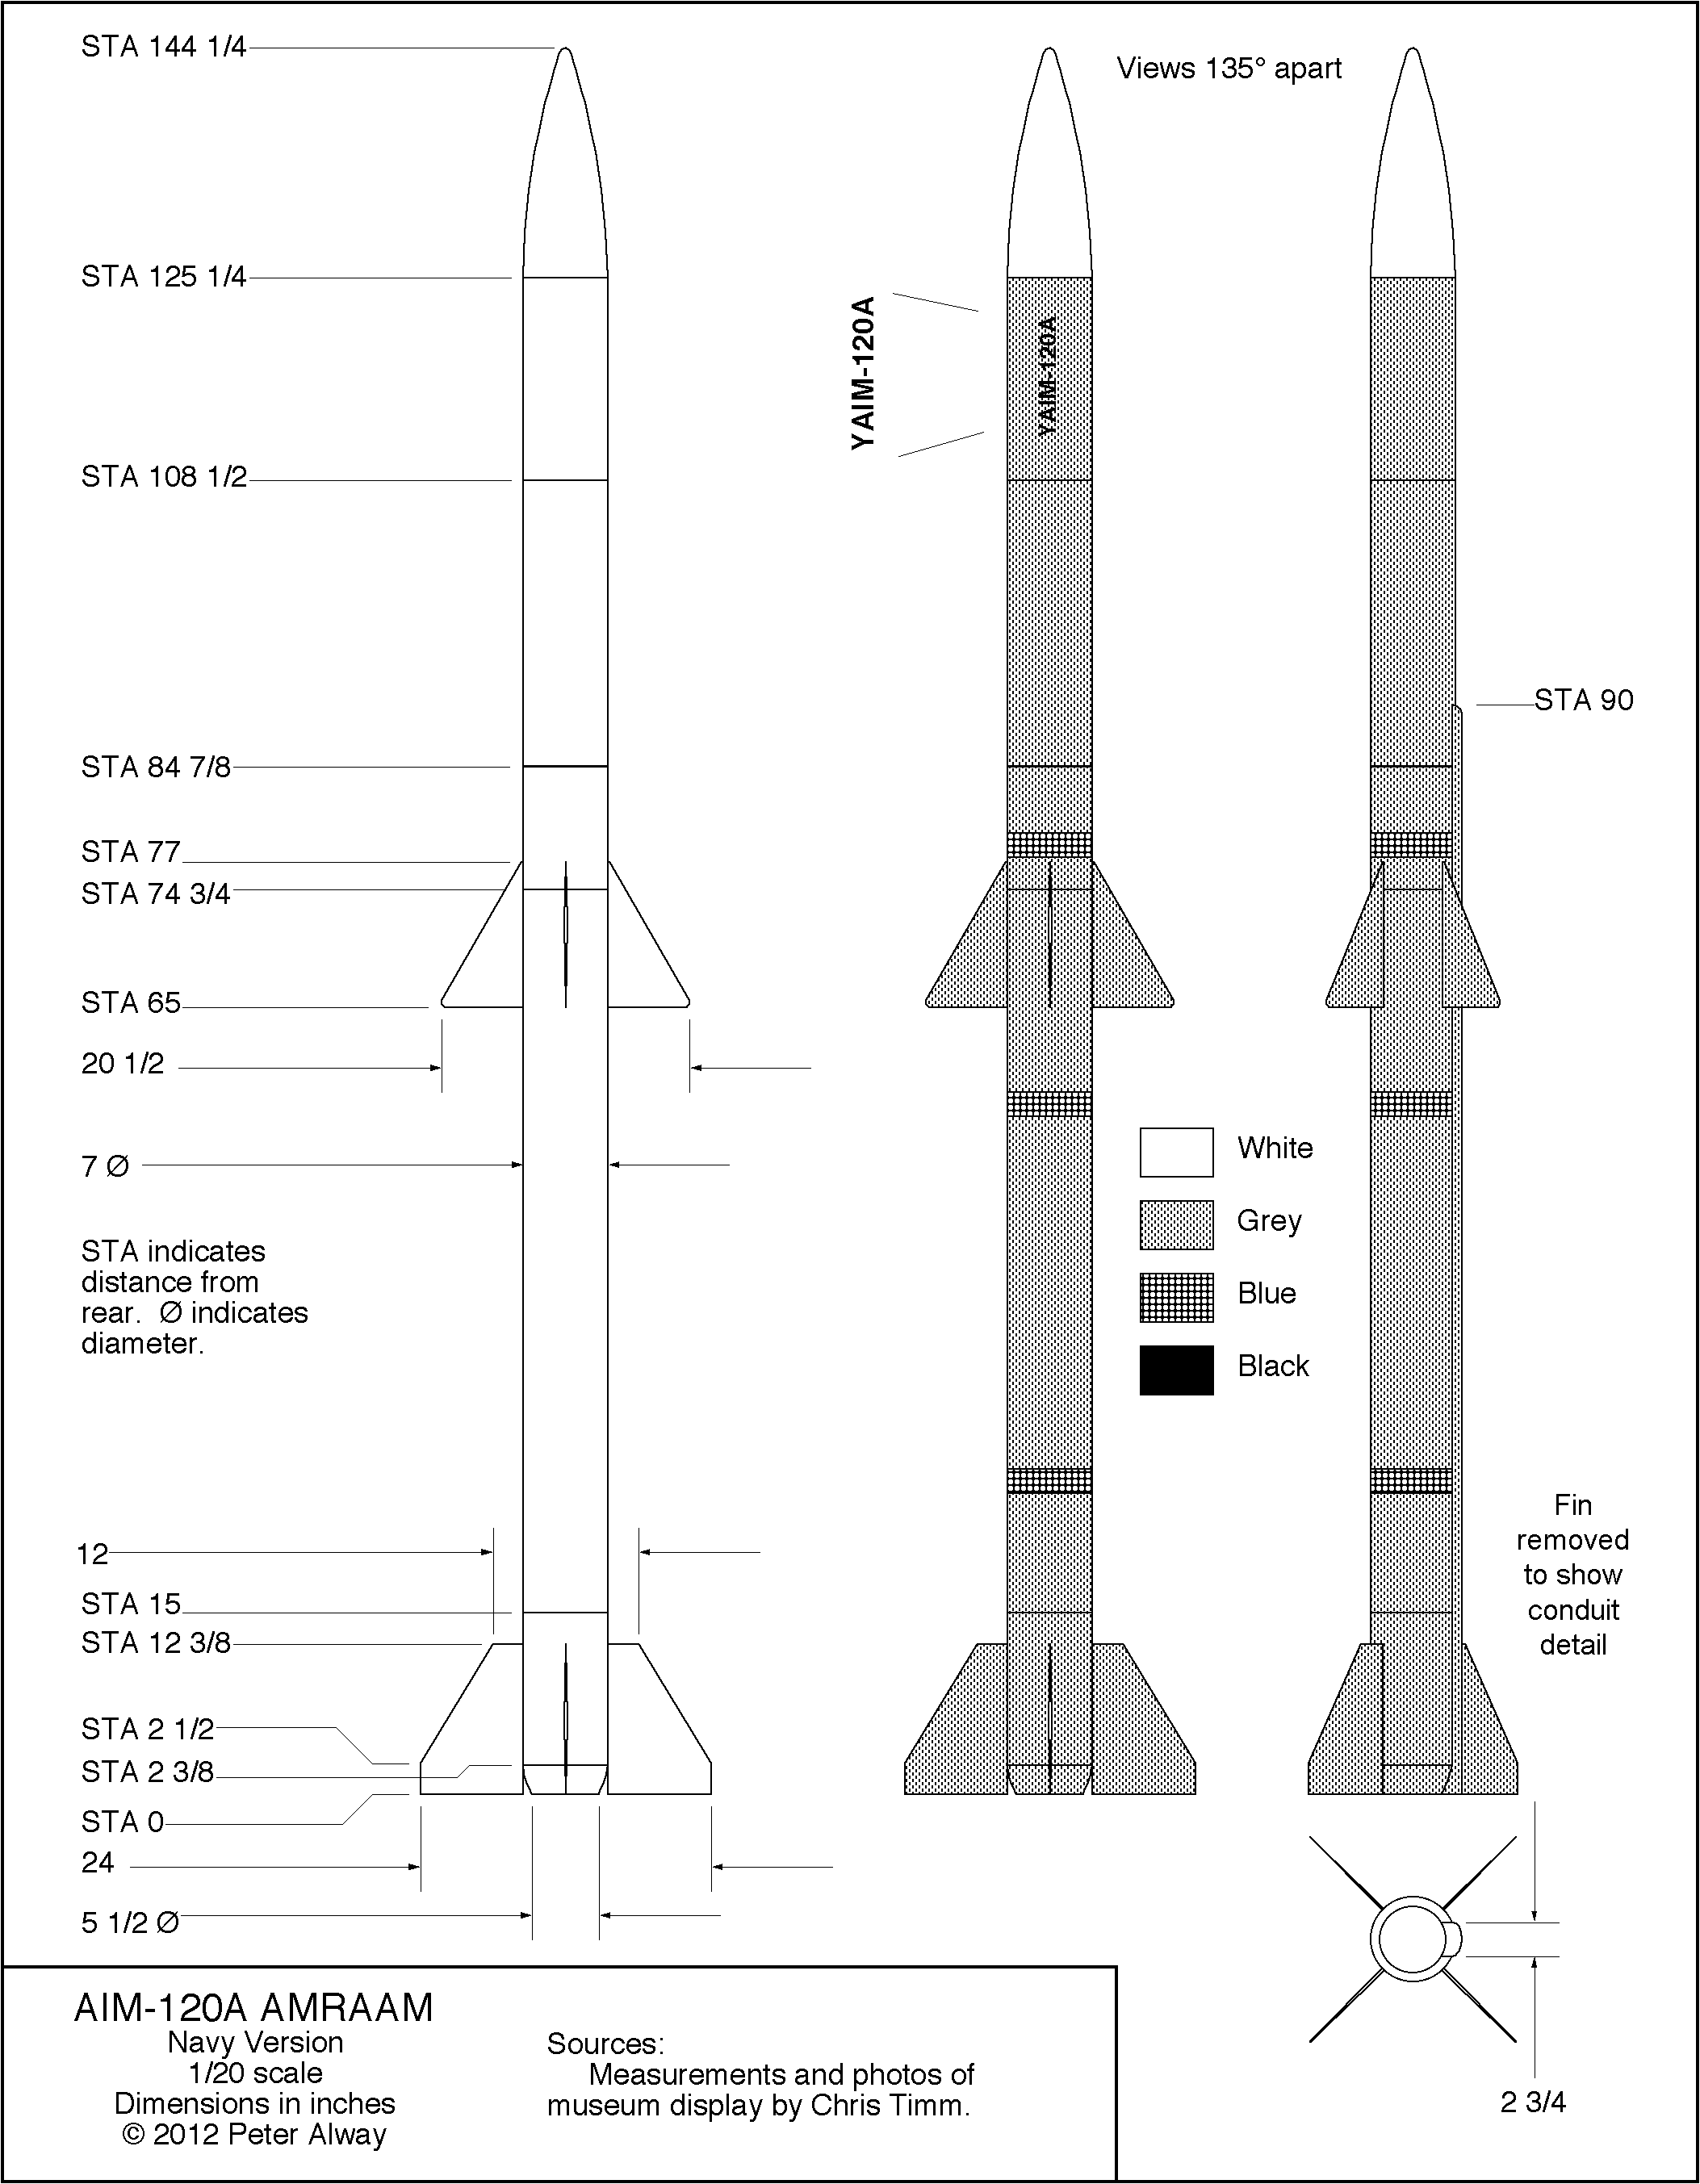
Blowing up the Alway drawing in Corel Draw - I came up with the dimensions for the long conduit tunnel.

Tunnel dimensions:
11.75" long
.130” high x x .40 wide

I used the online picture to get a better idea of the shape.


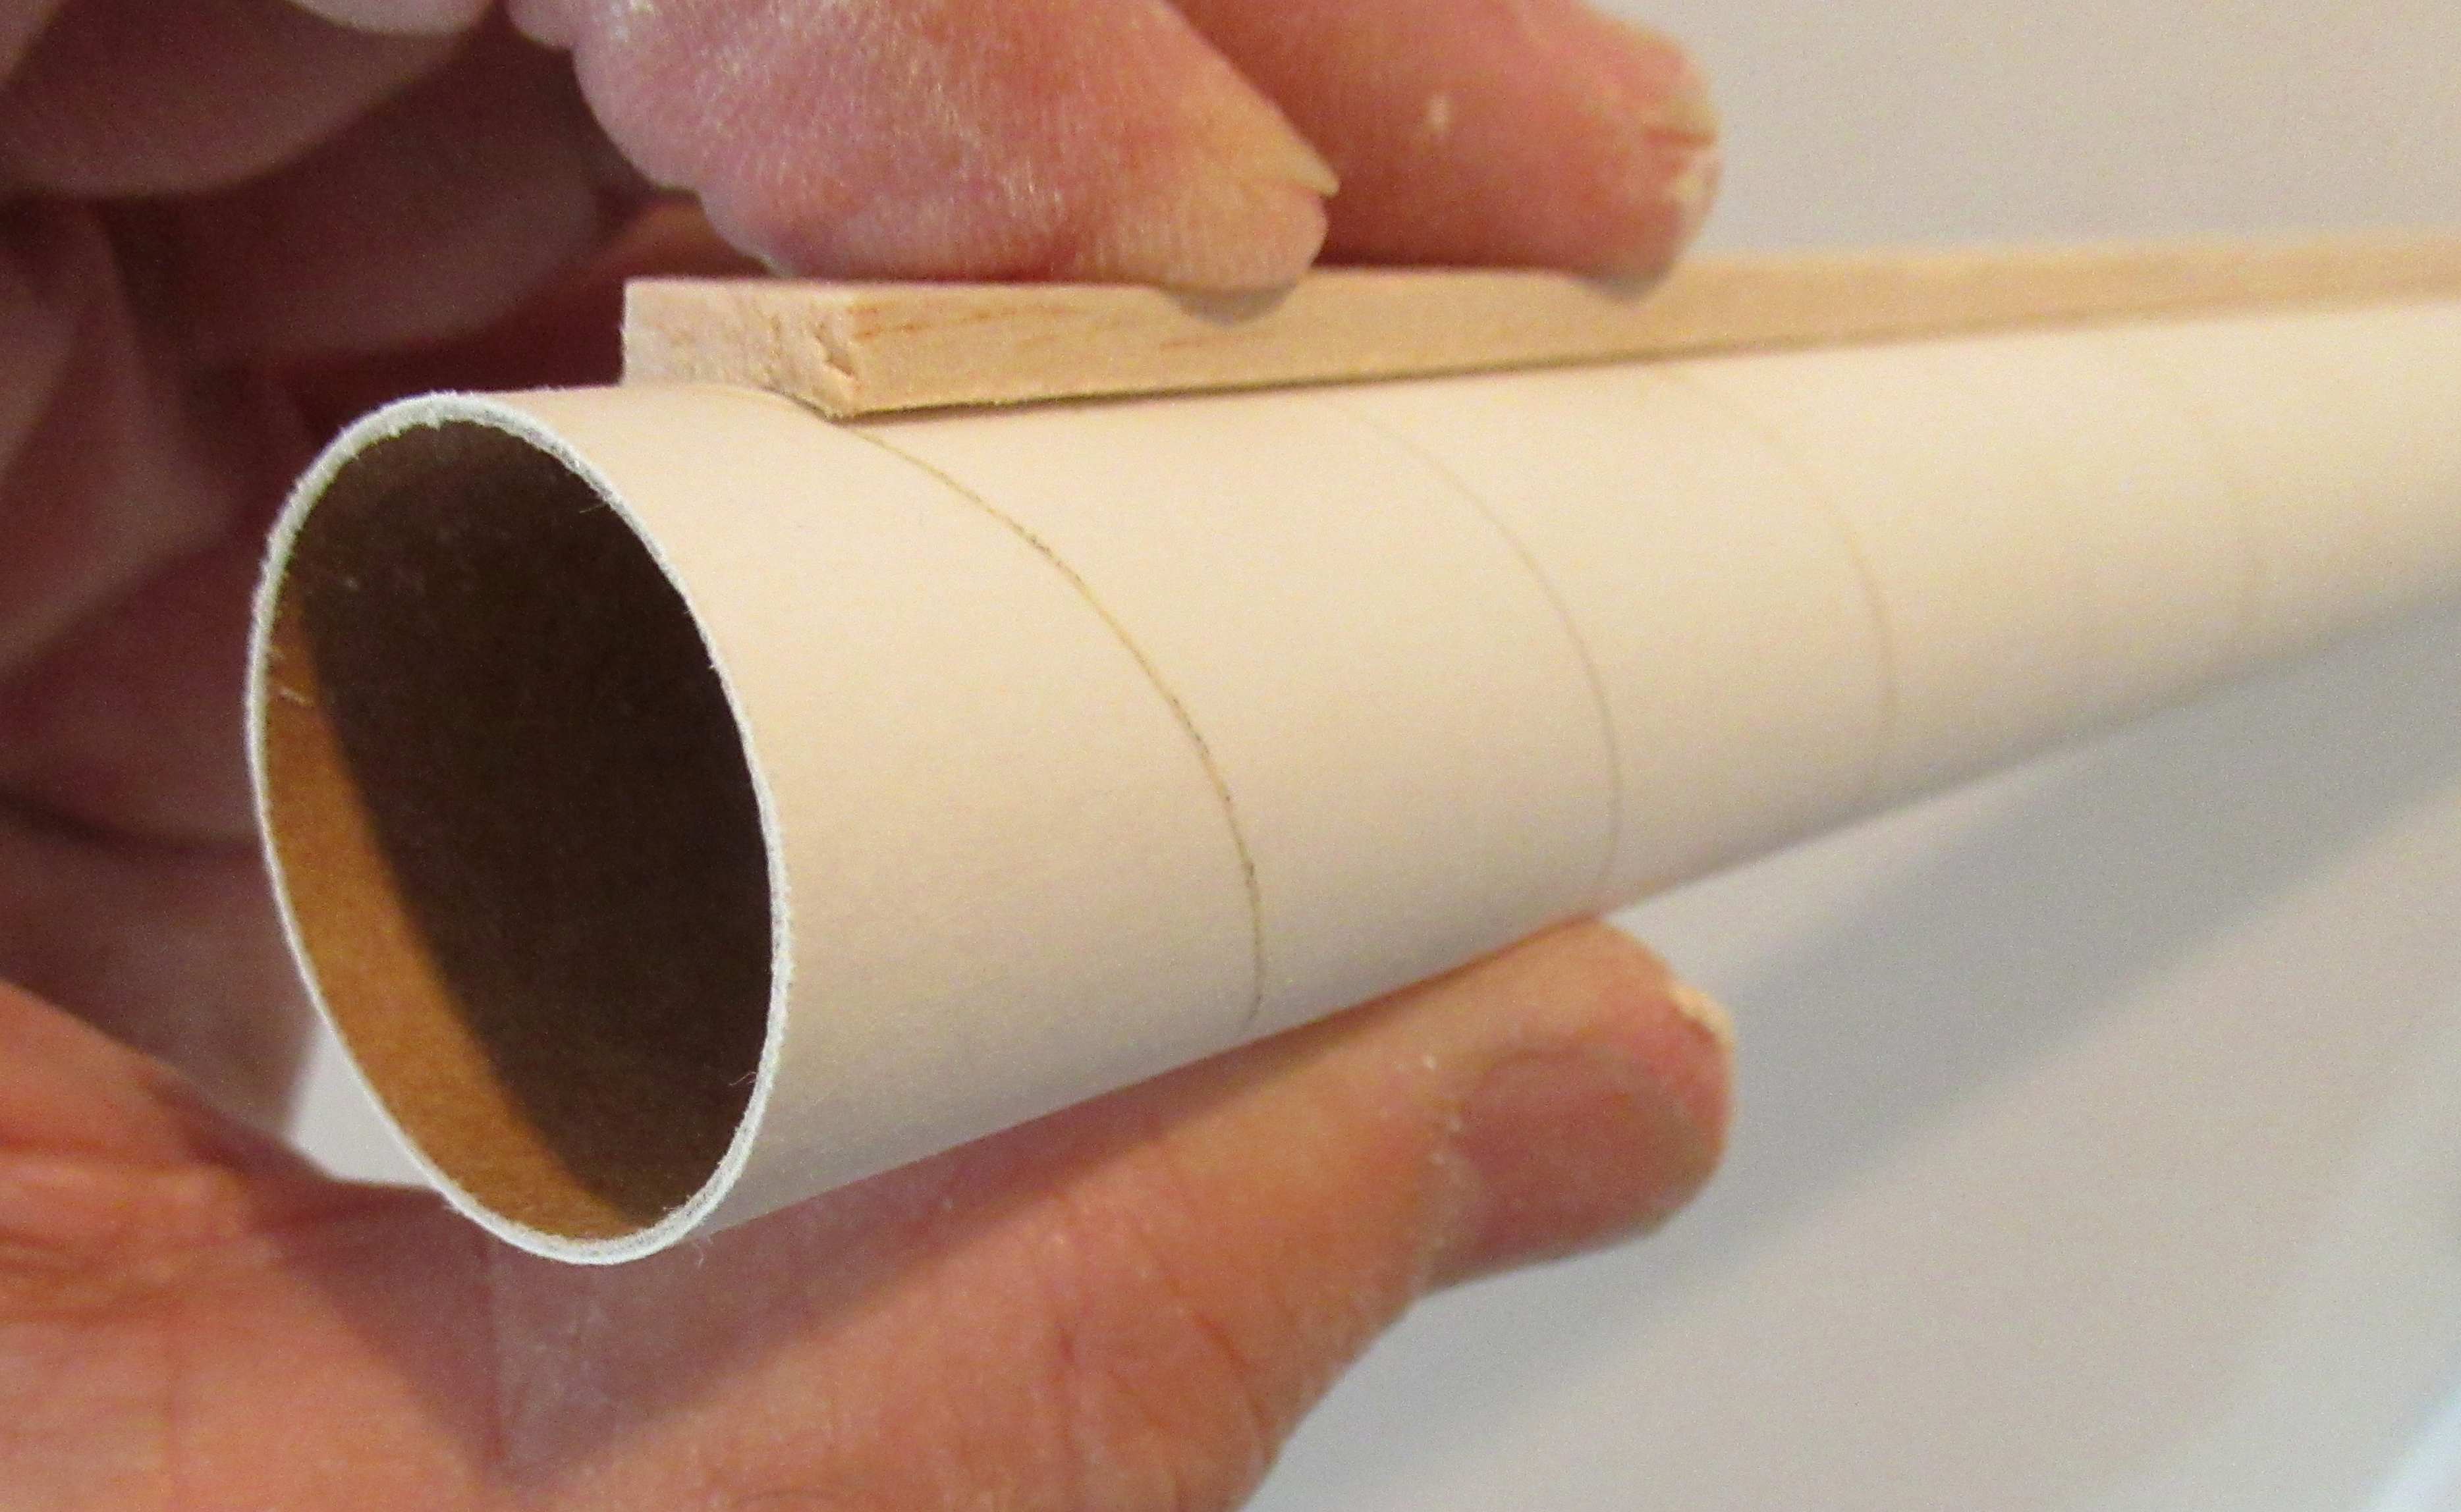
The tunnel is wide and won't have a good fit over the round tube.


I rolled some 320 grit sandpaper around the tube.
Using straight back and forth movements, a curvature was sanded into the bottom.


Here's a better fit.
Any gap will be filled with a glue fillet.

Friday, June 13, 2025

Estes AMRAAM AIM-120 Downscale, Build, Part 3, Cutting Out The Fins


This is a spare parts build.
The scrap 3/32" balsa sheet edge was a bit banged up.

Before cutting out the fins, 
The soon to be leading edges were sanded square using a sanding block.

Old school:
Tracing around a cardstock template using a pencil.

I don't like using a pen. Unless the ink is sanded off, it will bleed through the final paint.


On hand cut fins, gang sand them.
Stack and square them up using a sanding block with 220 grit.

On the left is the upper fins,
On the right are the lower fins.

Thursday, June 12, 2025

Estes AMRAAM AIM-120 Downscale, Build, Part 2, Semi-Scale "Cheat"


After a few searches, I found a clean copy of the Peter Alway drawing.

To view it: CLICK HERE
Note there is a boat tail on the real missile.


I did run the numbers to get the tube lengths. See the first "background" post. 

But, to get the fin patterns - 

I dropped the Alway drawings into Corel Draw and enlarged it until the body was 1" diameter. The BT-50H tubes I'll be using are .990" in diameter.
With the drawing enlarged I simply traced the fins.
Because the rocket body is tall, I had to draw the fins on two different pages.

Wednesday, June 11, 2025

Estes AMRAAM AIM-120 Downscale, Build, Part 1, Parts


I decided to go with one long tube, 16.40" long
Heat shrink tubing is now added to most all my new builds. Slide over the Kevlar line down to the engine mount and hit with a hear gun.
Odd'l Rockets 12" parachute
Forward fins can make a rocket unstable - .50 oz. of clay weight will be pressed into the nose cone.
The 1/8" diameter launch lug will be cut in half.
Apogee plastic nose cone is PNC-24D at 2.75" long. It's a close match to the AMRAAM scale length and shape.
3/32" thick balsa for the fins.
The water slide decals have been redrawn, the original kit had stickers.
I thought about a boat tail but decided against it. The boat tail wouldn't allow for an engine hook and would require friction fitting. The original Estes kit didn't have a boat tail.

Tuesday, June 10, 2025

Estes AMRAAM AIM-120 Downscale, Build Background


This is going to be a slight downscale based on the Estes AMRAAM kit.

Research is often part of a build - 
Here's some scattered specs I found online:

AMRAAM AIM-120 
Boxed kit, #2153. Part of the Estes BETA series 
Scale: 1:5
Produced 1996-2001
Original kit had stickers, not water slide decals.

Skill Level 1
Recommended Engines: B4-2, B6-2, C5-3, C6-3, C6-5
Maximum Estimated Altitude: 400 ft


My build will be a downscale from original kit BT-55 tubes to BT-50H (heavy wall tubing)

Downscale info:
Original kit tubes
#2153 AIM 120 AMRAAM   031191   BT-55   (2)   11.00" 030326   BT-20J   2.75"
Downscale tubes (2)
Two 8.20" long BT-50H tubes or single tube, 16.40" long

To downsize - 
BT-55 is 1.325" diam. / BT-50H (heavy wall) is .990" diam. = Scale Factor of 1.338 or 1.34
Divide the original (two) BT-55 11" length tubes by 1.34  =   (two) 8.20" long BT-50H tubes or one long  BT-50H tube at 16.40"

To see the original kit instructions, from the Rocketry Forum: CLICK HERE 
and scroll down to post #6.
If the PDF image comes up upside down, look for the "square/arrow icon at the top bar. Hovering over it brings up "Rotate counter clockwise" Click on it twice and the image will flip.