Showing posts with label Testing. Show all posts

Saturday, July 23, 2022

Mini Outdoor Hygrometer Thermometer

I do read the directions on spray paint cans.
My goal - To get better spray can glosses in the Summer heat.
Most spray cans say the recommended temperatures should be from 55 to 75 degrees Fahrenheit. Humidity should be at 60 or below.
Sure I could always check my outside wall Thermometer, but who had a Hygrometer to know the humidity level?

I have one now! (Actually, I have five!)
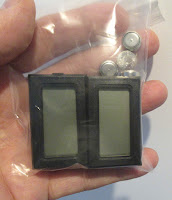
I found it on Ebay. To see it: CLICK HERE
What I didn't realize is I was sent FIVE units for $12.69! I thought I was buying only one.

It's small. Clips on the side imply it could have been snapped into a dashboard or control panel cutout.

I simply set it on my patio table and can easily read it through the window. The "35" is the Humidity, 107 is the "feels like" temperature on July 15 at 2:30 p.m.

I have mentioned in an earlier post, I didn't realize what time of day had the lowest humidity.
In central Florida, humidity is highest in the morning, lowest in the mid afternoon and highest in the early evening.

So it's a compromise - I could try spraying early in the day when the temps are lower, but the humidity is higher!


I took the batteries out of the extra Hygrometers and all went into small zipper baggies.

So I have four extras.
I also have solid wood guitars and ukuleles.
Those cases now have humidity monitoring.

Friday, July 22, 2022

Which Chrome Paint? None Of These! Part 2


A few of the YouTube test videos rated the Rustoleum Bright Coat Chrome the best of the available hardware store paints.


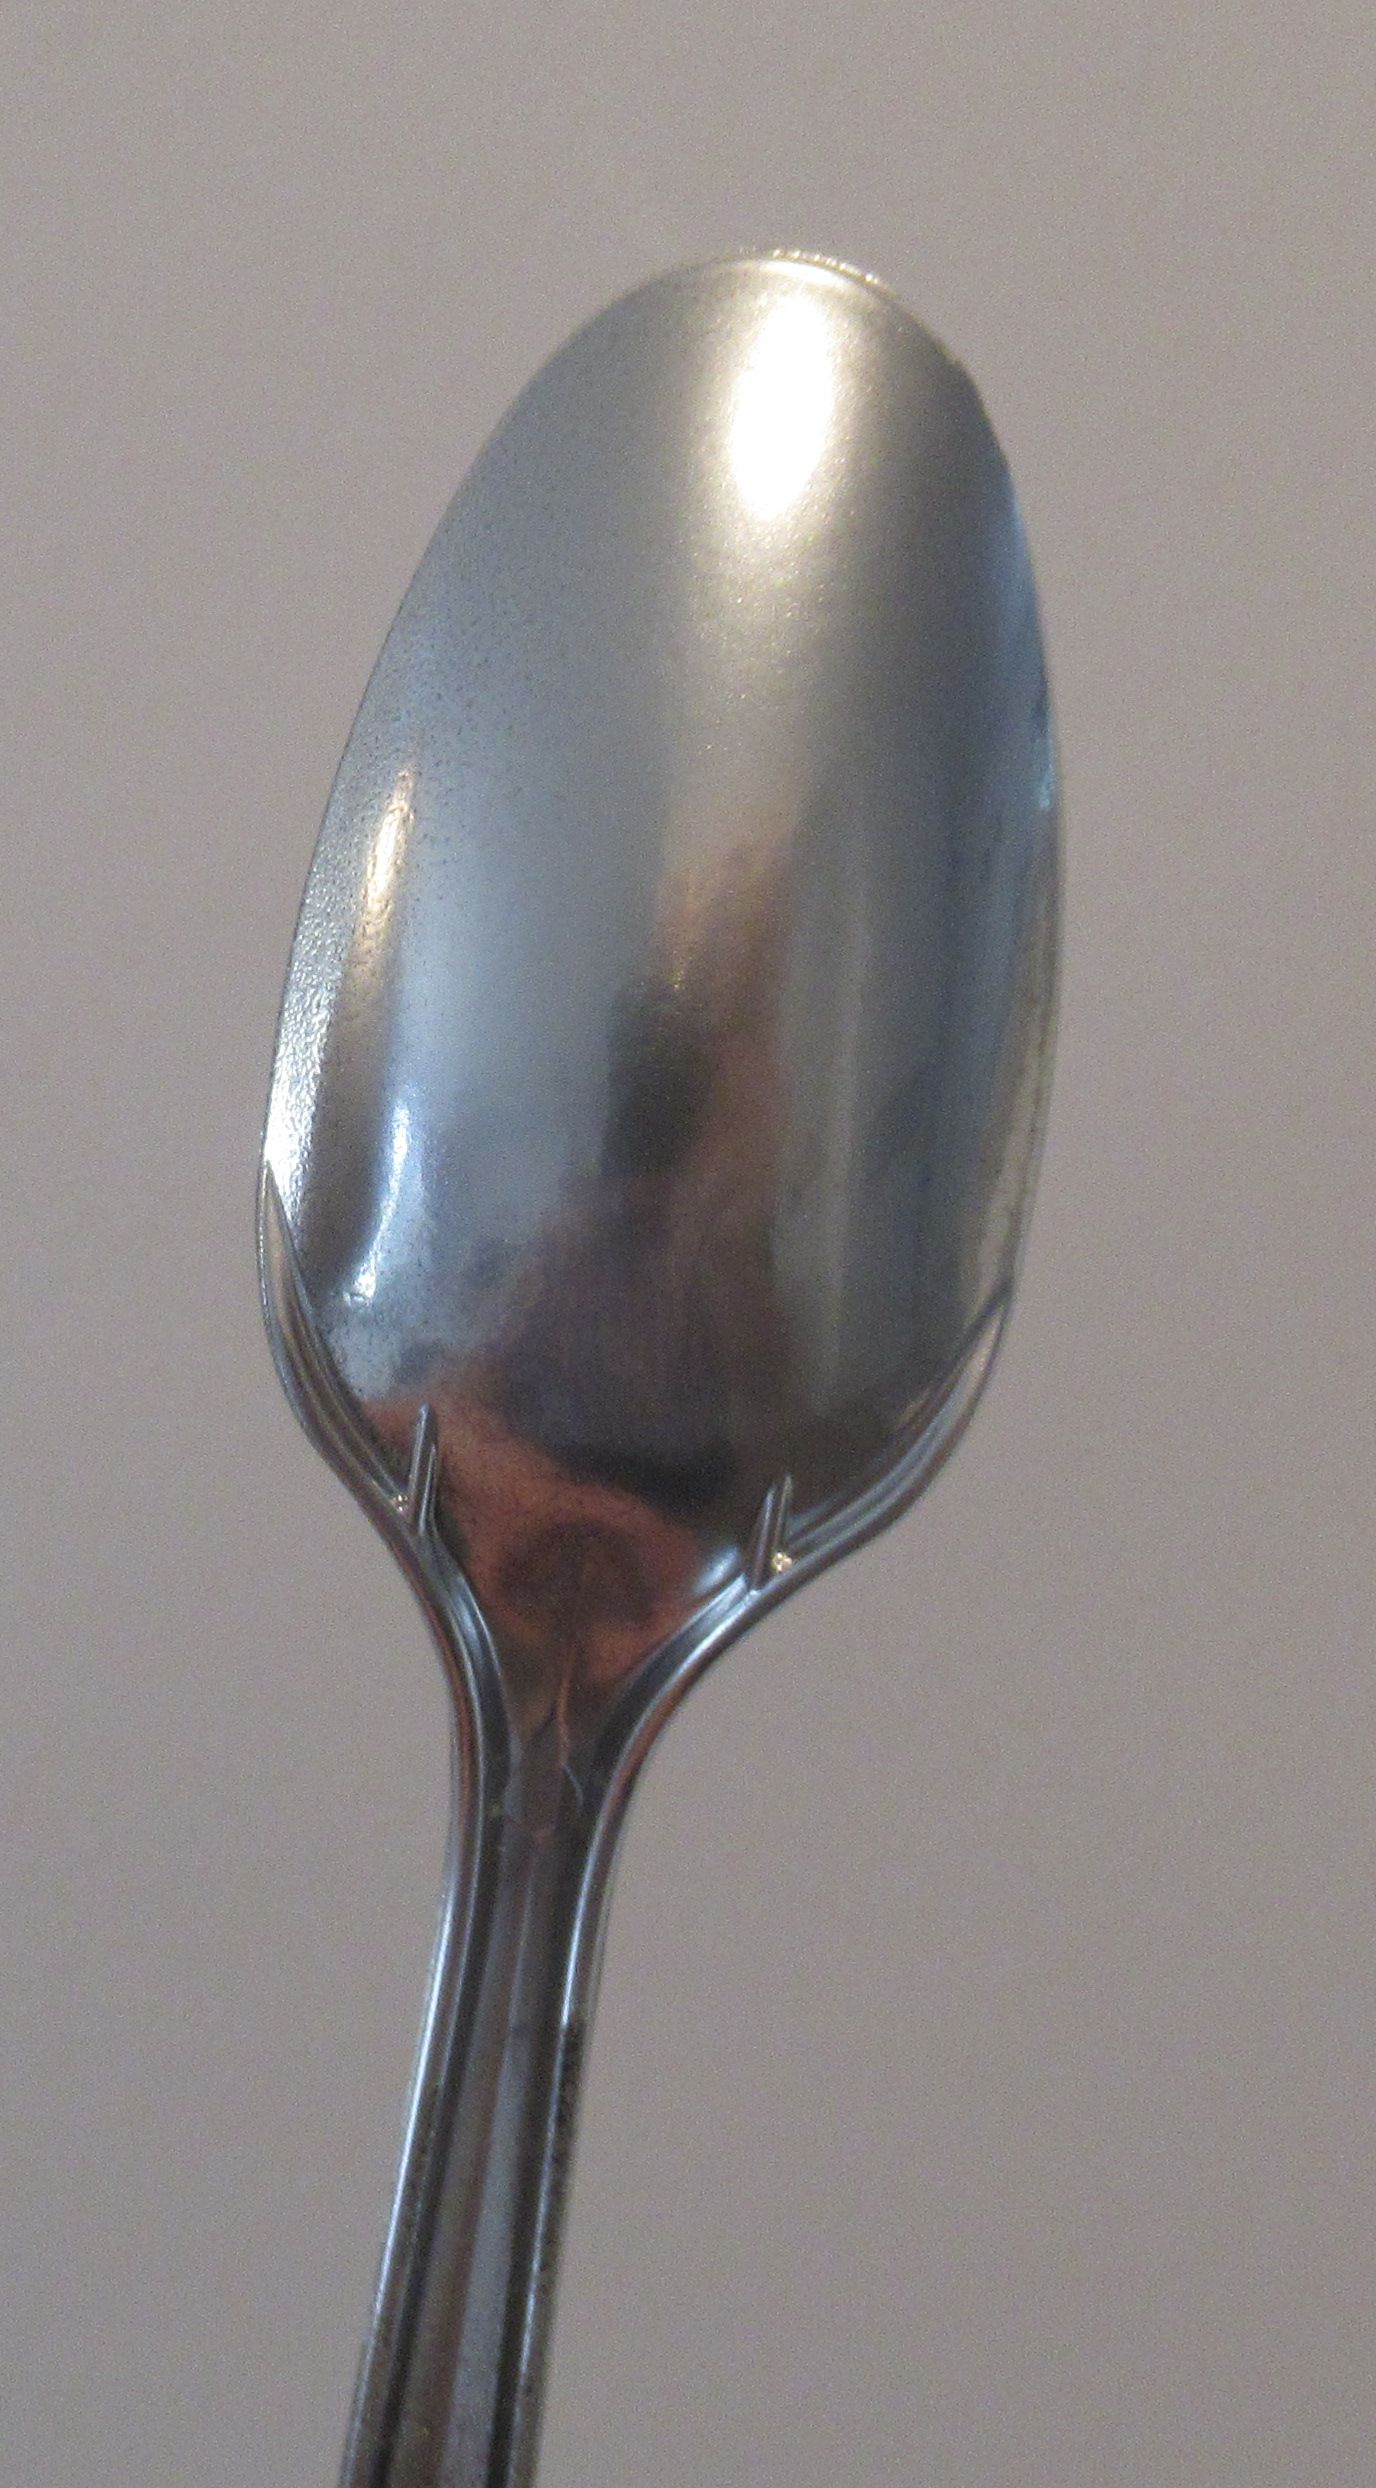
Here's a test spoon after two coats.
It is more reflective but still not a mirror finish.


The Duplicolor Chrome is on the left,
The Rustoleum Chrome is on the right.
The Rustoleum Chrome is more reflective. 


Still, I can't recommend any of them!

After three weeks of drying - one light rub of my thumb dulled the finish turning the sheen a dull gray!

Why bother doing a post if you can't report any decent results?
Maybe this information might save you money and frustration.
There are other chrome paint "systems" available but are much more expensive and outside the blog budget.

Thursday, July 21, 2022

Which Chrome Paint? None Of These! Part 1

Back story - 
I found an original Citation Quasar (in the box!) for a friend.
This was his favorite rocket - I thought it would make a good gift.

The kit arrived and was a great shape except for the "chrome" nose cone and fin unit. I thought at first these might be newer orange Alpha fins and nose cone that had been spray painted chrome by the seller.
Apparently over time, that chrome finish gets dull and mottled.
Why not find a good chrome paint and brighten the fins and nose cone. 

I've read on forums how some had problems with chrome paint when painting a model like the Mercury Atlas. It may look okay at first, but any handling dulls the finish.

I watched some YouTube videos where many different Chrome spray paints were tested side by side. I bought and tried the top three.
Some of the test sprays were done on plastic spoons. I had some black plastic spoons. Many say to use a black undercoat when spraying metallics.

First up was Krylon Premium Metallic, Original Chrome. The cap was painted chrome - I wish the test spoons turned out with that same reflective sheen! They didn't! 
Dull, no better than some Silver or Aluminum spray paints.


I've had some great results with Duplicolor paints. I always use their FP101 Filler/Primer.


Well - it was a better chrome than the Krylon,
Not a mirror finish by any stretch.

More tomorrow . . . 

Wednesday, December 2, 2020

New, Improved Estes Starters?

Estes sent me some of the new Uupcoming "more energetic" starter (igniters) to test.
I brought some of the new Starters to the L.A.S.E.R. group launch on October 18. One pair (two igniters joined by the paper tab) was handled out to club members.
The L.A.S.E.R. group doesn't have a large club launcher, but uses individual Estes Electron Beam 6 volt controllers. We didn't have much luck with the new starters. It could have been weak batteries. One of the controllers gave us problems throughout the day.

I decided to do a home test using my Electron Beam controller with new batteries and three different kinds of Estes igniters - the older black, the current clear tip and the upcoming dark gray tip.
Below are three of six tests. The first three were tried before these were recorded. I had similar results on the earlier tests. 


This is an animated GIF of the older black tip igniters.
The black tip on this igniter wasn't very large.


This is one of the currently available clear tip starters.
The clear tip took a little longer to glow. 
A small flame and not as large as the older black tip igniters.


The new dark gray tipped "G2" igniter.
While not as "sparky" as the original black tip igniter, the flame ball looks to be a little larger. 

Monday, July 1, 2019

Estes Saturn V #1969 Build, Part 51, Silver Trim and Dull Coat

Normally I'd paint and leave a Saturn V with gloss paint. Flat paint is a dirt and finger oil magnet! Flat finishes are also hard to clean. Estes requested these builds to have a dull, no gloss finish.

I hand painted these small motors on the 3rd Stage with bottled Silver paint.
The sheen was good - but look what happened after it was hit with a dull coat! It is now a dull gray and the brush strokes are very evident.


For a test, I sprayed some silver on card stock.

On the left is the sprayed silver.
On the right is the same silver after a shot of dull coat. I didn't want this gray look on the fins, and the silver on the fairings.


Oh boy - MORE MASKING!

I had to mask the silver on the fins and fairings to protect it from the dull coat.
A strip of tape was cut with a notch to fit around the low end of the fin.
A tracing was made of a fin and cut out. Notice the bent outside edge hinge. These mask covers are wide but still fit close over the root edge of the fin. Three more covers were traced and cut.

The cover is folded over the fin and taped closed.
Now the lower tube assembly can be sprayed with the Krylon Matte spray.

Krylon Matte Finish is considered flat - but does have a very slight sheen to it.

Assembly time so far:
38:45 minutes previous
    :45 this post
39:30 Total so far

Friday, December 7, 2018

The Elusive LPR Whistle Rocket, Part 2

My Odd'l Rocket Cyclone model does whistle on the way up. It's not loud, but can be heard during the coast phase of the engine burn.
The Cyclone has a hole punched in the side of the body tube to allow some of the ejection charge to vent like the old Estes Scout. That hole along with the the hollow area above the engine is the right area to make an audible whistle. The air flow is split at the low edge of the punched hole.
I tried to take this idea of a split air stream to make a louder whistle. The whistle has to be loud enough to be heard from the ground.

I thought maybe strategically placed hole might get a good whistle, but I didn't want to go through a dozen test flight variations.
Then it hit me, I could get a whistle while dong a swing test.


Here's my test model, a simple 3FNC rocket. My plan was to have three of these around a central core. The central core would have the engine and parachute. Each of the three "strap-on" whistlers could be tuned to a different note possibly making up a major chord triad of Do-Mi-So.

A Kevlar swing string was tied an taped on at the C/G point.


In the back is a capped engine block. The block could be slid up and down for "tuning". The capped block wasn't glued in. Using a dowel I could change the interior cavity size by sliding it up and down inside the tube. The right position might find a whistle "sweet spot".
Here's some of the tests - 

Test 1: A small hole was drilled near the top of the nose cone. The base of the nose cone was cut off to allow the air to past through to the body tube. The model was swing tested at a fast enough speed where a whistle should happen. Very little wind noise was heard.

Test 2: This upper nose cone hole was taped over and a hole was punched in the body tube. Swing testing again led to wind noise and deflection but no real whistle.

Test 3: The top of the nose cone was cut off at an angle. More swing tests got a whistle, but not loud enough.


Test 4: This cut make the most noise but still not loud enough to be heard over the engine.
The problem is the speed of the rocket has to be consistent to activate the perfect whistle design. Who knows what speed and whistle shape could work together to produce a audible result?

I had hope for some better results this time. I'm only out an hour of time and three nose cones.

Thursday, December 6, 2018

The Elusive LPR Whistle Rocket, Part 1

At club launches you occasionally hear a Mid Power Rocket whistle during ascent, and sometimes during a fast descent when the parachute ejection fails.

From a blog post in October 2010:
"Rockets with split fins like the BSD THOR do whistle. I've heard the THOR whistle at N.E.F.A.R. launches. Bullpups have also been known to whistle.


Estes had their SCREAMIN' MIMI design.
It didn't whistle loud enough to be heard over the engine. There wasn't enough directed air stream to activate the whistle. The Screamin' Mimi rocket had tubular plastic "Whoopee" whistles attached to the outside edges of small fins.

In 2010 I experimented with split fins trying to get a good whistle. The WHISTLER fins had opposite and angled trailing and leading edges. My hope was to direct and split the air stream over the angled leading edge of the lower fins.
Look closely at the leading edge of the lower yellow fin. You can see the angle cut.

On the BSD THOR, the parallel upper trailing edge and lower leading fin edges are square.

The Whistler was launched twice with a B6-4 and C6-5. 

No whistle was heard." More in next post - 

Thursday, October 11, 2018

Q-Jet Cutaway


I launched my first Q-Jet this last weekend, an A3-4.

Here's the engine after firing. This was from a bulk pack, there is no label on the bulk pack engines.
The scratches are from the engine hook, the tape was set down the casing lengthwise as a guide for cutting it in two.


Never, no NEVER cut apart a new, unfired, live engine. This is a used engine.

This was a tough casing to cut through, that plastic is pretty dense.
At the nozzle side there is a cardboard "spacer", the composite propellant was ahead of that. I would assume the entire lower cavity is filled on  the D engines.
Before I added the wording, you could tell visually where where the propellant and delay element were positioned.

The ejection charge is are to the right side in the small diameter area. If you look close (towards the outside wall) you can make out the threads where the ejection canister is screwed into the top of the casing.

Friday, March 3, 2017

Estes Skydart II #3229 Build, Part 10, Filler Weight

We all know that filler and paint can shorten a gliders air time.
That's where I have a problem, this isn't a competitive glider. I like my models to be smooth and shiny, like in the catalog pictures. How can you expect the supplied decals to stick on a rough surface?
I was curious to see how much weight the CWF balsa filler would add.


After smooth sanding, here's the main pieces to be filled.
The scale shows .93 ounces.

Here's the same three pieces with CWF brushed on. The CWF has dried and is not sanded to surface yet.
The weight is now 1.35 ounces, an increase of .42 ounces.
And finally after sanding to surface the weight is 1.06 ounces.
The CWF added a little over 1/10 ounce or .13 ounces.
The added filler weight was much less than I thought it would be. I can live with that.
This small increase in weight might amount to a half turn of the elevator adjustment screw.
Paint will also add weight . . .

Saturday, November 12, 2016

Estes Wadding Test

In a recent comment, Daniel (the Rocket Noob) wrote:

"Well, I can't attest to White Cloud's usefulness as wadding, but Estes wadding will also burn really well if you touch a match or lighter to it - as I learned when I did a demonstration at Rocket Camp.

"See? Wadding won't burn if you... Oh! Oh, gosh!" I said, stifling my desire to swear as I threw it on the floor and stomped it out.

That was last year. One of my returning kids kept bringing it up this year."

I also did a burn test recently of several different Kevlar sources. The Apogee shock chord burned a lot more easily - and more vigorously - than the Kevlar kite string I got from emmakites.com.

So, the match test may not be a good indicator. You might need to do a static test in a tube. I tried soaking cotton balls in water with baking soda, as I'd heard baking soda would make paper towels into wadding. The cotton balls turned out stiff and didn't stay fluffy like I'd hoped, so they weren't superior wadding, but they definitely did the job with no flames or even scorch marks like you sometimes get on the Estes wadding."


____________________________________________________________


I touched a lit match on some Estes wadding this morning. I tried to light two different pieces from two different packages.
The first piece lit on fire, it was a slow burn and was put out in water.
The second piece from another package was blackened but didn't catch fire.
There might be some inconsistencies between wadding packages. Estes made their wadding in the US for many years. I believe production went to Mexico for a while and is now made in China.

Saturday, June 4, 2016

Centuri X-24 Build, Part 13, Glide Tests

The instructions say to start with half the clay provided in the kit.
Who knows how much clay was included in the kit?

I started out with 1/8 oz. and added clay until I got a "glide" of about 10 to 15 feet.
In the end there was .25 oz. of clay weight in the back.
This is a tough one to test glide, it's hard to know what a good glide should be.


The old Quest HL-20 lifting body model had a small tube, string, card stock and two pennies for weight.
The total for all those parts came to .22 oz, pretty close to the weight I ended up with on my Bug.

Before sticking down the clay, coat the lower back of the inside of the shroud with glue and let dry. This prevents the clay color from "bleeding" into and discoloring the card stock.

After the clay is pressed in place, the clay got an outside coating of white glue.

Friday, September 26, 2014

Weight Of Filled Fins?

Here we go with another highly scientific test.
I read a comment about how much weight CWF filler adds to fins. I was curious.

The first picture shows a Estes Patriot fin. The leading edge is rounded and the sides sanded smooth with 400 grit.
The single fin weight is 0.05 oz.


After a brushed coat of (now dried) Carpenter's Wood Filler.
The same fin weighs 0.07 oz.
After sanding to surface (I do try to leave a very thin skin of CWF on the surface) that same fin weighs 0.06 oz.

The filler left in the grain pores adds a whopping 0.01 oz. of weight! One one-hundredth of an ounce.
I'm not a competition flyer. This little bit of weight won't make that much of a difference.

Sorry, I won't be doing the same test with sanding sealer. Sanding sealer stinks and is too expensive.

Monday, September 1, 2014

More Glue Tests

I did another "board test" using some new glues I picked up.

The old formula Elmer's White and the Aleene's Tacky both dried with high raised sides while the centers sank in. The old formula Elmer's dried very hard, the Aleene's tacky glue is soft. You can easily press it in with a fingernail. While the Aleene's is fully dry, it is flexible like the glue from a glue gun.
The other three - Elmer's School, Elmer's School Gel and a generic Hobby Lobby white all dried very flat, spread out and close to the surface.
All dried clear except for the Elmer's School Gel which ended up a green color. I was hoping the gel glue would allow for an easier slide in for engine mounts and couplers.
All the glues adhered well. The dried drops were hard to lift up of the cardboard with the tip of a knife.

On some of the Estes red couplers and (vendors) brown couplers you still have to sand to fit in the body tubes.
Enough testing, I'll use Epoxy on engine mounts and couplers.

Sunday, August 31, 2014

Battery Life? TIP


I'm changing out a 9V battery in my guitar preamp.
While the owners manual says you can get 100 hours of performance, it never seems to last that long.
To keep track of the new battery life, I marked the install date: 6/11/2014 with a Sharpie


This might be an interesting test for launch controller batteries, especially the Quest controller that also uses a 9V battery. The single 9V battery seems to lose its ignition strength faster than the Estes 6V controller.
You could also mark one of the four AA batteries in an Estes style controller.
If you keep a flight log (recommended, go to www.rocketreviews.com, register and start a flight log) you could keep track of how many launches and in turn, how many batteries you use.

Wednesday, August 27, 2014

Wadding Test - DONE!

I started the wadding test on April 24, 2014 to see if different types were biodegradable.
Estes TP, Quest Parade Pomp and Dollar Store crepe paper wadding pieces were taped to the arm rests of my patio chairs.
On the right how the Quest wadding looked on the first day.
The three styles of wadding were exposed to the elements - sun, heat, humidity, wind and plenty of rain.

The Estes wadding was the first to go. In a few days it had broken up and blown away. The crepe paper lasted a few days longer, but still broke down and was gone.

In the above picture, the Quest piece on the left blew off and couldn't be found. The piece on the right held strong.

Here's that same piece from the right side on August 24, four months later.
It's faded, feels thinner and is starting to tear but still retains it's square shape. It feels almost like a very thin sheet of plastic.
The Quest Wadding is degradable, but it takes a long time to break down.

Monday, July 21, 2014

Elmer's Glue - Uh-Oh!


This was talked about on the forums two years ago.
Elmer's had thinned out their glue and is now calling it a "NEW STRONGER FORMULA".

Many builders had problems using it, especially on couplers and engine mounts. The thinner glue quickly saturates the Kraft tubes and couplers. Engine mounts and couplers were freezing up and locking before they could be slid into the desired position.


Two years ago I bought six bottles of the old formula Elmer's Glue All.
My old bottle of the original "Bonds Strong" formula on the left.
On the right is one of the six bottles I bought two years ago.

The glue in the bottle on the right is thinner.
I had suspected it then, it seems Elmer's filled the old bottle with the new thinner formula!

I didn't use the new bottle until this morning on an engine mount/centering ring fillet.
The new formula is VERY thin and easily runs.
The thinner glue could shrink up body tubes at internal glue fillets - the "Coke Bottle effect".


I read somewhere the G. Harry Stine preferred Aleene's original Tacky Glue.
It's thicker than the older Elmer's glue. It does dry clear.
We'll see if it allows couplers and engine mounts to slide without locking up.

Last November I did a test of all threes glues: CLICK HERE
It was a little more interesting than watching paint dry.
The final results are worth the test.


I took the nozzle off the thin bottle of Elmer's and put it on the Aleene's.
Most all the nozzles are interchangeable.
I like the smaller hole on the Elmer's nozzle tip.

Before I put it on the Aleene's bottle I ran it under some water to clear out the new formula Elmer's glue. The thinner Elmer's easily washed out of the nozzle.
I mean - easily washed out. No picking or scrubbing.
The running water was all it took to clear the glue.

Wednesday, July 16, 2014

Wadding Test Part 4

I arrived back home from Mexico on July 1.
Here's how the Quest Pomp Wadding looks after being exposed to the outside elements in my open patio since April 24, 2014 - CLICK HERE
One piece of the Quest wadding had torn off the arm of the chair right where it was taped on. The second piece is still intact.
The blue color has faded over the past two months but is not breaking down.
The square shape is still pretty sharp!

UPDATE: Today is July 16 and the Quest wadding is still taped my my patio chair.
This morning we had heavy rain. The wadding is almost like a thin plastic sheet. The edges are folded under and the tear in the lower left is longer.

Biodegradable? Eventually. This piece of wadding has been outside exposed to the elements for almost three months.

On May 30 schoolyard launch, I left some Quest wadding tucked into the corner of a brick wall. It was pretty well hidden.
I went to check on it a few days back and it was gone.
I'm sure the maintenance guys picked it up and threw it away.

Monday, July 14, 2014

White Squadron Putty Test

I was curious how the white Squadron Putty could stick so well in the intake tab recesses on the Estes QCC Explorer intakes.
After sanding the QCC intakes, my water based CWF filler wouldn't stick in the super glued recesses.
But, the white Squadron Putty stayed in the tab areas. In the picture, a pencil line is drawn around the sanded white putty areas.


I got my white Squadron Putty from jonrocket.com.
For a test, I set a large drop of medium CA glue on my work area cardboard. As the glue drop dried, it spread out a bit at the top.
After it fully dried (a thick drop takes a while to dry) some Squadron Putty was pressed into the CA.


After the putty dried it was sanded down with 400 grit on a sanding block.
You can see the white putty left in the recesses.
It has to be the Toluene solvent in the putty.
It got into and held in the hard, dried CA glue!

Wednesday, June 4, 2014

Ongoing Wadding Test

Here's the Quest parade pomp wadding still taped to my patio chair.
The test was started on April 24 HERE with two pieces of wadding taped to my outdoor patio chair. This picture was taken on May 30, 2014.

The two pieces of light blue wadding continue to get lighter, bleached by the direct sunlight exposure.
The square on the left show two very small tears, one below the clear tape holding it on the arm of the chair.

After the May 30 morning launch I picked up all the wadding at the soccer field site.
Four out of the five models launched used purple Quest wadding. Each model only needed three squares each.
Only the lowest piece of wadding (closest to the engine) was charred.
The other pieces looked like new and could be used again.

I opened up the un-burnt crumpled pieces.
I found a place to leave them where they shouldn't be found or disturbed. Four squares were loosely set in the bushes against a brick wall.

The wadding will be exposed to rain, heat, humidity and sunlight.
I'll check these when I return around the first of August to see if they have broken down.
They'll probably be picked up by birds and end up in a nest.

Tuesday, May 20, 2014

Unscientific Wadding Degrade Test, Part 2

The wadding degrade test was started on April 24, HERE
On the right is the blue Quest wadding on the first day of the test.
The Estes toilet paper wadding squares had broken down in a week.
I left the yellow crepe wadding and Quest parade pomp wadding outdoors, taped to my patio chair armrest when I was away on the cruise.
I returned yesterday on May 16, 22 days after starting the test.

The yellow crepe paper wadding was gone, but the Quest wadding was still here.
It has faded in the sunlight but doesn't show any real signs of breaking down.
It's been just over three weeks, I'll leave it out a while longer.