Tuesday, June 17, 2025

Estes AMRAAM AIM-120 Downscale, Build, Part 7, Fin Grain Filling & Reuse Sandpaper TIP


STEP 1
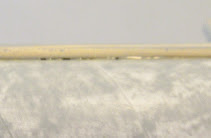
On the left, a lower fin with a brushed on coat of thinned CWF.

On the right, another fin after sanding smooth with 400 grit. 90% of the grain is now filled.

STEP 2
Here's the front and rear fins after sanding down the Duplicolor  filler/primer that followed the CWF. The grain is 100% filled.

Balsa grain filling can be a simple two-step process. After spraying with color coats there shouldn't be any visible grain.


Saving Money!
TIPS: You don't have to throw away sandpaper when if gets loaded up with filler/primer.

Buy a soft brass brush, I got mine from Home Depot.
Brush off the gunk with the brush under running water. Use a circular brushing motion. 


Here's the same three pieces of 400 grit, 
ready to go again!

I wouldn't recommend wet sanding on balsa and Kraft body tubes. Both will absorb water and swell up.

Monday, June 16, 2025

Estes AMRAAM AIM-120 Downscale, Build, Part 6, Engine Mount Assembly & TIPS


Many kits have you glue 20/50 centering rings at 1/2" from each end of the engine mount tube. That doesn't really give enough flex for a spring steel engine hook.

The mount shown here is flipped over with the hook pointing up.

TIP: I've found the best position for the low, bottom ring to be 7/8" from the bottom of the engine tube. This allows enough flex to slide in a motor.


TIP: This is a brilliant way to lock in the Kevlar line comes from the older Semroc kits.

The Kevlar line gets a small overhand knot.
This is slipped under the upper bend of the engine hook.

In the picture, the upper centering ring has not been glued in place yet.


The upper centering ring is slid up and glued on slightly over the Kevlar loop.
The centering ring also locks the upper bend of the engine hook in place.

TIPIn all my new builds, I am incorporating heat shrink tubing over the Kevlar line for extra protection. The heat shrink tubing idea comes from Rick Randoll of New Way Rockets.

Sunday, June 15, 2025

Estes AMRAAM AIM-120 Downscale, Build, Part 5, Making The Conduit


Here's a blow-up of the front of the tunnel.

The tunnel shape is flatter than I thought, not just a half circle.


Here's what I came up with, as close to the front taper as I could make it.


This is the back end and will be even with the end of the tube.

The small inset picture shows the cross section shape.

Saturday, June 14, 2025

Estes AMRAAM AIM-120 Downscale, Build, Part 4, Making The Conduit

Blowing up the Alway drawing in Corel Draw - I came up with the dimensions for the long conduit tunnel.

Tunnel dimensions:
11.75" long
.130” high x x .40 wide

I used the online picture to get a better idea of the shape.


The tunnel is wide and won't have a good fit over the round tube.


I rolled some 320 grit sandpaper around the tube.
Using straight back and forth movements, a curvature was sanded into the bottom.


Here's a better fit.
Any gap will be filled with a glue fillet.

Friday, June 13, 2025

Estes AMRAAM AIM-120 Downscale, Build, Part 3, Cutting Out The Fins


This is a spare parts build.
The scrap 3/32" balsa sheet edge was a bit banged up.

Before cutting out the fins, 
The soon to be leading edges were sanded square using a sanding block.

Old school:
Tracing around a cardstock template using a pencil.

I don't like using a pen. Unless the ink is sanded off, it will bleed through the final paint.


On hand cut fins, gang sand them.
Stack and square them up using a sanding block with 220 grit.

On the left is the upper fins,
On the right are the lower fins.

Thursday, June 12, 2025

Estes AMRAAM AIM-120 Downscale, Build, Part 2, Semi-Scale "Cheat"


After a few searches, I found a clean copy of the Peter Alway drawing.

To view it: CLICK HERE
Note there is a boat tail on the real missile.


I did run the numbers to get the tube lengths. See the first "background" post. 

But, to get the fin patterns - 

I dropped the Alway drawings into Corel Draw and enlarged it until the body was 1" diameter. The BT-50H tubes I'll be using are .990" in diameter.
With the drawing enlarged I simply traced the fins.
Because the rocket body is tall, I had to draw the fins on two different pages.

Wednesday, June 11, 2025

Estes AMRAAM AIM-120 Downscale, Build, Part 1, Parts


I decided to go with one long tube, 16.40" long
Heat shrink tubing is now added to most all my new builds. Slide over the Kevlar line down to the engine mount and hit with a hear gun.
Odd'l Rockets 12" parachute
Forward fins can make a rocket unstable - .50 oz. of clay weight will be pressed into the nose cone.
The 1/8" diameter launch lug will be cut in half.
Apogee plastic nose cone is PNC-24D at 2.75" long. It's a close match to the AMRAAM scale length and shape.
3/32" thick balsa for the fins.
The water slide decals have been redrawn, the original kit had stickers.
I thought about a boat tail but decided against it. The boat tail wouldn't allow for an engine hook and would require friction fitting. The original Estes kit didn't have a boat tail.

Tuesday, June 10, 2025

Estes AMRAAM AIM-120 Downscale, Build Background


This is going to be a slight downscale based on the Estes AMRAAM kit.

Research is often part of a build - 
Here's some scattered specs I found online:

AMRAAM AIM-120 
Boxed kit, #2153. Part of the Estes BETA series 
Scale: 1:5
Produced 1996-2001
Original kit had stickers, not water slide decals.

Skill Level 1
Recommended Engines: B4-2, B6-2, C5-3, C6-3, C6-5
Maximum Estimated Altitude: 400 ft


My build will be a downscale from original kit BT-55 tubes to BT-50H (heavy wall tubing)

Downscale info:
Original kit tubes
#2153 AIM 120 AMRAAM   031191   BT-55   (2)   11.00" 030326   BT-20J   2.75"
Downscale tubes (2)
Two 8.20" long BT-50H tubes or single tube, 16.40" long

To downsize - 
BT-55 is 1.325" diam. / BT-50H (heavy wall) is .990" diam. = Scale Factor of 1.338 or 1.34
Divide the original (two) BT-55 11" length tubes by 1.34  =   (two) 8.20" long BT-50H tubes or one long  BT-50H tube at 16.40"

To see the original kit instructions, from the Rocketry Forum: CLICK HERE
If the PDF image comes up upside down, look for the "square/arrow icon at the top bar. Hovering over it brings up "Rotate counter clockwise" Click on it twice and the image will flip. 

Monday, June 9, 2025

BMS School Rocket, Build, Finished


A sharp, well designed rocket for school programs looking for something other than a snap together build. Thru-the-wall fins, Kevlar shock cord and a Mylar streamer.

The instructions only suggest an A8-3 motor, but it would certainly be stable with a B6 or C6 engine. 


You might not get it back with the C6-5 motor.

Taller than an Estes Alpha, with the extra length it should be easier to pack the wadding and streamer.

Saturday, June 7, 2025

R.O..C.K. Monthly Launch, June 7, 2025


I had hoped to get in two more test flights of the Odd'l Rockets ROBOT today.
Boost was stable with a B6-4 motor, but at ejection the head popped off! The rear ejection worked fine, and the main body found.
But, the head was lost. No C6-5 second launch today.


Second up was the downscaled Centuri UFO INVADER
It performed as advertised, turning over at apogee and landing on the spring wire legs. 
Space X has nothing on this 1976s kit!

Boost was labored but straight up with a C6-3 in the tail.


The New Way LETTER GO yielded the best launch picture of the day.

An older Chinese Quest B6-4 had a noisy boost with an altitude guess at 325 feet.
The 12" parachute was large enough for recovery on the newly mowed field.

You can see how small the ASP Micro HAWK next to the BT-55 diameter model.

I like to add a Micro-Maxx launch for some variety. Boost is always fast. Altitude was an estimated 75 feet.
I asked for extra eyes to follow the descent but with the shiny streamer it was easy to track.

Only launched four rockets today. It was very hot and might be my last launch until Florida cools off next October.

BMS School Rocket, Build, Part 9, Tying It All Together

The nose cone shoulder was masked using a rolled sheet of copy paper and masking tape. 
Normally I don't tie on the shock cord until after it is painted. 


The kit is supplied with a Kevlar shock cord. I added a length of elastic.

The elastic and Kevlar was tied together using interlocking loops.
The elastic was tied to the screw eye using a Duncan Uni-Knot. 


From the instructions - 
Tape, fold and staple the streamer to the shock cord.


The shock cord is chrome Mylar. 
It is thick Mylar, 2" wide x 24" long.

Friday, June 6, 2025

Super Mars Snooper on Display at Estes


On Facebook, Braden Carlson posted some pictures from a tour he got at Estes.
(This was a private tour, Estes no longer offers public tours.)

That's my Super Mars Snooper build on display in the glass case at the front doors.
Maybe it shouldn't be in the 1960's case, it's the upscale version from 2021!
To see the Estes tour video: CLICK HERE
To see the Super Mars Snooper build: CLICK HERE

Check out the "War Room" segment for some upcoming new products - 
At 6:16 the Jayhawk
At 6:18 a re-release of the D-Region Tomahawk

Thursday, June 5, 2025

BMS School Rocket, Build, Part 8, Paint & Mask

After a few white undercoats - The body was painted and overall gloss yellow.

A paper towel was rolled and slid into the front of the body tube to keep the paint out.

The four fins will be painted black.

I used my standard Scotch tape masks, the edges marked with an off brand permanent marker. I'd recommend using an actual wide point Sharpie to mark the tape, some of the off brand marker ink rubbed off on the fins and body.


Here's the rounded leading edge mask made up of a few small pieces of Scotch tape mask.


After the tape was pulled,

There was traces of black marker ink on the yellow body paint. This was cleaned off using a Magic Sponge. 
The Magic Sponge can dull the gloss, some polishing compound brought back the shine.

Wednesday, June 4, 2025

BMS School Rocket, Build, Part 7, Filling The Fin Grain


Here's one side of one fin with the filler brushed on.

Notice I didn't brush filler onto the TTW fin tab.


Many builders comment on forums about how CWF filler warps their  fins.
With the filler on just one side of the fin, the fin will warp as it dries.

Don't worry, the fin will flatten out when CWF is brushed on the other side and allowed to dry.

Tuesday, June 3, 2025

BMS School Rocket, Build, Part 6, Gluing In The Engine Mount & Filling The Nose Cone

I use a dowel set a ring of wood glue inside the main airframe tube.
A dowel is set next to the mount with the end just below the upper centering ring. The bottom of the mount tube will extend 1/4"  below the end of the main airframe tube. The dowel is marked at the 1/4" extension.
A ring of glue is placed around the top of the dowel. Using the pencil mark as a depth gauge, roll a ring of glue inside the tube. 
Slide the mount into place, up to the 1/4" mark.

I like to center the engine hook between two fins.

Right now there is only glue at the upper centering ring.

There isn't much room to apply and smooth a glue fillet around the rear ring. Apply some glue and smooth the fillet with a Q-tip formed into a "tip" by rolling it between your fingers. 


The shoulder lip on the nose cone wasn't as square as I would like.

Notice the CWF filler is painted just over the edge of the shoulder.

Push the nose one all the way into the BT-50 tube and turn.
Turn and remove the nose cone.


What you are left with is a raised filler bead right above the balsa shoulder.
Let dry and sand with 400 grit on a block.

The shoulder lip will end up sharper and a better fit against the end of the body tube.

Monday, June 2, 2025

BMS School Rocket, Build, Part 5, Fin Prepping


The pre-cut fins are 3/32" thick.
Laser cutting cuts the sides in a slight wedge, widening out on the backside.

On the left, some of the laser ash has been sanded, squaring up the cut angle. This makes it easier to glue the fin on straight.


With the fin tabs in the slots, 
The trailing edge is even with the end of the body tube.


Just the leading edge is rounded.

I knock off the sides with my sanding block with 220 grit sandpaper.


Smooth off the leading edge with 400 grit.

Sunday, June 1, 2025

BMS School Rocket, Build, Part 4, A New Kevlar Cord Protection?

I can't take credit for this idea - 
Props go to Rick Randall at New Way Model Rockets. He has incorporated this Kevlar protection cover in many of his LPR kits.

Kevlar lines start to break down and can fail at 10 to 15 launches.
Near the low end of the Kevlar, near the engine mount - Rick adds some heat shrink tubing over the Kevlar line. When you consider how hot a heat gun gets (to shrink the tube around a wire) it makes sense!
An black powder ejection charge is momentary, the heat gun take a few seconds to shrink around the Kevlar line.
Heat shrink tubing is not included in the School Rocket Kit. I found some on Ebay and am starting to use it in my builds.

For reference, here's a 1/16" diameter heat shrink tube slid over a 135 lb. LPR Kevlar line.

To fit it over the Kevlar knot under the engine hook,
I flared the open end a bit using a sharpened dowel. The flared end makes it easy to slide over the knot.


On the left,
The heat shrink is slipped down and over the knotted Kevlar line.

On the right,
A heat gun was used to shrink the cover tight over the Kevlar and knot. The hear gun was used on the LOW setting.


There is that square hole left on the other side. Some ejection gasses could escape out of the hole.

A small piece of scrap BT-20 was cut and glued over the hole.