Wednesday, August 31, 2022

My Der Red Max Family - Model Profile


Here's my current Der Red Max family.
1. On the left is the "normal" BT-60 based Red Max. This one goes back to when I reentered the hobby in 2006. Originally I had a wrong nose cone and it was painted orange and black. Orange was the suggested color in the old Citation kit instructions.
2. In the middle is the tiny BT-5 tube carded version. 
If you are a current Patreon subscriber, the PDF is available! 
Email me at: oddlrockets@bellsouth.net and ask for the "Downscale Red Max". 
This is a carded, home print model. The red color prints up a little lighter than a spray painted model.
3. On the right is the newest member - The NewWay Der Squared Max.


There was a few others - 
This Pink Max - Hello Kitty version was built using an Estes Mini Max kit with some custom decals from Excelsior.
A standard, full size Pink Max was also built. 
Both were sold on Ebay to a collector.

I haven't built the 3" or the 4" Estes BIG Red Max kits. 
I really don't care to - I don't have the room to store,
or the field to launch larger Mid and High Power rockets!

Balsa Grain Direction?

Eugenio Cebollero posted this on the Scratch Built Rocketry and Rocket Repairs Facebook page: 


"When scratch building and making ones own fins from balsa stock one must always remember to pay close attention to wood grain direction. I stole this from a woodworking group and this illustration perfectly explains the importance of grain direction as it correlates to strength."


My response: "That grain is gonna be hard to fill." 

Eugenio responded: "Nah, that's what the dip is for!"

Tuesday, August 30, 2022

Inspiration - Don Thomas' Inter-X-ceptor ... E Power Intergalactic Rocket.

From the Estes Model Rocket Facebook page:


Here's Don Thomas' take on the Estes Interceptor - 
Inter-X-ceptor . . .  Power Intergalactic Rocket.

Sometimes throwing out the face card paint suggestions are a good thing!

New Way, Der Squared Max Build, Finished


This was a good build - a change from the recent more complex models.
The white ink in the decals are very good, but not quite as opaque as old school silk-screened decals.

The Model is about 2.37" taller than the Estes Mini Max. The square tube is almost a BT-55 width.
It should be a great small field flyer with an A8-3.

Monday, August 29, 2022

New Way, Der Squared Max Build, Part 11, More Decals


Save the Skull and Bones wrap around decal for last after you've had some practice with the smaller decals.

The instructions suggest setting the decal around 1/8" below the top lip of the body tube. It's good advice - If the decal is even with the tube end, it can lift and peel back.

The Skull and Cross Bone are on opposite sides of the four sided tube,

You are given three "Mitt Grabben" and three "Nicht Stompen" decals.
I use two of each and mixed the black and white decals.

I don't like to overdo decals. I've seen Goblin builds covered with too many bat decals. It's up to you - just because they are on the sheet doesn't mean you have to use them all.


The "Motorverkens" decal is wide. I only used one of the two supplied decals on the widest flat side of the body tube.
I had forgotten to slide and heat the shrink wrap tube before the motor mount was glued in.
I slid it on before the Kevlar was tied to the elastic shock cord. With the tube slid all the way down onto the centering ring, I added a small drop of white glue to keep it down in position. Maybe the ejection charge with shrink the tube down to the Kevlar diameter!

The elastic was tied onto the Kevlar and tied to the screw eye. Note there is a washer weight under the screw eye.
I prefer to tie the parachute snap swivel a few inches down from the base of the nose cone. This prevents the nose cone from swinging in and out of the shroud lines causing too many tangles.

Sunday, August 28, 2022

New Way, Der Squared Max Build, Part 10, Fin Decals

You aren't locked in to this placement of the decals. It's just how I did it.
Each side of "Fin #1" got a Der Squared Max name and small skull decal.
Each side of "Fin #2" got the Cross decal
Fins #3 gets the large Skull on one side and the "Kills" decal on the other.
This way, any two facing fins will have different decals.
   
To be sure of a straight baseline,
I find something with a 90 degree corner. This is set into the root edge. The top edge of the name decal is lined up using the top of the cardboard for reference. 

Overall, the decal is set visually centered on the fin.

These last three pics photographed a bit pink. The model is very Red. 
One third turn rotation to the left - 
The backside of this fin get the second Der Red Max decal.

The facing right side fin gets a Cross decal.


Another third turn to the left - 
The second Cross is applied.

The facing fin gets a Skull and Crossbones decal.

 A final turn to the left - 

I like to use the "kills" decal here. The instructions always say this one is optional, but I always use it.

On the right, we're back to the first set decal.

Saturday, August 27, 2022

New Way, Der Squared Max Build, Part 9, Decals


I used the NewWay logo decal for a test. 
I can get a soak time and see how easily the decals slide off the backing.

The instructions say the soak time is 15 to 20 seconds.
I found these needed 30 seconds of a water soak, then 30 seconds out of the water sitting on a paper towel before it slid easily off the backing.

Here it is on the model . . . temporarily.


Here's a Red Max I found after a quick search.
Note the angle of cross decal on the fin. Many builder's apply this decal parallel with the leading edge of the fin.

I prefer the original decal position - parallel with the leading edge. 
See the picture below.
Here's the original Citation kit showing the decal positions: CLICK HERE 


How I set the cross decal - The vertical bar is in line with the root edge of the fin.

Many builders also set the Goblin decals at an angle - It's up to you.

Friday, August 26, 2022

New Way, Der Squared Max Build, Part 8, White Undercoats

White undercoats are important to bring out the brightness of the color coats to follow. Lighter final colors are a bit transparent - the white underneath makes the colors pop.
The only time you don't need a white undercoat is if the final color is black. The Red Max nosecone is black. I shot it anyway while it was slid in the forward end of the body tube.

I usually do two white undercoats - there is final smooth sanding between and after these two coats of white.
 
Look close at the picture above to see some gray primer showing after light sanding of some rough areas and glue blobs.

The first picture shows the model after the first white undercoat and light sanding with 800 grit.

This lower picture is after the second white undercoat. More light sanding with 800 grit followed.

With a good, even white undercoat, color coats can be applied.


No tricky mask on this one. 
The body and fins are red, the nose cone is sprayed black separately off the body.

Thursday, August 25, 2022

New Way, Der Squared Max Build, Part 7, Fins Gluing & Fillets


Here's the square tube in the fin alignment jig.
The third fin slot is facing down, the side with no slot is facing up.
You glue the angled "side" fins using the jig.

The inset picture shows the glue application.

When the fins are slid into the slots, you'll have some glue squeeze out along the joint. I removed the assembly from the jig to pick up the excess glue with a Q-tip. Best to remove the excess now than try to smooth out dried glue later.

Set the fin/body tube assembly back in the jig to allow the glue to dry.


I applied glue fillets (on one side of the fin joint) while the assembly was still in the jig. After that dried, the body with two fins was removed and a glue fillet was applied to the other sides.

Many builders don't continue the glue fillet/fill under the ends of the fins at the trailing edge joint.

Left - Glue applied,
Right - Excess glue removed.


The same end fill can be done at the front and back edge joint of launch lugs.

Wednesday, August 24, 2022

New Way, Der Squared Max Build, Part 6, Seam Fill & Root Edge Bevels


The body tube seam was filled with thin CWF.

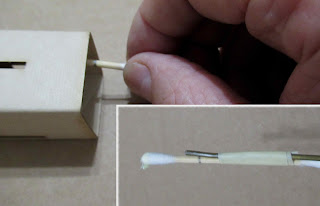
Even the launch lug got brushed with filler. It was stuck on a Q-tip for a painting holder.


The fin alignment fixture is set on the body tube and a fin slipped in for fitting.

Above the engine hook you can see the open root edge joint.
An emery board is supplied with the kit to cut an angle into the root edge. I used my sanding block with 220 grit sandpaper.


The picture on the left shows the new root edge angle.

On the right, the same fin with a much better root edge fit.


Be sure to sand the root edges in a mirror image on two fins.

The root edge on the third fin stays square.

Tuesday, August 23, 2022

New Way, Der Squared Max Build, Part 5, Fin Rounding & Parachute


The instructions don't mention rounding the outside edges of the fins. I guess square edge fins carry through the square rocket theme.
I rounded just the leading edges.
The parachute is square, four sides, not the regular six or eight sides.
The shroud line reinforcements are very smart, Nomex jewelry tags.
"Nomex® is a tear-resistant, high-temperature resistant fiber. It is offered in paper, felt, fabric, and fiber forms."

Under normal tag use, they are looped around the back of jewelry rings, the price written on the round ends. The facing round ends are sticky. The folded loop has no adhesion on the back.
The shroud line is tied through the loop. 


I store the parachute in a zip style jewelry bag with the snap swivel out the top. This prevents tangles in the shroud lines.

Monday, August 22, 2022

New Way, Der Squared Max Build, Part 4, Nose Cone Forming

The nose cone shoulder and exposed sides will require some forming to fit the tube.
The shoulder starts square but needs rounding to fit inside the slightly rounded tube corners.

Round a bit, and check the fit. In the right side picture the edge of the tube is still depressing the corners of the balsa shoulder. More rounding is needed.


After the shoulder is fitted,
The sides of the nose cone will probably still overhand the tube.

Round the sides and block sand the flat side surfaces until the balsa is even with the sides of the tube. 
To somewhat match the Red Max nose cone,
The top and sides of the nose cone are rounded.

On the left, I've just started to round over one side of the nose cone tip.
On the right is the finished shaping. Just a bit of the sides have been knocked off with 220, followed by 400 grit.

Sunday, August 21, 2022

New Way, Der Squared Max Build, Part 3, Engine Mount Gluing & Jigs

The engine mount was glued in.
Glue for the forward ring was applied using a coat hanger wire with a taped Q-tip on the end.

Glue was applied to the Q-tip and transferred inside the body tube. The motor mount is slid in place and a fillet applied to the back centering ring.

Mentioned earlier - I forgot to add the shrink wrap tubing over the Kevlar. 


These are some well fitting Fin Jigs.

The smaller, forward jig was pressed together against my block.

Press the larger rear jig together and slide apart. The laser cut leaves an ash mark that shows where the glue line should go.


Another template is for the launch lug placement.

Fold and press over the corner of the tube. The alignment lines should be drawn next to the single centered fin slot.

Saturday, August 20, 2022

New Way, Der Squared Max Build, Part 2, Engine Mount


The fit of the two square centering rings was a little tight on the BT-20 sized motor mount tube.

No big deal, I wrapped some old 400 grit around a finger and slightly enlarged the inside circle. 

There are two engine hook retaining rings. These are glued together to hold down and allow the engine hook flex.

I glued them together while they were on the engine tube and over the the hook to insure good alignment.
The smooth jawed tweezers were used to pinch the two rings tight, back to back.
The low ring is glued on.

The Kevlar is tied on above the retainer ring.
I did use a small drop of wood glue to set the first half of the square knot. The glue keeps the first overhand knot tight around the tube.
TIP: Never use Super Glue (CA) on Kevlar or shroud line knots. The CA dries hard and can make any string brittle.

After the upper ring is glued on, a second line of glue is placed underneath.
Slide the Kevlar loop into the glue and press up against the ring. The loose tail can go under and between the ring and Kevlar to hold it down.
The finished mount.

The kit includes a thin heat shrink tube to slide over and to the bottom of the Kevlar line. Heat is applied, the tube shrinks around the Kevlar.
I forgot about the heat shrink tube and glued in the mount without adding it! Silly me -

Friday, August 19, 2022

New Way, Der Squared Max Build, Part 1, Parts

Here's another fun, square rocket from New Way Space Models.
I liked the red in the name at the top of the face card - 
SQUARED MAX.

A four sided square body with only three fins!


New Way kit parts are always high quality.
On the left is the sandpaper, emery board and Q-tip package. Under that is the fin jig, needed to get the correct angle on the two side glued fins. 
The parachute is four sided red square.


Parts of interest:
There are four small separate decal sheets. Notice the white ink under the black!

On the center bottom is the square launch lug marking guide.
Next to the launch lug is the Kevlar protective heat shrink tube.