Monday, October 31, 2022

Estes Odyssey #7235 Build, Part 9, Engine Mount


One of the 50/55 centering rings will need to be notched to allow engine hook flex.

I usually cut the notch with a single edge razor blade. You can simply press down on the blade and get a clean cut.
Notice the angle of the set blade. When cutting at this angle you can end up with sides that match the movement travel of the engine hook. 


Set the glued notched ring into the BT-55 body to hold the ends down as the glue dries.

I did cut off the finger tab . . . because I'm a big boy.


A sparse line of glue is rolled around the tube and the black retainer ring is slid into and over the glue until it rests against the top of the lower centering ring.
Fillets are then added.

The engine block ends up recessed inside the top of the mount when slid in against the top bend of the engine hook.

Launch? Well, I Tried!

An email from Jeff asked: "Are you okay? And no launch reports since Jan or Feb?"

There are some reasons why I haven't done any launching, actually since last May.
Over the years I tend learned to shy away from Summer launches in Florida. A long day in the sun leaves me to "recover" the following day. On some Summer club launch days the field is flooded.
I've been building a LOT of show models for Estes and Quest/Aerotech. 
Some days are filled with blogging, building rockets and bagging up kits. By the time the weekend rolls around, I'd rather spend time with my daughters than have another full rocket day.

So I'm okay! I just haven't been to the school soccer field in a while until yesterday.
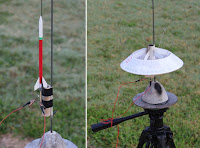
I prepped some rockets, A and B motors and a C in the 3/4 size Centuri Saucer.
All the models were recent new builds from the blog.
 
My continuity light was dim. I didn't even think about new batteries. 

The first try was the Micro Maxx ASP Sandia Sandhawk. These usually take a second or two to ignite. Nothing!

I slid the Centuri Saucer down the launch rod. Press and hold - press and hold - Nothing!


One last try with a new, BP dipped igniter.
The New Way DER SQUARED MAX with an Estes A8-3.

I held down the button, the camera was taking burst pictures. Nothing.
I released the camera shutter and looked away for a second - Whoosh!
First launch for this new build. No launch picture. 

Maybe 200 feet with a little drift as the winds were starting up. No damages, just wet dew on landing.
Here's what I hoped to fly this morning - all recent new blog builds.
The Estes Shuttle, Solar Sailer II and the EAC Firecat clone.

Note to self - Install new Alkaline batteries.

Estes Odyssey #7235 Build, Part 8, Launch Lugs Prep

There are 13 (Yes, thirteen!) 1/8" x 1 1/4" decorative launch lugs. They are glued side by side as simulated nozzles out the back of the secondary, inside jet engine. 
The cut ends should be cleaned up.

On the left you can see the rough cut end.
Start by turning a sharpened dowel or pencil to round out and expose any rough edges. 


Lightly sand off the raised edges using some 400 grit on a block.

Then lightly sand the edges at an angle to remove any remaining rough corners.
Repeat on the remaining other 12, 1/8" lugs.
On the left is a before - 
On the right is a cleaned up launch lug.
Repeat on the final 3/16" diameter actual flight launch lug.

To fill the seams, all the lugs got a coat of CWF and sanding followed by filler/primer and sanding. Yep - I'm a detail guy. I fill the seams in the launch lugs.

Why clean up launch lug ends? On this model, I don't want any launch rod "hang-ups" with the 3/16" lug that goes over the rod. Those 13 small simulated nozzle lugs were cleaned up and seams filled to look better on the finished model.

Sunday, October 30, 2022

Estes Odyssey #7235 Build, Part 7, Tail Cone Hook Relief

Take this step slow!
A notch has to be cut into the tail cone to allow movement of the engine hook.
Mark with a sharp pencil, 1/8" wide by 1/2" long.
Those half round vertical ribs are wider at the bottom. Keep that in mind when cutting out the notch.

Score the pencil line with a sharp knife.
I carved the notch out making small chip cuts from side to side. 
The top of the notch was squared up using a diamond file.

The sides were widened with the flat file so the 1/8" width would be consistent from top to bottom.
Check the width by sliding the engine hook in making sure it doesn't bind against the sides of the notch.

Saturday, October 29, 2022

Estes Odyssey #7235 Build, Part 6, Nose Cone Prep


The plastic recess inside the tie down lug was thick!

I ended up stabbing small holes all the way around the side line. 


On the left is the rough edge after popping out the center. 

On the right is after filing and cleaning up with a knife. You want that inside edge smooth so it won't wear through the shock cord and chute shroud lines.


There are three pats of nose weight clay.
Each pat weighs in around a quarter ounce. 
Three pats of clay for a total of .75 oz. nose weight


Instead of rolling "snakes" and chasing the string of clay around the tip of the nose cone - 
I roll little clay balls and drop them into the tip.

Drop in about 10 clay balls and tamp down with a dowel end. Repeat until all the clay is pressed into the nose cone tip.

I try to make the clay as level as I can. You can check it against a bright light.

Friday, October 28, 2022

Estes Odyssey #7235 Build, Part 5, Sealing Cardstock Edges


This shows the wiggled laser cut lines on the front edge of the "O" pieces.
On the lower right, notice the arcs of the laser cuts on the "R" disks aren't perfectly in line. I'll have to round out the circles.


I stacked "like" circle disks on the supplied dowel and gang sanded the sides with a block.

On the left is the before - on the right is after sanding and shaping.


Here's a three ring stack (no glue yet) being rounded and evened up with 400 grit on a block.


The edges of the cardstock pieces will look better after painting if they are sealed.
Apply a narrow bead of wood glue around the edges. Smooth out the glue bead with the side of a fingertip. Try to keep the glue off the flat face, just on the edge.

On the right is the same ring after the glue dried.
Sand the glue bead smooth with 400 grit.

These are all the "Y" pieces.
Oh boy - More edges to seal!

There are 18 Y pieces. They are small and easy to loose. Keep them in a zip-lock bag until they are needed.

You can apply a sandable wood glue bead to the sides that you will see (facing out) on the finished model. On the left, a glue bead has been applied to the exposed edges only. Keep glue off the flat side surfaces. Sand smooth after the glue dries.

Thursday, October 27, 2022

Estes Odyssey #7235 Build, Part 4, Prepping The Cardstock Pieces


I know - you're tempted to punch out the cardstock pieces.
Use a sharp knife to cut through the hold down tics.
You might find it easier to erase some of the brown before removing  the pieces from the sheet.
The sides of the laser cut pieces have some browning. If you clean some off you'll have an easier time getting even coverage with the white paint. Some Gloss White spray paints aren't very opaque.
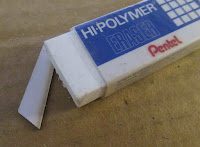
Use a white eraser. Don't use a white eraser meant for erasing ink, ink erasers are too abrasive.


Here's a before on top,
After using the eraser is shown on the bottom.

You might not remove all of the brown, just get it as clean as you can.


A few of the straight laser cut lines had a wiggle. These could be seen on the finished model.

Sand the crooked lines square with 400 grit on a sanding block.
Much better!
 

Wednesday, October 26, 2022

Estes Odyssey #7235 Build, Part 3, More Parts


Here's the large, thick cardstock sheet.
Hang onto the scrap left after removing the parts - you might need it. There are plenty of small parts that could be misplaced.


The BT-80 tube has rough cut edges. 

It doesn't matter - these will be cut off in the build.


Here's that detailed plastic nose cone.

The cockpit window is a tricky mask. Fingers crossed for a clean color separation. 


I'll be bouncing around on this build. The blog posts may not be in the order of the instructions.

Tuesday, October 25, 2022

Estes Odyssey #7235 Build, Part 2, Parts


18" long BT-55 main body tube, BT-80 tube, 7.1" long, BT-20 tube, 6" long, 
Plastic nose cone
1/8" dowel
Laser cut balsa sheet, 3/32" thick
Large decal sheet, large laser cut card stock detail sheet.

35" long, 1/4" wide rubber shock cord
Three clay nose weight pats, each .25 oz, .75 oz. total
Detailed, plastic tail cone
Four BT-5 size nose cones, Mosquito style
One longer BT-5 size cone
24mm engine block
Two 50/55 rings
Engine hook retaining ring
15" Parachute, pre-assembled
Tri-fold shock cord mount, printed on light cardstock
Engine hook
Three BT-5 Detail tubes, 2" long
One BT-5 Detail tube, 4" long
Thirteen 1/8" launch lugs, 1 1/4" long
One 2" long 3/16" launch lug
Two Mylar spacer rings

More in next post . . .

Monday, October 24, 2022

Estes Odyssey #7235 Build, Part 1 Background


The first Estes kit named the Odyssey (# 1289) was in production from 1987 - 1982.
(Photo above from stickershock23.com)

The current Estes Odyssey kit is a great design and challenging build. I've been reluctant cut open the bag because of all the thick cardstock detail pieces. There will be extra time spent prepping and sealing the cardstock before gluing up the assemblies. This blog build will bounce around, not necessarily in the order shown in the instructions.


This nose cone was previously used in the Estes Voyager II (#2002) and the Xarconian Destroyer (#1903).
The kit nose cone was part #71037, is now part #72689. New nose cone molds were made a few years ago. 
Information from John Brohm's Estes Nose Cone / Kit List Reference: CLICK HERE


Online pictures show the model painted white with red trim. Even the canopy window is red, shown in the picture above.
I'll be painting the model as shown on the face card with some silver details as shown below.

Sunday, October 23, 2022

Barberville, FL, International Festival of the Musical Saw

No Internet and or build posts this weekend - I was in Barberville, Florida for the 1st International Festival of the Musical Saw.
That's me holding my Musical Saw to the right side of Tim Martin who coordinated the event. In my pocket are some Rattle Bones. One vendor was selling wood bones. I gave introductory lessons to those who bought a set.

I was very surprised (actually shocked) to win the "Professional" division. First prize was a saw sculpture and $500! 

Some played classical music and melodies that nobody knew. I handled it like a short show. My selections were recognizable and talked between songs with (hopefully) funny introductions. My opening line was: "You ready for some heavy metal music?"


Here's one you don't see everyday, the "Holy Grail" of Musical Saws. a Deluxe Mussehl and Westphal from the 1930s. Gold plated with rhinestones set around the screw handle washers. A valuable saw in the original wood case. 


This is Yolanda who traveled all the way from Poland to compete!
She plays a thin piece of sheet metal and uses a handle for the left hand grip. Saw snobs call the handle a "cheater".  
Others traveled from Hungary, Finland, Canada, California, Massachusetts, Georgia, Arkansas and six others from Florida.

While all other played long trapezoidal sheet metal, I was the only competitor that played something that looked like a hand saw. I didn't use a cheater handle, the "S" bend is traditionally made with just the fingertips.

 Here's some of the competitors for a group shot.  
I'm in the back row wearing my Estes cap.
Some people did recognize the Estes logo and we talked rockets for a few minutes.

Friday, October 21, 2022

Posts Over This Weekend?


I probably won't have Internet this weekend - I'm goin' Camping!
I may not be able to do blog posts until Monday.
That's my "rig" above. At 4' X 8' it's not big, just room for a bed and TV.
Storage bins under the bed hold cooking supplies and clothes.

I'm going to the International Festival of the Musical Saw in Barberville, FL. over Friday, Saturday and Sunday. Wish me luck in the Saw playing competition - there are some players flying in from overseas! Yikes!

Joel Shepherd's STM-012 Inspiration

From the Estes Model Rockets Facebook page:
Joel Shepherd posted -


"This is an old Estes STM-012 that my daughter picked out of the free pile at our first club launch, about a year ago. I wasn’t crazy about it but then saw some posts by someone who converted theirs to dual deploy. That seems like a good thing to learn about so that’s the plan for this one. The electronics bay, etc., is all ready to go: just need to learn how to do it. Color scheme was inspired by the Terrier Mk70 Improved Malemute sounding rocket."

I like the paint treatment! Gives it a real scale look.

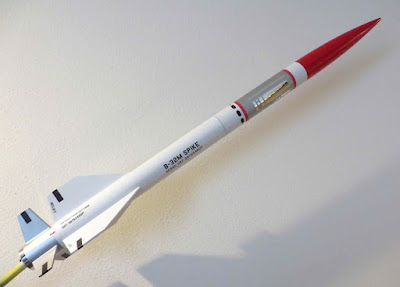
Here's my kitbash of the STM-012, called the B32-M Spike:


This one borrowed some design elements from the Madcow
AGM-33 Pike.
Here's my B32-M Spike build from repairs, the finished model to the start of the build: CLICK HERE

Here's what the original STM-012 looked like:


I originally was going to make a sport-scale Amramm.
But, the Amraam had two sets of four fins, the STM-012 body tube was slotted for two sets of three. 


Thursday, October 20, 2022

Rob Caswell's Goony - Inspiration

Some builder's get their scratch build design ideas from places you wouldn't expect.
Rob Caswell shows how it's done! 


"My long range build plans were snafued by once again (obsessively) catching the Goony Bug. Like my v-1/2 (aka “Missile Toe”) built earlier in the year, this takes its inspiration from the original Estes concept sketches of the Goonybirds from the early 70’s, where they were all “chibi” interpretations of WW1 and WW2 aircraft… perhaps to follow up on the popular success of the relatively recently released Der Red Max."

The original Estes Design Concept - Note the small red rocket in the upper right

I call this one “Baron von Liftoffen” and it capitalizes on the sketch done for what would become the Sky Shriek. There are TWO vehicles in the original sketch. It the foreground a British biplane inspired work, but in the background a “design twin” that was clearly aiming at the Fokker triplane. Since the release version of that Goony featured the scalloped trailing fin edges, it seems like it must have come from details for the background bird, so that’s the direction I went… though it could be fun to try the Brit version at a later date!

With Bad Boy Rocketry’s recent Goonybird clone releases, I asked to by a laser cut fin set from James as trimming those scalloped edges would be a pain… and I’m all about The Lazy. I mashed that with an Estes Mini Fat Boy. I did cut down the main body tube to the originally spec’d 5” length, but I threw a quarter ounce of nose weight just for good measure.
The guns are off an old Cox gas powered Fokker triplane. They worked perfectly, as far as the scale I wanted. I was lucky enough to find someone selling it – JUST the guns – on ebay. The rocket fates were smiling on me!
The decals were my own design and production, using an inkjet and decal stock from Micro Mark. I made a decal for the brass data plate that would have been on the Fokker’s engine cowl and placed it atop a small rectangle of gold Monokote Trim Sheet… but I should have doubled the size as it’s illegible. I’ve included a better view of the decal in the pics. The brushed silver ring behind the nose is also Monokote trim.
I’ll also call attention to the aft text string. The original Fokker DR-1 carried the string “Fok. DRI 425/17”. I mutated it to “Est. (for Estes instead of Fokker) GRI (“G” for Goony) 812/40 (Estes’ Penrose zipcode)”. And of course I HAD to include Snoopy head kill marks!
von Liftoffen’s maiden flight is next weekend at the CMASS launch in Amesbury, MA."

Wednesday, October 19, 2022

Inspiration - Baby Bertha to Cigar Rocket


Todd Nichols posted his Baby Bertha conversion 
on the Facebook Estes Model Rocket page - 

Don't know about you guys but occasionally I like a good cigar. Now I can launch one. Lol
Modified Baby Bertha. I call this one, "Slow Burn".
* I am only showing my cigar rocket.
* I am not promoting the use of tobacco.
* I am not promoting any particular cigar company.
- Just to be clear.- Lol

Estes Parachute Shroud Line Concern?

Last year on YORF, Bernard Cawley had first launches with his new Green Eggs and Olympus models:
"For some reason I don't really know the Olympus stripped four of six shroud lines on the 18 inch 'chute and so broke a fin on landing. The fins in this particular kit were quite light/soft for an Estes kit."

My response:
If you still have the parachute -
Give the shroud lines a quick pull and see if they break. I've had a few Estes kit chutes with weak shroud lines.
When building an Estes kit, I (reluctantly) grab the line with two hands and give it a good tug. If they easily break, I replace them with #10 embroidery thread.

Tuesday, October 18, 2022

Good Sanding Blocks?

On YORF, Don A. asked:
"I have two Great Planes Easy-Touch hand sanders that I use all the time.
I would like to get some more but it appears that these are OOP now.
Any ideas for anything similar? Something that has a smooth metal surface that self adhesive sanding paper can be attached to and that has a comfortable handle."

Tigerhawk answered:
"The DU-BRO company sells the aluminum sanding bars."


CJU gave a link:


These look identical to the OOP Great Planes Easy Touch Sanders. 
On the right is the profile view. That raised hand grip is comfortable and affords a lot of control.
For me, they are the best sanding blocks out there.
I have two - one loaded with 220, the other with 400 grit. If I don't have adhesive backed sandpaper, I can adhere it to the flat bottom with an even coat of a glue stick.

For a post about good, cheap self adhesive sandpaper rolls - CLICK HERE 
Making sandpaper last much longer: CLICK HERE

They are twice the price of the older, OOP Great Planes blocks, the 5" X 2" long block at $14.99, before shipping! But I would pay that much for them without hesitation.
These blocks are that good!

Monday, October 17, 2022

Estes Solar Sailer II, Kit # 2044, Finished


The fin decals are evenly spaced down the leading edge of the lower fins, a little away for the dowel line.


The girder decals visually break up the center truss fins.


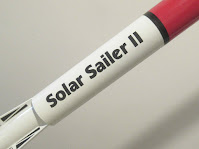
The name decal is centered in the open white space under the red mask line.
The tube wrap decal line sets over the paint mask line.


The upper end is gloss red, a bit plain. 
Recovery will be a 15" chrome Mylar chute. The Solar Sailer II had a 18" chrome cute. That seemed a little large.