Showing posts with label E Alien Invader. Show all posts

Friday, November 25, 2016

Alien Invader On Ebay


The Estes Classic
ALIEN INVADER
is up for auction on Ebay

To see the listing running through next Wednesday night: CLICK HERE
Stop by make a bid and support the blog!

Tuesday, November 22, 2016

Estes Alien Invader Paint Fix - Part 2, TIP


Here's the front and back after the flat clear was shot.
The light spraying of acrylic dries almost instantly. If you enlarge the pciture the black might look splotchy. That's just the low pixel resolution. The black actually looks very even now.


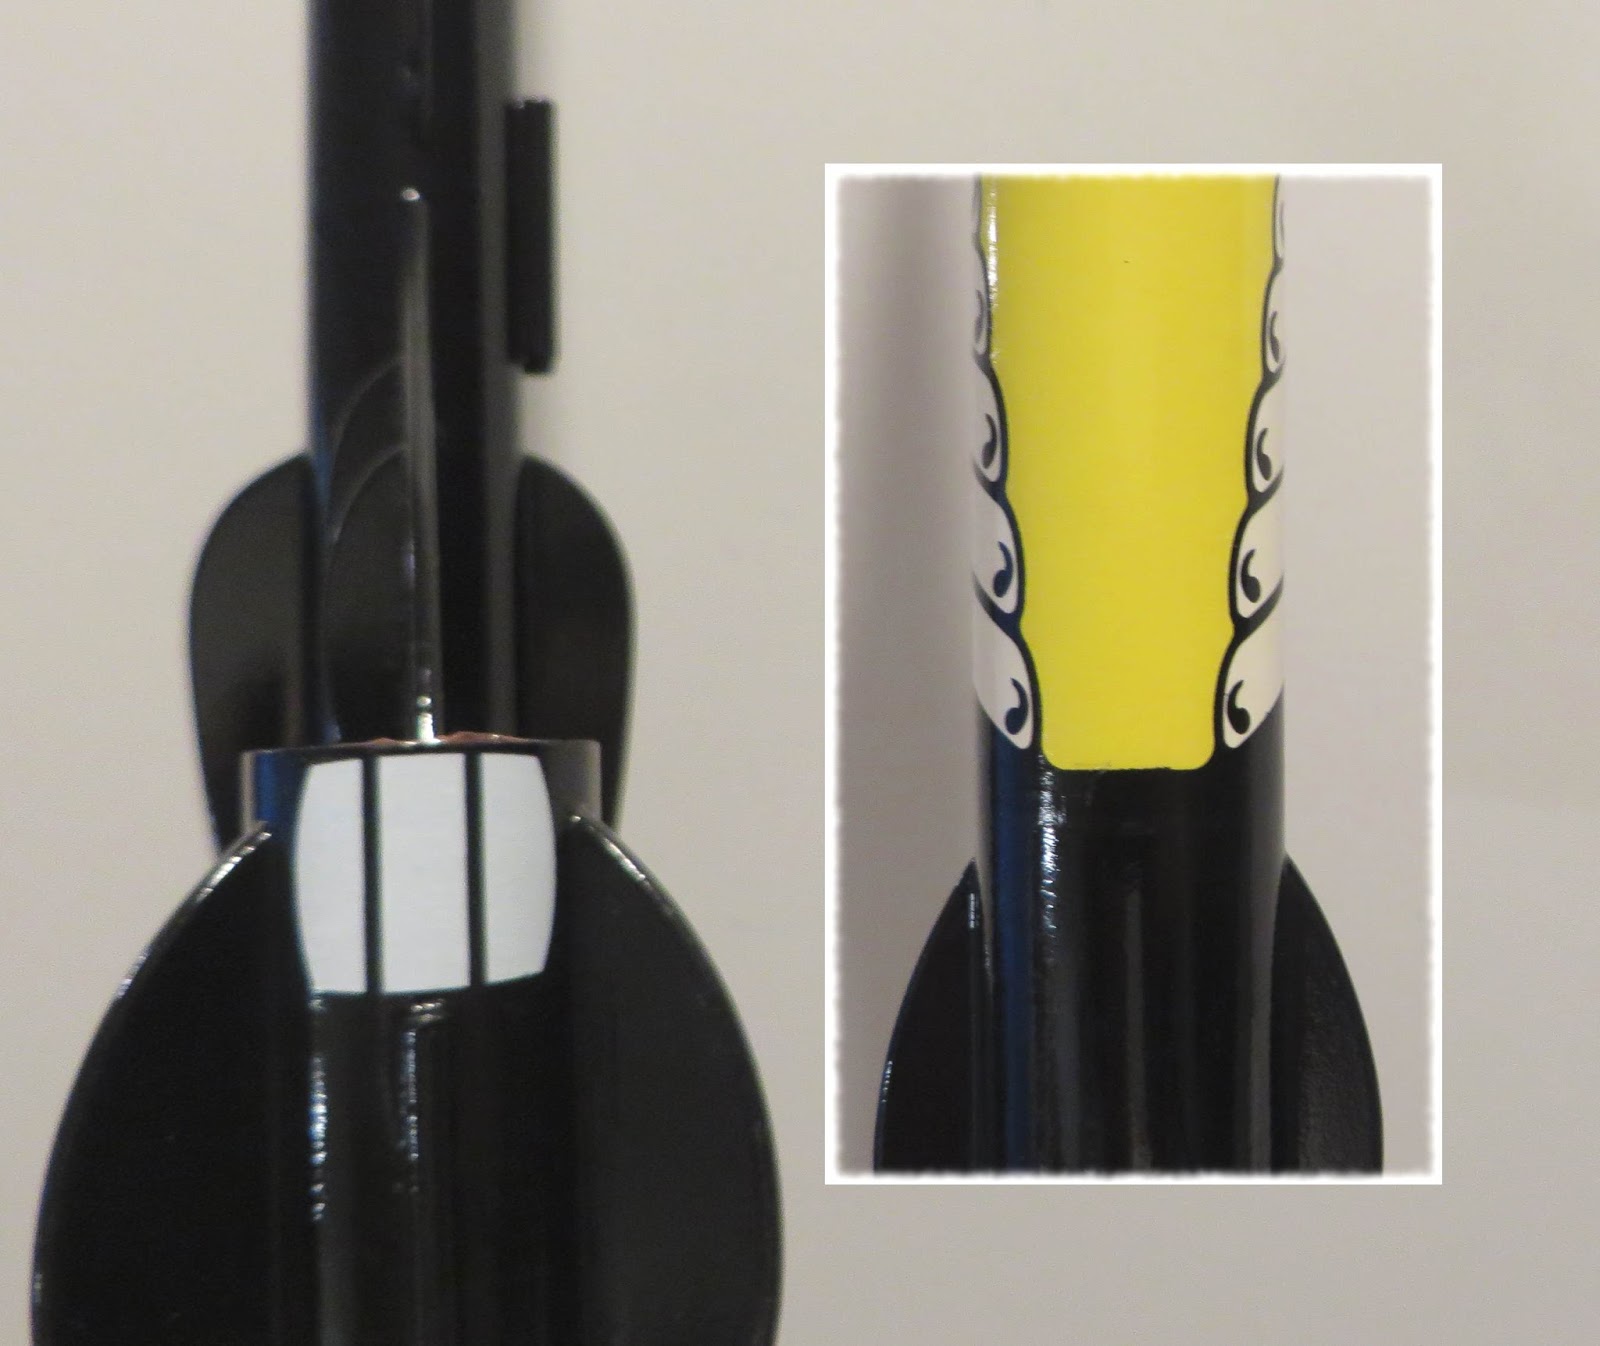
This is the angled mask over the transition decal wrap.
Look close and you can see a little of the gum residue from the edge of the tape.
I sprayed a little glass cleaner on a paper towel, some light rubbing removed it. I used Glass Plus cleaner, not Windex with ammonia. Windex could remove the clear acrylic spray. I just needed a light solvent cleaner.


Gloss paint shows everything! Spraying flat clear acrylic is a great way to cover up some light finishing inconsistencies.
I don't recommend applying a matte finish to lighter colors like white, yellow pink or orange. Light flat finish colors pick up dirt and finger oils quickly! Flat finishes are also harder to clean. On this model the flat finish sprayed over the black won't show any discoloration from handling.

The instructions do say to use gloss black paint, but it looks so much better with the back end in a flat finish.

Monday, November 21, 2016

Estes Alien Invader Paint Fix - Part 1, TIP

A few years back I was talking to a local guitar repairman. Early on he had worked for Tobias guitars, learning the finer points of lutherie.
He drilled the screw holes for a tailpiece install. After drilling he realized one hole was in the wrong place, off by a good half inch.
Expecting the guitar body would have to be thrown away, he went to his boss expecting the worse.
His boss didn't bat an eye and simply said: "Put an inlay there. Make it look like you meant to do that."
This rocket fix is a little like that. Sometimes you can cover things and make them better than before.

I didn't like the looks of the gloss black paint on the rear half of the recent Alien Invader build. Too many inside surfaces were hard to get smooth and reach with the black spray paint.
Some areas got more paint than others. The gloss finish showed every unreachable glue line and rough area.

This was one of those finished projects I let sit for a few months while I figured out a solution.
I'll attempt to paint over the gloss black fin areas with a dusting of flat clear acrylic.

The picture shows me brushing off any dust from the gloss black. Black seems to attract dust. A soft brush got most of it off before spraying the flat clear.

One problem was the upper decal. The low end of the wrap isn't in a straight line. I decided to mask it off, half gloss and half flat - like it was meant to be that way!

I didn't use Scotch tape, this clear line isn't critical. Before setting the masking tape down I stuck and lifted the sticky side on my jeans pant leg a few times. Some jeans fibers will stay on the sticky tape and diminish its tackiness. I don't want to risk lifting the decal edges.

Only one piece of masking tape was used for the edge mask. The tape was gently set on an angle and bunched over itself over the curve. The upper yellow body was covered with a wrap of printer paper and a small piece of tape to hold it down.

Sunday, October 30, 2016

Estes Alien Invader Decal Fix


I finally set the decals down on the second Alien Invader. I think I got it right this time.

The white decal on the tube sides won't fit the way the face card shows it. With the dowel in the location specified in the instructions, this decal is too tall. I turned it on its side.


This time the three stripe decal was set up on the main body tube and tucked into the root edge of the fin.

The smaller alien eagle decal was correctly set to the forward right side of the body tube front. This decal isn't shown in the reissue kit instructions. You've got to look up the old kit online instructions to figure it out.


The larger alien eagle went underneath the model on the right wing.

Done!
I may hit the lower half with a dullcoat to make it interesting. The dullcoat will hide some of the areas that aren't as clean as I would like.

Tuesday, September 20, 2016

Estes Alien Invader #3003 Build, Follow Up


In a comment, Naoto Kimura mentioned the older instructions at the Jim'z website. CLICK HERE

I should have checked the original Alien Invader instructions and face card for the correct decal placement.
Normally when I have a assembly question on a reissued kit, I'll look up the older instructions. This time I didn't.

Shown on the old face card picture -
The three line wing decal is short of the right ring pod. It sets into the fillet and up the side of the body tube.

The smaller winged decal goes on the body tube to the right side of the upper wrap decal.


Here's what I had to work with with the reissued kit. The face card shows two different three stripe decals on the right side wing, the decal spans the wing width.
They don't show where the winged decals go. Oh well! The second build will have the correct decal placement.

Thursday, September 15, 2016

Estes Alien Invader #3003 Build, Finished


I had build this one years ago and was interested in trying it again when Estes brought it back as part of the Classics Collection. It was a fun build, this time I got all the balsa filled correctly before painting. The decals were the only disappointment.
We'll see if those trailing pod dowels last through a few landings.

Wednesday, September 14, 2016

Estes Alien Invader #3003 Build, Part 15, Decals

The decals provided don't match the face card illustration or even the instruction sheet.
You don't get the three white lines on the left side of the wing or the short decal that rolls over half the body tube.

The circle decal by my thumb can't and doesn't go into the outside edge of the wing.

I've seen this too many times. Quest kits sometimes don't include the decals advertised shown on the face card.


The clear border on the outside pod decals overhang the top of the tube. It's easily trimmed after it dries.

Here's how the underside of the big body wrap decal joined up. Try as I might the ends wouldn't quite line up. Close though!


The decal sheet had some creases in it. The crack broke up one the white lines that go across the wing. I should be able to touch this up and join the line.

The instructions don't say where the "wing" decals go. There is one large and a smaller one.

I couldn't tell if the decal had white ink on it or not. (That's why some decals are printed on light blue paper.)
If the decal had white (I could tell after soaking) it would go on the wing. The large one on the bottom, the smaller one on the top of the wing.
Luckily there was white ink along with the black. It worked well on the left side of the wings where the stripes were missing.


Tuesday, September 13, 2016

Estes Alien Invader #3003 Build, Part 14, Paint, Mask and Paint Again


This is an easy mask.
Spray the upper tube so you have yellow coverage right below the smaller forward fins.
Don't worry, the black will cover up the yellow. Black can pretty much cover anything.


The instructions just say to mask above the forward small fins.
Double check by setting the decal beside the body tube.
You want a little clearance above the largest decal and the top of the body tube.


Scotch tape, masking tape and a garbage bag were used to cover the yellow.


Like I mentioned, a very easy mask.
You can always get a clean line going around a smooth body tube. The decal will cover the color separation.

Saturday, September 10, 2016

Estes Alien Invader #3003 Build, Part 12 Pod Glue and Masking

The pods were masked for the internal flurescent red/orange spraying. It's easier to mask and spray the inside of the tubes before gluing them onto the wings.

You must use a white undercoat when using fluorescent paints.
The inset picture shows the red/orange paint inside the tube.

The pods were glued onto the outside edges of the wings. The dowels (Part O) were added, centered between the crescent balsa fins.

The inside red/orange paint is masked off so no white under coat or black will get inside. Small pieces of masking tape were set over the edges. A roll of paper was set inside for a full interior mask.

Friday, September 9, 2016

Estes Alien Invader #3003 Build, Part 13, Undercoats and Sanding!


After the first white undercoats were shot there was more sanding.
There are too many nooks to sand!
This model took extra time to get rid of the glue fillet ridges.


Then another white undercoat.


The instructions are vague about the decal and color separation point.
The main decal helps bisect the upper yellow and black to the rear.
The horizontal decal wrap around band goes over the color line.

You can't see it, but to the left of the larger black decal are white decals. You'll have to hold the decal sheet under a bright light to find and cut around them.

Estes Alien Invader #3003 Build, Part 11, Wing Gluing


Be sure you glued the small crescent fins to the "mirrored" tops of the main wings. Don't ask me why I bring this up!

Two on top of the right side wing, two on top of the facing left side wing.


Here's how the wings are glued onto the body. The lugs are on the bottom.

Thursday, September 8, 2016

Estes Alien Invader #3003 Build, Part 10, Wing Prep


Here's the main wing after primer and sanding.
Notice the leading and outside edges where the primer was sanded down for better adhesion and fillets.


The body tube fin areas were also scraped for better adhesion.


I noticed too late that the bottom "root" edges of the small part K fins needed to be filled. The center area will be seen between the front and rear of the main wing sections.

I had to stop and brush some CWF on the open area.


The "K" pieces were hit with primer/filler and sanded smooth.

Now they can be glued to the front and rear wing using the wing pattern sheet guide.

Wednesday, September 7, 2016

Estes Alien Invader #3003 Build, Part 9, Engine Mount Gluing


I marked the inside rear of the main tube and end of the engine tube with a Sharpie. sometimes its hard to get black spray paint into the rear after the mount is glued in place.
TIP: Set the engine mount and Kevlar line down the length of the body tube to get an idea of how long the Kevlar should be. Tie a loop knot before the top end of the main tube.
Gluing in the engine mount before the wings and fins is sometimes easier. If the wings were in place you might not have the extra moment to get the mount perfectly in line with the top fin or lugs.

A ring of glue was set in the tube and the mount pressed in place using the flat top of my sanding block. The flat block insures both tubes are even. Note the engine hook is to the side and off the sanding block.


After the engine mount was in place and the glue dried, the fins were glued on.
Here I can line up one the top fin with the engine hook.

Tuesday, September 6, 2016

Estes Alien Invader #3003 Build, Part 8, Wing Tube Fill and Paint


I filled the inside seams of the Wing Tip Tubes, part F.
The interior of the tubes will be visible on the finished model. They will be painted red before gluing onto the wing fins.


The outside surface of one tube was wrinkled. A little sanding with 400 grit brought it down slightly. Filler/primer will remove the rest.


All three tubes were joined with the coupler and the 24mm casing on the painting wand for a shot of primer/filler.

After everything dried it was lightly sanded to surface with 220 then smoothed with 400 grit.


The outside of the individual wing tip tubes were masked off and the interior tube walls painted with a white undercoat then fluorescent orange/red.

It's easier to paint the inside of the tubes now, before gluing to the wing and spraying the main body black.

Monday, September 5, 2016

Estes Alien Invader #3003 Build, Part 7, Miscellany


The nose cone seams were sanded down. What seam that was left was filled with beads of medium CA glue. The pencil circles outline the recesses.
After the CA bead dries (it does take a few minutes) the glue sands down with 220 grit. Follow with 400 grit.


I'm building two kits at the same time. This is some of the balsa taped up for a shot of primer/filler.


I pulled gently on the shroud line knots. On the pre-assembled chute some were "Granny" knots, not square knots. The Grannies slipped where the square knots didn't.
Tie an additional overhand knot to lock the Granny.


Before cutting the dowels to length they were sealed with a wipe of varnish. You could also use primer/filler to smooth out any grain in the dowels.

Sunday, September 4, 2016

Estes Alien Invader #3003 Build, Part 6, Fin Rounding and Assembly


The rear "I" piece was glued on first and sanded flat.
The front piece wasn't glued on yet so I could fill the inside edges of that "H" piece and the main "G" piece. It would be very hard to fill the inside edges after the front and rear wing pieces were glued together.

You have to make the decision which edges are rounded and which are left square. The front edge of the "H" piece (between the pencil marks) will be rounded. All other edges will remain square.


I had to fill the fin surfaces once and the butt joint areas twice.

Saturday, September 3, 2016

Estes Alien Invader #3003 Build, Part 5, Balsa! Lots Of It


I don't always sand the balsa sheet flat. I depends how rough the sheet is. Sometimes if the sheet is smooth I go right to freeing up the parts. This one was rough.


I said there was a lot of pieces.
ALL the leading edges will be rounded.


The curved inside edges of the forward wing pieces were sanded square with some 400 grit wrapped around a 24mm engine casing. This keeps a squared edge on the inside curve without breaking off the tip just to the right of the casing.