
Showing posts with label OR B32-M Spike. Show all posts

Wednesday, December 27, 2017

THE BIG FIX! B32-M Spike, Part 2


Some CWF was brushed over the fill piece.
Sandpaper was wrapped over the fin so I wouldn't sand into the original leading edge.


Here's the patch after sanding.
The decals were peeled up without any problem. Home print water slide decals didn't stick very well to the aluminum paint.

The upper body was masked off at the halfway point between the two fins.

I shot the repair and surrounding area with Duplicolor Filler/Primer. Two more coats were shot and sanded to surface.


After the tape was lifted the mask line was clean and sharp.
There is still a dent in the body tube and some minor scratches. I was more concerned with the fin repair.


Instead of printing up more fin decals, I cut some strips of black and red trim Monokote. They ended up sticking better to the aluminum paint and were much more opaque.
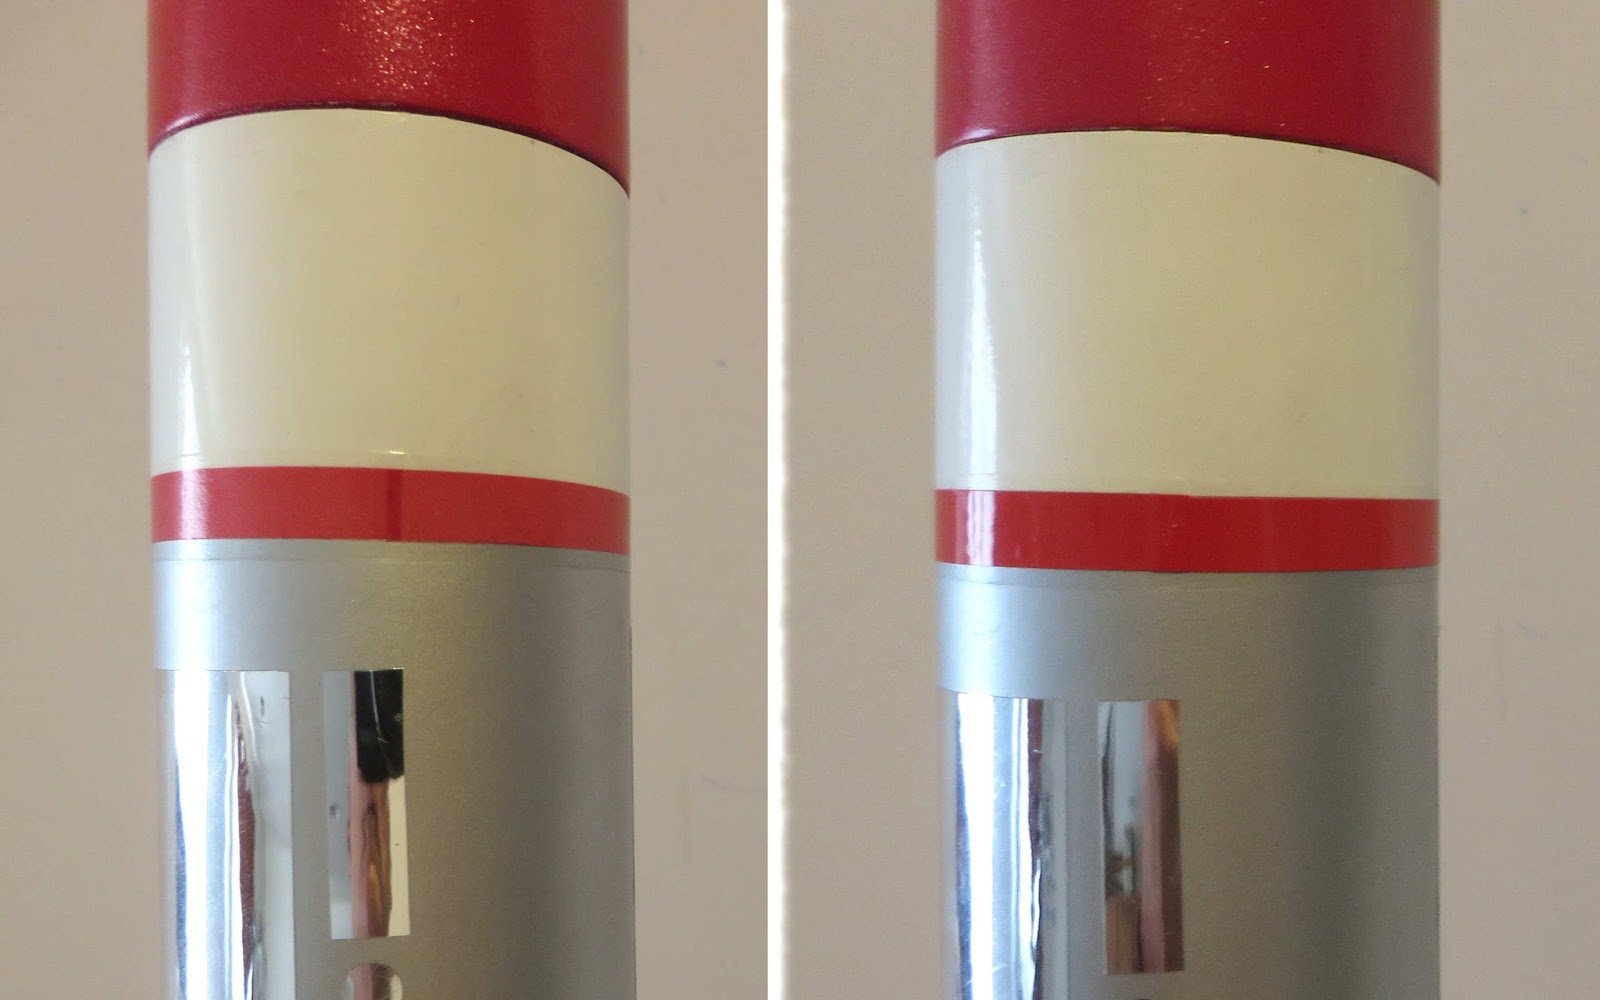


The red bands on the payload section were replaced with trim Monokote. On the left is the translucent decal before, on the right is the new red trim.

Ready for the next NEFAR launch with a D12-5! 

Tuesday, December 26, 2017

THE BIG FIX! B32-M Spike, Part 1


This is the B-32M Spike I kit-bashed from the Estes STM-012 kit. I took some design cues from the Madcow AGM-33 Pike.

I like how it turned out - too bad it didn't stay shiny for long.


I've only flown it once, last July with a D12-5. How it got this lower fin damage I'll never know, probably a snap-back of the upper section. The hit was strange, a chunk taken out of of the lower fin, scratches and a dent in the tube. The fin right above it had no marks.


This missing chunk was larger than what could be filled with putty.
It's easier to plug in a rectangular piece of balsa.

The rough edges were squared up with a diamond file.


3/32" thick replacement balsa was set behind the area and the edges traced.


The new piece was cut out and sanded to fit, then glued in with yellow glue.


After the glue dried, a rounded leading edge was carved following the original fin.
The leading edge was matched and smoothed with 400 grit.

Friday, June 9, 2017

Estes STM-012 Kitbash to the B32-M Spike, Finished


This one turned out very well, except for the nose cone paint.
The picture on the right was taken before the wrinkled nose cone paint was sanded smooth.

My favorites are now two foot tall, BT-60 based rockets that could easily fly with a C6-3 through E engines.
The BT-60 is still a fairly strong body tube. BT-70 and 80 tubes feel flimsy to me.

Estes STM-012 Kitbash to the B32-M Spike, Part 11, Nose Cone Paint


Damn paint!
Painted plastic nose cones take forever to dry!

Sure, the can says "Recoat within one hour or after 24 hours." I waited a few days after the white undercoat. That seemed to take forever to dry.
The red coat wrinkled!


This slowed down the finish of this build.
This picture shows the wrinkled surface after wet sanding with 400 grit.

I think I'll wait a week before trying to spray the red again.

Thursday, June 8, 2017

Estes STM-012 Kitbash to the B32-M Spike, Part 10, Decals and Trim


The fins got a different decal treatment.
I used a marked spacer strip to be sure all three bars were consistently spaced.

The home print decals stuck and wrapped around the outside edge very well.

The payload section also got something different.
On the left was the initial aluminum paint and decal wraps.

The inset shows some random pieces cut from chrome Monokote trim.
These were simple strips and rectangles. While the chrome on aluminum contrast looks great, it needed something more.


I made some round spots with the rotary punch.

The inset picture shows the knife tip picking the circle out of the cutter tube. The rotary punch cuts through both the chrome and backing paper.

Initially I was going to place the circles over the chrome pieces already on the model. I thought it might show up better. Look close and you can see the first circle placed over the chrome. It almost disappeared!

The inset picture shows the final look with the chrome dots placed.
A repeated chrome overlay is also on the other side.

Wednesday, June 7, 2017

Estes STM-012 Kitbash to the B32-M Spike, Part 9, Paint and Trim


The low end fins were sprayed with Rusto 2X Aluminum. This metallic paint dries very quickly and decals adhere to it well.

As usual, I stuffed a rolled paper towel in the rear engine mount recess to keep paint out.


The upper payload section was also masked and sprayed with aluminum paint.

The main color on the model is white, the secondary color is aluminum. The decals add trim red and black.


I wanted to use one of the original decals supplied in the STM-012 kit. The center of the decal wrap was cut out leaving just the black.


The two halves were butted up at the centers. The inset shows the final look.

Tuesday, June 6, 2017

Estes STM-012 Kitbash to the B32-M Spike, Part 8, Decals


I looked online at a few missiles to get some ideas for decals. I ended up making some markings similar to the decals in the Estes Bullpup 12d kit.

The black segments and long strips are in two different sizes. Sometimes when you print decals you wish you had them in a slightly different size.

All the numbers and weights were made up! This missile doesn't exist so who cares?

Estes STM-012 Kitbash to the B32-M Spike, Part 7, In Line Fin Gluing


The body tube was marked and the primer/filler scraped off the root edge and fillet areas.


The rear fins were glued on first; The trailing edges were set down farther back than the Madcow Pike.

Thin tape lines were rolled around the tube to align the tailing edges of the other two fins.


Craft sticks (Popsicle sticks) were used with clothespins to insure both fins were in line.


Here's the side view showing the flipped clothespins. When the backs are used for clamping the pressure is more even and spread out.

Monday, June 5, 2017

Estes STM-012 Kitbash to the B32-M Spike, Part 6, Fin Filling

Here's the before and after using Elmer's Carpenter's Wood Filler.
On the forums I've read where first time builders question how grainy the filler is. Too many try to use it full strength the first time.

Here's a good starter mix ratio of CWF and water: CLICK HERE

The inset picture shows the same fin after sanding. You want to leave a very thin "skin" of filler on the balsa surface.


Here's one of the smaller rear fins after the Duplicolor Primer/Filler was sanded down. Look close and you can see the line where the fin was pieced together.


Before filling the body tube seams I trace down the seams with a mechanical pencil. It's easier to see the seams with the contrast of the pencil line. This BT-60 tube was wrapped so well there wasn't any seam for the pencil tip to follow!

Sunday, June 4, 2017

Estes STM-012 Kitbash to the B32-M Spike, Part 5, Coupler Bulkhead

The bulkhead plate will be glued to the top of the coupler so when the ejection charge fires the shock cord will be pulling down. There will be no chance of it pulling off if the glued bulkhead is is on the top.

Apply a good bead of glue to the top edge. Press on the disk and turn to form an even fillet bead on the inside.


After the glue dries trim off the coupler edge with a single edge razor blade. Get it close to the outside diameter of the coupler.


Sand the bulkhead disk even with the sides of the coupler with 220 grit on a block.


Before gluing the coupler into the upper payload tube, tie on a length of shock cord to attach to the nose cone. This additional shock cord will prevent losing your nose cone and gives you something to attach an altimeter to.

Saturday, June 3, 2017

Estes STM-012 Kitbash to the B32-M Spike, Part 4, Coupler Bulkhead


There will have to be a bulkhead plate in the coupler between the two body segments.
I'm cutting this from my frame matting stock. Two disks will be made and laminated together for a strong thickness.

Trace around the red coupler with a sharp pencil.


These disks will be trimmed afterwards to the outside diameter of the coupler.
You can cut them out with scissors, just outside the pencil line.


The two disks are glued together. I used reversed clothespins to clamp them together for drying.
To see how to make a more efficient hobby clothespin clamp, CLICK HERE

Friday, June 2, 2017

Estes STM-012 Kitbash to the B32-M Spike, Part 3, Tubes


I had to get rid of the slotted tubing, the slots wouldn't fit the new fins anyway.

The Madcow Pike is 28.9" tall.
With the STM-012 nose cone at 8.4" long I figured I'd need about 20 1/2" of BT-60.
This length would be pieced from the two 18" long STM-012 kit tubes.
The lower tube ended up at 14 5/8" long.
The upper tube will end up being a payload section at 7 1/4". I set the nose cone and coupler beside the tube to check the payload capacity length. Making the payload section longer, the Spike design will be a bit taller than the Madcow design.
That red coupler is 4" long, probably longer than it needs to be. 1/2" was cut off. Keep this ring, it'll be used later.


The engine mount went together as normal. I did my standard replaceable Kevlar mount with the guide tube on the side.

Thursday, June 1, 2017

Estes STM-012 Kitbash to the B32-M Spike, Part 2, Fins


To get a rough idea of the fin to body tube size ratio I copied a picture from the Madcow website.
I wasn't trying for an exact copied fin profile. I did like the fin size and placement in relation to the body tube size.
The picture was sized to the width of a BT-60 at 1.637" wide. That gave me a tracing of a close size template.
Like most of the current Estes kits, there is more than enough extra balsa for a kit bash. The Spike fins are much smaller than the fins in the STM-012 kit.
The Spike upper fins easily fit into the STM-012 fins. The fin tabs will be cut off.
The smaller lower fins weren't as easy. One fin fit in the extra balsa.
I traced around the template with pen. I used a pen here so it would show up in the picture.

TIP: It's not a great idea to draw fin lines on a body tube with pen. The ink will bleed through and be visible in the finish paint! Use a pencil to mark the body tube.

The second and third smaller fins will have to be pieced together.
Sure I could just cut fins from another balsa sheet but what challenge would that be?

Wednesday, May 31, 2017

Estes STM-012 Kitbash to the B32-M Spike, Part 1, Parts


The STM-012 parts were all high quality and a good value for what I paid on Ebay.
The STM-012 is a tall rocket made up from two 18" lengths of BT-60. The "Spike" will be shorter.

The parts of interest:
That 8 3/8" LONG nose cone
The black engine hook holder (coupler)
The 4" long red body tube coupler
Two slotted BT-60 tubes