Monday, December 23, 2013

Launch - Schoolyard, December 22, 2013

Here's my typical set-up on the soccer field. 
Range box on the wet grass, rockets on top of the box shelves.


The MMX Downscale SKY WRITER is always a good "first up" to test the system and check for any upper winds.
I know the batteries are good if you can launch a MMX engine with the bare nichrome igniter. It always takes 2 or 3 seconds holding down the launch button. Altitude is usually about 125 feet.
I lost sight of this one but watched the horizon for movement and the streamer. I did see it before it hit the ground.
This one is really banged up, bent and now retired. I'll have to build another.


The GYROC clone had it's second flight, this time on an Estes A8-3.
It was turning during boost, the engine ejected with a loud pop and the panels flipped.
After a very fast spin it landed without damage on the basketball court.
The CA coat helped prevent damage to the blunt nose cone.
This one might be considered the wasted engine of the day.
An Estes B6-2 boosted my old Quest HL-20 with a wide spiral to maybe 200' up. A shotgun ejection popped the engine with streamer attached.

The HL-20 returned with a steep 5 to 1 glide ratio.
It did fall diagonally, the nose dipped and turned up, dipped and turned up. Not a stall but a tight wobble.

When picked up I realized why, the small nose cone was blown off the front of the shroud! It was found close by. The engine and streamer weren't found, I was too busy watching the "glider".
The HL-20 is now retired.

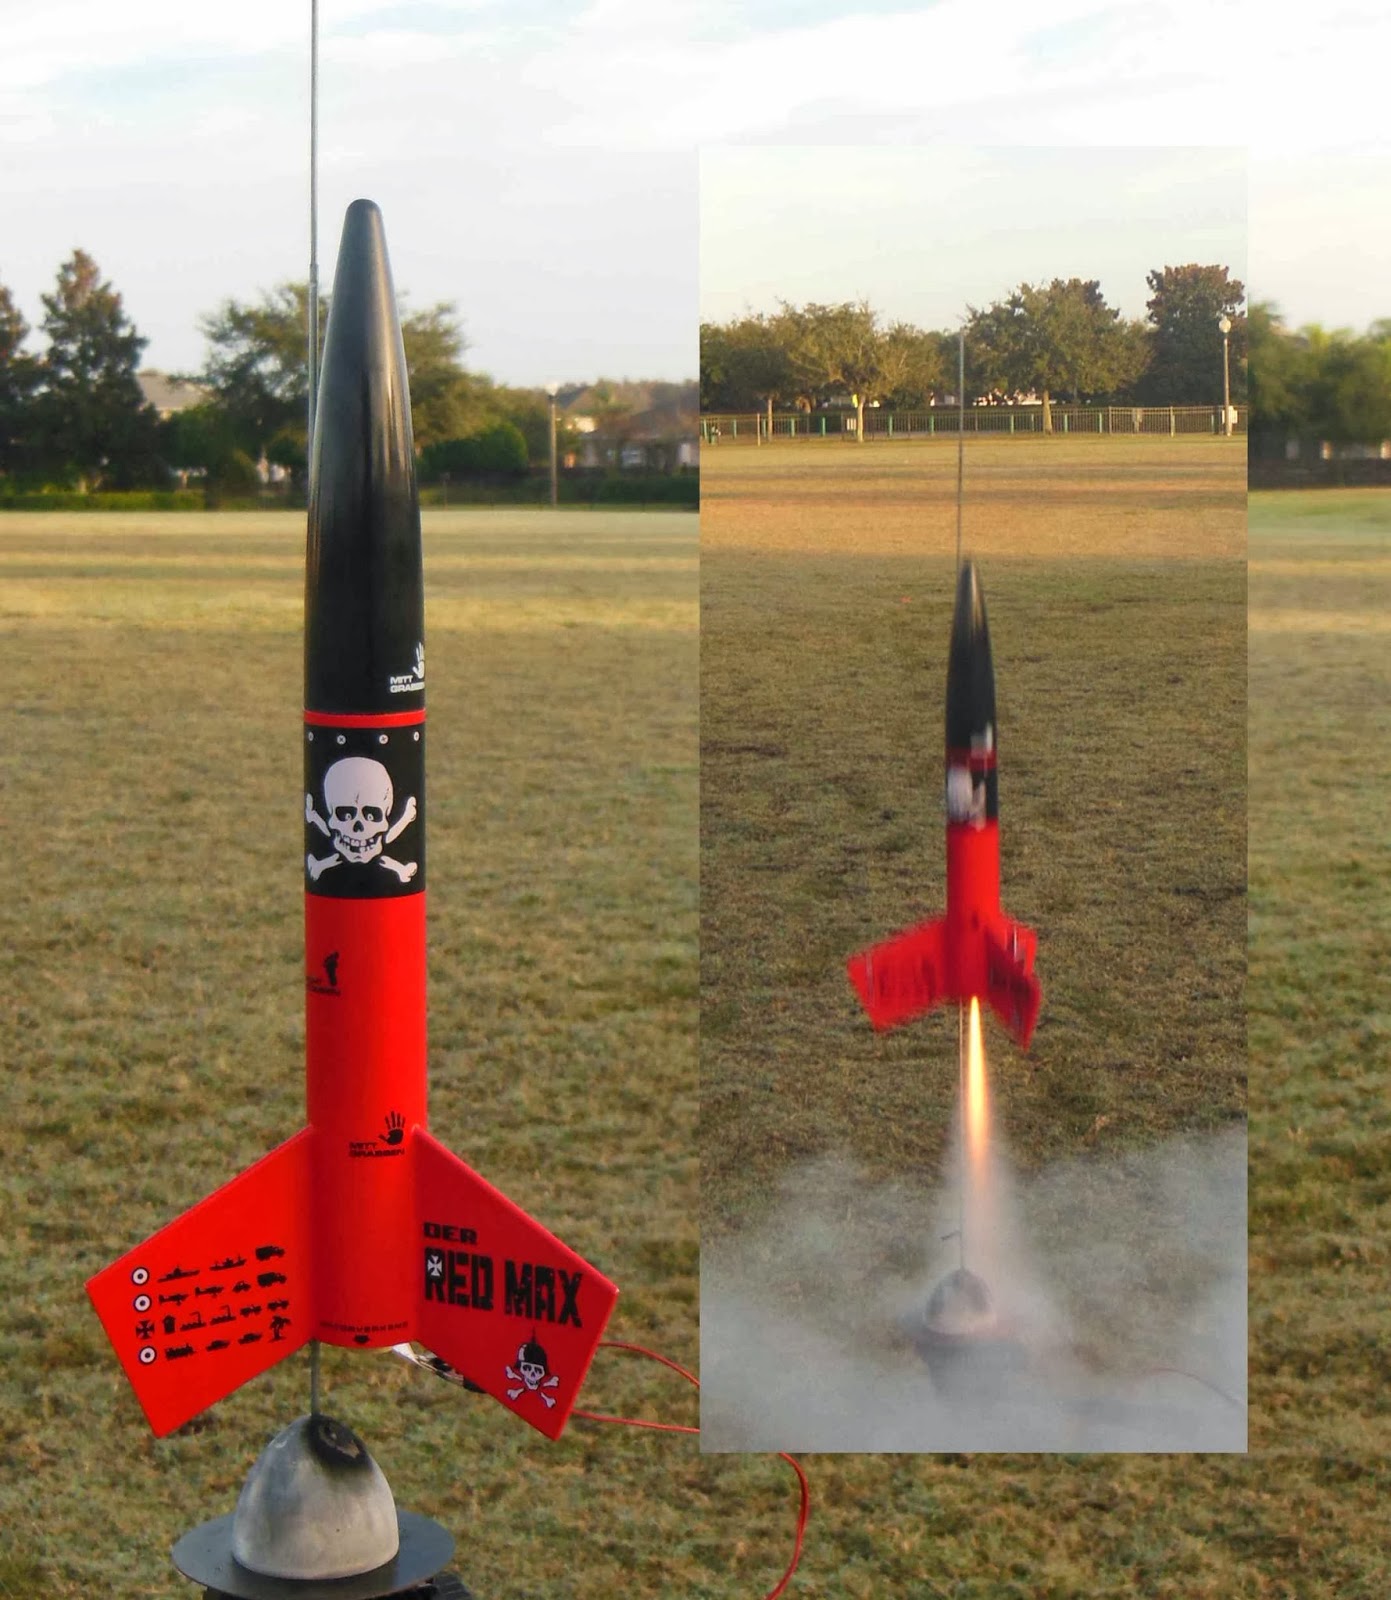
I don't think I've ever launched the RED MAX at the schoolyard.
This was my first build when I got back into rocketry. Originally painted orange with the wrong nose cone, it went through a rebuild with red paint.

Great for this small field, the B6-4 got it to an estimated 325'.
The sticky 35 year old Centuri parachute didn't open until it had descended half way down.
Winds were just starting to pick up at 7:45 a.m. but I was on a roll.
I had just repaired the Semroc ASTRON nose cone and added more shock cord.
The Estes A8-3 peaked out at an estimated 300'.
At ejection it did drift towards the playground.
The parachute draped over the fence with the fins just touching the ground.

Also flown:
Quest ORANGE (1" Stretch Cobalt) with a Quest A6-4. I've mentioned before how loud the Quest engines are, it actually echoed in the soccer field. Estimated altitude 300'.
The parachute easily pulled out of the hollow nose cone shoulder for a flawless recovery.

Estes Gyroc Build Part 7, Gluing the Flip-Flap

Before going any further, read this post regarding corrections to this step:
HERE

Things get vague in Step 6 of the old Estes instructions.
They don't specify how far up to glue the "flip-flap".
(Really, they called it a flip-flap!)

You've got to allow for the friction tab and the drawing does show the root edge hanging over the body tube end.
I set the tab on the fin side and guessed!
The instructions don't say where to apply the glue. I have to wonder how many of these were built with the root edge of the flap glued to the body tube.
On the right side of the picture I've folded the flap and will only apply glue to the root edge above the fold line.

More vague instructions:
The launch lug is trimmed and glued to the line between the flip flop fins. How high? Who knows!
I guessed after looking at the pictures and set it 1" from the end of the body tube.


With the flap taped down the main fins are glued on their pencil lines.

Because the fins are large - 
You are best off using the double glue method and not much glue.
Get the large fins to tack in place, be sure they are straight then add white glue fillets.
Considering when this kit came out, I thought the next step was pretty clever.
The width of the tube marking guide is used to set the rudders.
Instead of holding the marking guide and gluing the fins on, I decided to use the side of the marking guide to draw a gluing line with a pencil.

For an even better alignment, the back of the marking guide was cut off at the same angle as the fold of the fin.

Sunday, December 22, 2013

Estes Gyroc Build Part 6, Wing Hinges


Tape the two halves of the wing together. Line up the root edges on a straightedge.
The two wings flip in opposite directions, but tape both wings facing the same way.
When the wings are set on opposite sides of the body tube they will flip correctly.


Before setting down the sticky hinges, wipe down the hinge area.
You don't want any sanding dust, the tape won't stick very well to sawdust.


The center of the hinge strip was marked with pencil. These marks will go right over the joint.

Don't set the hinge down with your fingers. Any oil or dust will diminish the stickiness of the hinge.


Burnish the hinge with the end of a Q-tip.
The Q-tip won't scar or dent the balsa.


Remove the masking tape from the other side of the hinge.
Make sure the two flat edges are even then fold it over and make a sharp crease.

Estes Gyroc Build Part 5, Nose Cone and Lug Prep


The nose cone and body tube joint were already filled with CWF.
The nose cone is rounded and blunt for a good reason, the rocket lands nose first.
The nose cone was toughened up with a coat of medium CA.
After it dried it was smoothed over with 400 grit.


In an optional step you can trim the launch lug ends. The instructions say: "Trim if desired"
The angle cuts on the instructions were extended with a pencil line.
The lug was set over the instructions and the cuts made with a new razor blade. Try not to crush the lug when cutting the end angles.


Sand the cut ends with 400 grit on a block.

When you sand a lug ends the outside Mylar skin will roll over.
Pick it out of the lug with a toothpick and sand it off.

Saturday, December 21, 2013

Estes Paveway III Finished


This one was part of the Estes Enduring Freedom series from 2003.

An interesting build.
I took a small gamble using a decal over the semi gloss upper body but there as no silvering on the decal.
There were a few adjustments, from cutting down the upper body tube length and drawing up decals to avoid using the stick-ons. It still needs a clear coat.

Estes Gyroc Build Part 4, Balsa Truing and Filling

Edit: Don't sand the root and outside edges even like I did! The flap (lower fin) is not as wide as the upper fin. Line up the outside edges and the root of the rear flap fin will be raised to clear the body tube so they can flip!
See this correction post HERE

After gang sanding the like parts the root and outside edges didn't match up. The fin set on the left is before sanding and evening up the sides.
On the right is the large fin pieces, taped together and after sanding.


The fin edges were sanded flat on a block with 220 grit sandpaper.
The fin stock is 1/16" thick. You don't see 1/16" thick fins on models anymore.
Some forum posts have talked about balsa warping when the applied CWF dries.
The balsa will warp down the grain lines when only one side of the fin is drying. When the other side is painted the drying filler counteracts the warp and the fin should end up flat.

Just to be sure, I set the fins in a heavy book when the filler is about half dried.
This is a side view of the root edge of the four wing pieces.
All are flat and straight.

Friday, December 20, 2013

Estes Gyroc Build Part 3, Hinge Cutting and Prep


The tape hinge material is "pressure sensitive" paper.
It's just sticky paper with a removable backing.

I'll cut them from the left over borders from a CD label.


Some extras were cut, I always make extras.


The nose cone will be glued in place and the joint seam filled.
I went ahead and sanded the shoulder to better match the body tube diameter.


All the leading and trailing edges of the fins were rounded.
The straight sides at the hinge were left square.