Sunday, November 20, 2016

Estes Mini Max #2445 Build, Part 5, Ends and Edges


One side of the BT-50 tube was a little out of round.
I decided to glue the engine mount in the ovaled side so the centering rings would form it back to a perfect circle.


To place the glue for the engine mount, cut a strip of balsa from the fin stock.
Always hang onto the excess fin balsa. I have used it in the past for other things like a launch lug standoff.

The nose cone have small nicks along the shoulder edge. These could have been left when the pieces were broken off the molding trees.

I placed a small drop of medium CA glue in the torn hole being careful not to let the glue run down and over the shoulder lip.
The inset picture shows the area after sanding. The nick is filled.

Estes Mini Max #2445 Build, Part 4, Engine Mount


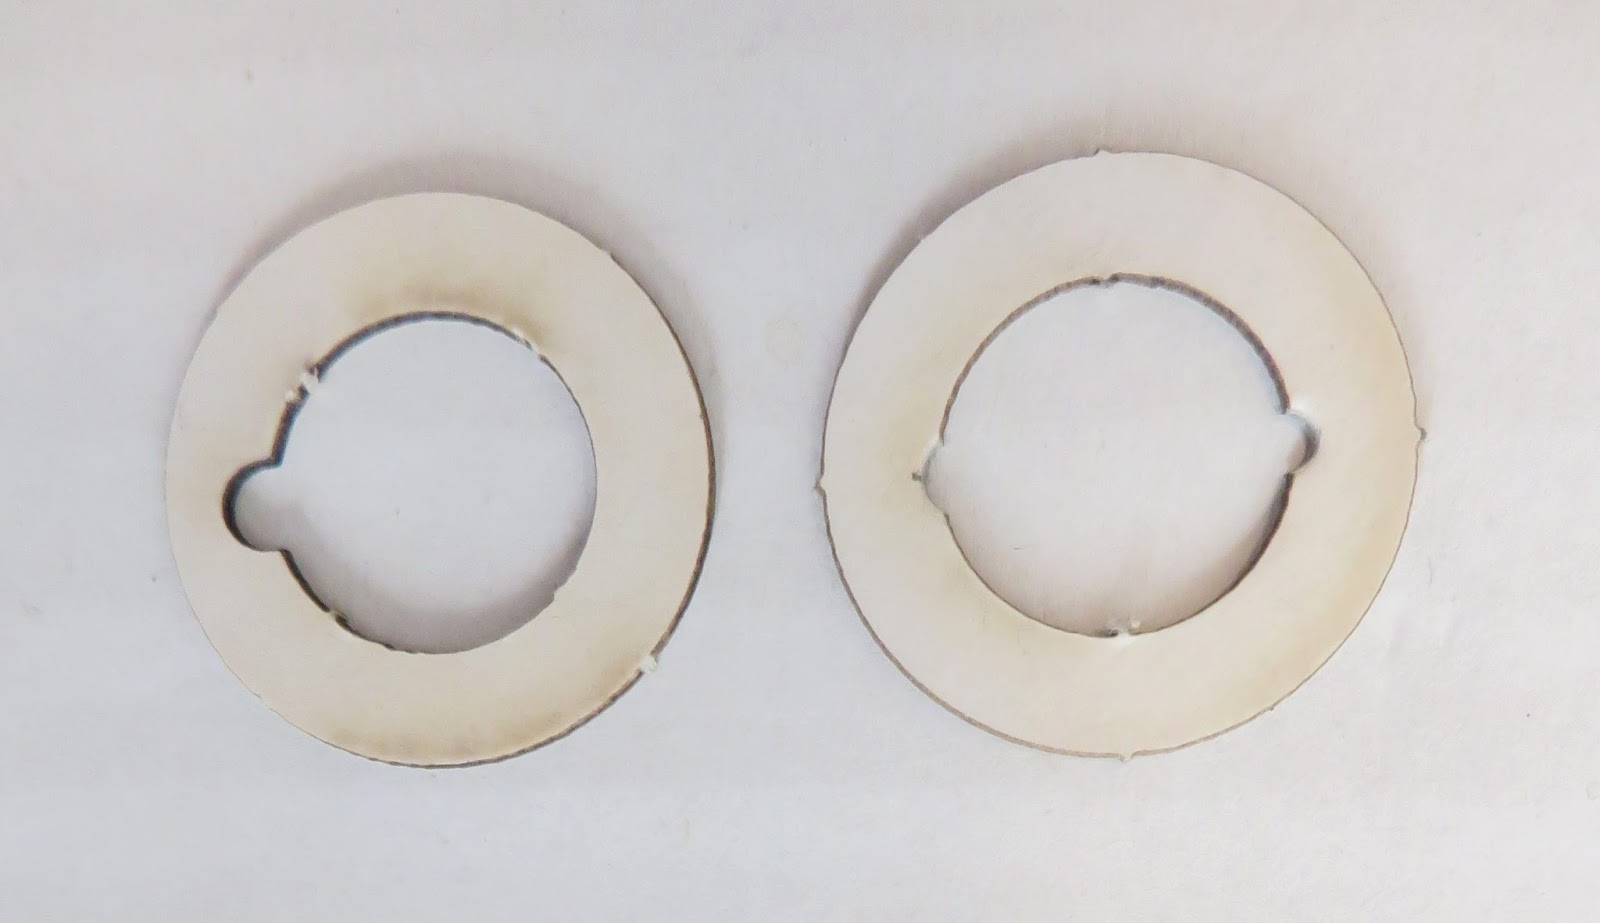
I used the rotary punch to make a engine hook relief notch and a small hole for the Kevlar line in the upper ring.


Here's how the centering rings look after the punches.
The lower ring is on the left, upper ring is on the right.


And, the finished engine mount with the Kevlar line tied on.

Saturday, November 19, 2016

My First Rocket Launch - 1969

My "first" was a night launch.
I was raised in California. In 1969 you couldn't buy engines without a state issued special permit.
We'd order rocket kits from Estes and Centuri, but no engines.
At the time I received the Johnson Smith catalog ("It's fun to get stuff in the mail!")
Johnson Smith always advertised X-Ray Specs and the throw your voice "Ventrillo" on the inside front cover of comic books. At that time they sold M.R.I. starter sets and engines.
At the bottom of the rocket listing it always stated: "No engines shipped to California, Oregon, Washington state or New Jersey."

One year the Johnson Smith catalog didn't have California listed as a prohibited state. The other states were still there. This was before the state had lifted the restrictions on engines. A mistake?
I ordered some engines. Not knowing what to get, I ordered three A3-2 MRI engines.

We got to the school yard field after dark and loaded up an Estes Streak on an old style Electro Launch.
The launch button was pressed and held down for some time. The igniters then were bare nichrome wire. We all looked at each other with an expression of: "Well, is it going to fly?"

As soon as we turned away it did. We thought it would be a slow, NASA style launch, not a hiss, flash and some sparks.
We ran scared underneath the school building awning and waited. It was a real adrenaline rush! We didn't hear a thing, no ejection or landing. It was too dark to look for it, we went home thinking it was lost. One of the boys found it the next day before school.

For six years that after that I launched 1/2 A through D engine rockets in that same schoolyard. I even launched a single Enerjet Nike Smoke there with an E24 engine. There was a fence around the property but the gate was always open. After some vandalism the gates were locked after school hours and weekends.

Estes Mini Max #2445 Build, Part 3, Engine Mount

I cut off the finger tab. On a model this small with the finger tab extended far out the back, it might not stand upright on the fin tips.

On the left is the upper bend. The sharp corners have been rounded off with a file. I knock off the corners slightly for easier insertion of an engine. This will be flipped over and be at the bottom of the mount.
The inset picture is the cut off finger tab. This end will now go to the top just under the engine block.


The engine mount tube surface is rough. It doesn't seem to have a glassiene coating.
Here its marked for the centering rings.
This end is the bottom, it got a coat of medium CA glue for strength.


This is two of the lower centering rings.
The one on the left is burnt more than the right side.
TIP: Turn over and use the cleaner, whiter side facing out or to the bottom of the rocket.

Friday, November 18, 2016

Plugged Indicator Adaptor?


I really like the looks of the mini engine Indicator #7244 from Estes. It really calls for two stage gap staging.

There is a plastic adapter at the base of the upper fins joining the BT-50 lower tube and BT-20 upper tube.
On the NAR Facebook page, James Helman noticed the adapter: "This is the transition between the two body tubes...but as you can see the top of it has that little thing usually used to tie a shock chord onto...does enough pressure from the ejection charge go thru that little hole to deploy the chute?"

John Boren from Estes responded: "James, there is plenty of area there for the ejection gases to pass through to eject the recovery system. I've never had it not work yet."

The instructions show both tubes glued into the adapter. The small parachute is ejected at the nose cone joint: CLICK HERE


If I were building the kit I'd cut off the flat adapter top with the shock cord tie loop. That's me - old school, concerned about enough of the ejection charge getting through the small sides of the shock cord tie loop. 
I remember this illustration from the 1971 Estes catalog. 

Who knows, maybe the redirected venting might act as a baffle. Well, until the ejection heat melts through the plastic adapter top. 

Estes Mini Max #2445 Build, Part 2, Nose Cone Prep

At the top is the current version of the PNC-60AH nose cone in the Red (Pink) Max kit at 6.7".
The inset shows the Mini Max nose cone. About 3 1/8" is exposed.

It turns out the Mini Max nose cone is not a true downscale. It should be closer to 4" long.


The nose cone shoulder is different.
The vertical friction fit bands give an adjustable fit allowing you to sand the ribs if needed.

On this nose cone shoulder the ribs are wider at the bottom.


The nose cone tip does need some cleaning up.

The after in shown in the inset picture. There were no side seams on the injection molded nose cone.

Thursday, November 17, 2016

R.I.P. Dave Bucher

From Blake Goddard's NAR Facebook post:

"So last night was a very bittersweet night for me. I got together with a group of friends commiserating on the loss of my best friend, Dave Bucher. He passed away yesterday in his sleep. If there was a way to go, we could not ask for better. This man taught, encouraged, loved and lived with a strength few could muster. He lived, worked, and played hard. He was fiercely loyal, not only to his friends, but on his convictions as well. A master carpenter, an expert model maker, and a luthier extraordinaire, I will miss your class, learning from your techniques, and your sound opinions in rocketry. Have a good rest my friend and know that we who are left will miss you and will think about you. Your knowledge has been passed onto others.

We will be setting up a Go Fund Me page for his wife to help with expenses. We will also be holding a launch in his honor next June at his wife's request.
He was very active on here and loved showing his work and helping others move forward in this craft."

Dave Lucas and Dave Bucher both bought the rights and remaining inventory of Flight Systems Incorporated. They were in the process of bringing back kits under the FSI name.