Saturday, October 31, 2020

Estes Asteroid Hunter #3224, Build , Part 1, Parts


Lots of new parts, some of the plastic pieces may to have been molded for just this design.
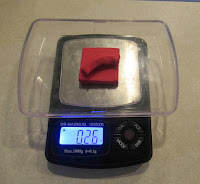
The main (internal) body tube is a BT-50. There are three clay packets for a total nose weight of 3/4 oz.
Four sheets of laser cut balsa! Many of the balsa pieces make up the internal body structure.

Parts of interest:
A small bag holds the white plastic detail pieces.
A good sized sheet of water slide decals.
Two card stock sheet "skins"
I understand new molds were made for the nose cone / nozzle piece. The shape is based on the nose cone used in the 1982 Attack Craft Orion and alsi used the more recent Cobra kit. 
To see the Older Orion design: CLICK HERE  

Friday, October 30, 2020

Estes Asteroid Hunter #3224, Build Background


The Asteroid Hunter was available from 2012 through the 2016 catalog.
I remember seeing it in the Sport Rocketry magazine when it was being developed by John Boren. The magazine picture showed a prototype. This was one of the new Level 5 builder's kits. 
I was interested in building it, but was concerned there was only one recommended engine, the C6-3. Now with the new Estes C5-3 and 18mm Quest Q-Jets I started to track one down.

I found and ordered an Asteroid Hunter kit online from a School Supply Company. I never got a confirmation email. I waited for the package to arrive - nothing. My account was charged!
I called the bank, they followed up and got me a refund.

I kept an eye on some Ebay listings and bought the kit for a reasonable price.

I made a blog post about the failed mail order and heard from three different hobbyists offering to donate a kit to the blog. I was surprised and thanked them for their generosity.
Get ready for one of the more interesting blog builds!

Thursday, October 29, 2020

Estes Starliner (#0863) Build, Finished


As I mentioned, this was a clever and involved design. The build is made more complicated as the finished model is on the small side.

From the back end you can see the intake engine boxes and the angle of the elevators.

The engine mount is actually centered better than the picture shows, the camera was a little off center.


No decals are on the bottom. I would have liked to see at least the elevon line decals here. 


You might recognize the canopy window decals. These were used on the Orbital Transport, printed in black.
The same body stripe colors and stylized "E" on the rudder was used on the Estes Deep Space Transport kit.

Wednesday, October 28, 2020

Estes Starliner #0863 Build, Part 11, Decal Placement


The elevon decals should retain the same spacing from top to bottom.


Before setting down the long window decals, set the canopy decal on the nose cone.


The stripe decals start and center at the nose cone tip. Bear in mind, the second longer strip end is set into the open intake. 

Notice how the ends of the front door strip and longer rear window strip but up against each other at the nose cone / body tube end.


Here's how the end of the window strip slips into the front of the intake.


I don't usually use a clear coating, but will use some Future to seal the open end edges.


The clear edge overlaps were trimmed off with a razor blade. 

I also used some Future on the edges of the elevon decals. The ends might lift without the extra adhesion.

Tuesday, October 27, 2020

Estes Starliner #0863 Build, Part 10, Final Assembly & Nose Weight

Use the drawing in the instructions to set the angle on the elevator root edge.

At the top of the picture is the flat side of my sanding block. Set the fin at the angle on the drawing for an angle reference against the sanding block.

Sand a mirror image angle into the right side elevator.


Left: The view from the rear with both elevators glued on.


Right: The view from the side.


The entire model is sprayed gloss white, lightly sanding between coats.

Hooray - No masking on this one!


The nose cone gets some clay weight.

The kit included one pat of clay, those typically weighed in at .25 oz.

Monday, October 26, 2020

Just So You Know . . .

I'm aware that the blog page format is screwed up again.
Thanks for letting me know by email - 

I have written and complained. 
Let's hope it is a quick fix.

Estes Starliner #0863 Build, Part 9, Wing & Intake Fitting


With the wing dry fitted, a pencil line was drawn where the rear win extensions touched the body tube.

Some 400 grit was wrapped around a dowel and the pencil line sanded off. This removed some filler/primer for a better glue bond. 


The inside edge (root edge) has to be sanded at an angle to fit against the body tube. This took a few tries to get the right angle. Don't sand off too much or you will end up with a gap.


The intake contact points were marked with a pencil. The filler/primer was sanded down as before for a better glue bond.


Here's a pretty good fit of the intakes with a tight contact through the wing slot and against the body tube.


With everything glued in place - here's the view from the rear.

The vertical stabilizers are actually straighter than the camera distortion shows.

Sunday, October 25, 2020

Estes Tazz - Post Flight


Last week I launched my Estes Tazz for the second time.
I didn't notice any damage until I got home.

On the right you can see the paint cracking along the hinge line. I expected this to happen over time. My old Gyroc had a paint crack down the hinge.


This concerns me though.

The new Tazz has a body tube slot for a thru the wall tab. The tab is on the upper half of the root edge of the wing/fin.

The ejection charge broke through the glue fillet and made a small tear in the body tube.

Keep this in mind if you build one - make those fillets strong!

Estes Starliner #0863 Build, Part 8, Engine Mount Gluing & Wing Fit


I had to go back and re-cut the long slot to fit the wing. I just wasn't happy with the way the first try came out.
This time is slid in two used engine casings for better support when cutting into the tube.


The engine mount is glued into the tube with the flat side of the centering rings lined up in the slot.

TIP: I slotted a scrap piece of BT-20 tubing to wrap around the open slot and keep it closed around the centering rings.


Here's a better fit of the wing in the front of the long slot.

Saturday, October 24, 2020

Blog Builds In Order -

I know the blog search function isn't perfect - Eleven years and too many posts might make a certain build hard to find. And when you do find it, the build goes from finished model to start!


Roger from Rocket Reviews reminded me in a comment:
RocketReviews.com includes an index of rocketry blogs including the Model Rocket Building Blog. 
The index makes it easier to find articles on specific topics and lists them in the correct build order

For example, to see a list of the posts in order for the Estes Honest John build,
type: Honest John Blog in the Search window on the upper right side of the home page.

Hit Search and you'll see this:


Down, 


down, 


down . . .


Down here - 
Look for the little red rocket and the words Honest John and "Model Rocket Building Blog"


Click on that title and you'll get a listing of all the steps, in order.
The title descriptions should take you to any steps where you might have questions. 

It 'ain't perfect, but this could help you find what you are looking for!

Estes Starliner #0863 Build, Part 7, Decal & Template Draw

I redrew the deals and fin patterns.
The decals are available online but I wanted a cleaner original print.

Interesting to notice the canopy decal is the same used on the Orbital Transport. It was also used on a few other kits.

The decal PDF is available to Patreon support members. Email me at: oddlrockets@bellsouth.net and ask for the Starliner Decal PDF.

Friday, October 23, 2020

Estes Starliner #0863 Build, Part 6, Wing Fitting


The sides of the intakes are glued onto the vertical stabilizers. I used my angle to be sure they were 90 degrees to the stab.


In Step 11 of the instructions show the wing dihedral. With one half of the wing on the table, the wing tip is raised to 1" high. 


For a good fit of the wing sides, you'll need to sand an angle 
into the root edges.


To better see what I was sanding, the root edge was marked with a soft pencil. Keeping an eye on the pencil marks as you taper the edge with a sanding block.


I used a pencil under the wing, raising the tip up to a height of 1".


After the glued dried, the joint was filled with some CWF.

Thursday, October 22, 2020

Estes Starliner #0863 Build, Part 5, Fin Fitting


My fins were hand cut from 1/16" balsa.

I used the corner of my metal ruler to be sure the inside angle was at 90 degrees.


The illustration from the old instruction sheet shows how the wing and intake sides are glued up.

Double check the rudders and engine sides to be sure of the front angle orientation. You should have two assemblies a mirror image of each other. 


I slide a scrap piece of 1/16" thick balsa into the slot to be sure the spacing was correct. Remove the scrap so it doesn't get glued into the slot.


Here's the two rudder and engine side pieces glued up. Like I mentioned, be sure the side pieces have that front angle correct.

Wednesday, October 21, 2020

Estes Starliner #0863 Build, Part 4, Slotting For The Engine Mount


The older instructions show how to sand the "flats" into the centering rings. I don't remember ever seeing this any other model rocket kit.


The Wing Saddle Template is cut out and wrapped around the BT-20 tube.

Trace around the outside top and mark the arrow points with a pencil. Connect the arrow points with a straight line using an aluminum angle tool.


Using a new sharp knife blade - 
Carefully cut out the slot. I used the aluminum angle again for a blade guide cuts down the long sides. 

The instruction drawing (above) shows a sheet of sandpaper set down on the work table to sand the flats into the centering rings. I find more control using a sanding block.

Notice the flats are sanded directly opposite the engine hook.


Sand a bit and check the centering rings. You don't want to sand into the engine tube. 

Stop when you see the tube starting to show through when the rings are reduced down.

Tuesday, October 20, 2020

Estes Starliner #0863 Build, Part 3, Engine Mount


The upper ring is slotted for the Kevlar line to pass under.

The original instructions have you use a tri-fold mount, but I find them too thick on BT-5 and BT-20 based models. A Kevlar line tied to the engine mount won't block the ejection of the parachute.

Note the wrap of electrical tape, the pictures are out of order - this engine hook retention is explained below.


This is the top of the mount.
The kit didn't include an engine block, I feel better about the mount with a block inside.

A glue ring was set in using a Q-tip.
An expended engine was used to push the engine block squarely into the tube. Sometimes an engine block can go in crooked when it hits one side of  the engine hook.


There was no engine hook retention ring in the original kit. The engine hook doesn't sit flat against the tube.

I added a wrap of electrical tape to hold it down.


Here's the finished mount with the three upgrades - Kevlar, engine block and hook retention.