Showing posts with label E Dragon Ship 7. Show all posts

Sunday, July 1, 2018

Estes Dragon Ship 7 #1345, Finished


This was an involved build. Fin patterns and decals were redrawn. (I can send out fin patterns and canopy PDF but the decals are not available.)
The decals took over 7 1/2 hours to apply!
The finished look is good, I was very happy with the nose cone and body black blends.

Thanks go to SCIGS30 and his 2017 build posted on TRF.
My printed JimZs instructions didn't show clear decal placement. SCIGS30's finished pictures gave me a good idea where the decals went!
Here's his build: CLICK HERE

Friday, June 29, 2018

Estes Dragon Ship 7 #1345, Part 21, Nose Weight

Here's an example of what can happen when trying to research a complex clone build - 
I knew there was clay weight added to the nose cone, but didn't know how much the kit clay weighed.
I went to the old Semroc.com website and clicked on the "Classics" button on the right side.

Scroll down to 1980 - 1981 to find the Dragon Ship 7.
If there is small parts icons in a blue box to the left, click on that and you'll get a parts list.
To see the parts page - CLICK HERE The clay weight is near the bottom -


Semroc says the part name is CB-M4. Apparently "C.B." is an abbreviation for Clay Balance. The CB-M4 clay weight shown here is 6g or .21 oz.

Next, the old Estes Custom Parts Catalog CLICK HERE but couldn't find any clay weights. There are lead weights and washer weights with the prefix - NCW-1, 2, 3 and 4. If the numbers are still consistent, the clay CB-M4 weight should be .354 oz.

On the left is the 6g or .21 oz. clay weight. It seems pretty small.
There are small forward fins on this model, I'd feel better if there were more nose weight.
On the right is the NCW-4 weight equivalent of .35 oz. I'll play it safe and go with the larger nose weight.

The current Estes Clay Nose Cone Weight package #3180, contains 10 pats of clay, each one weighs approximately .25 oz.

Sometimes cloning is a guessing game. You hope the parts list and online scans are correct. Maybe the Semroc parts page listed the wrong nose weight?

EDIT: Check BAR Geezer's comment below. The #82560 clay weight ends up being 6 grams or .21 oz.! After the finished weigh-in, I may launch this one with a C6-3.

Thursday, June 28, 2018

Estes Dragon Ship 7 #1345, Part 20, Fin Decals, Fin Fit and Parachute


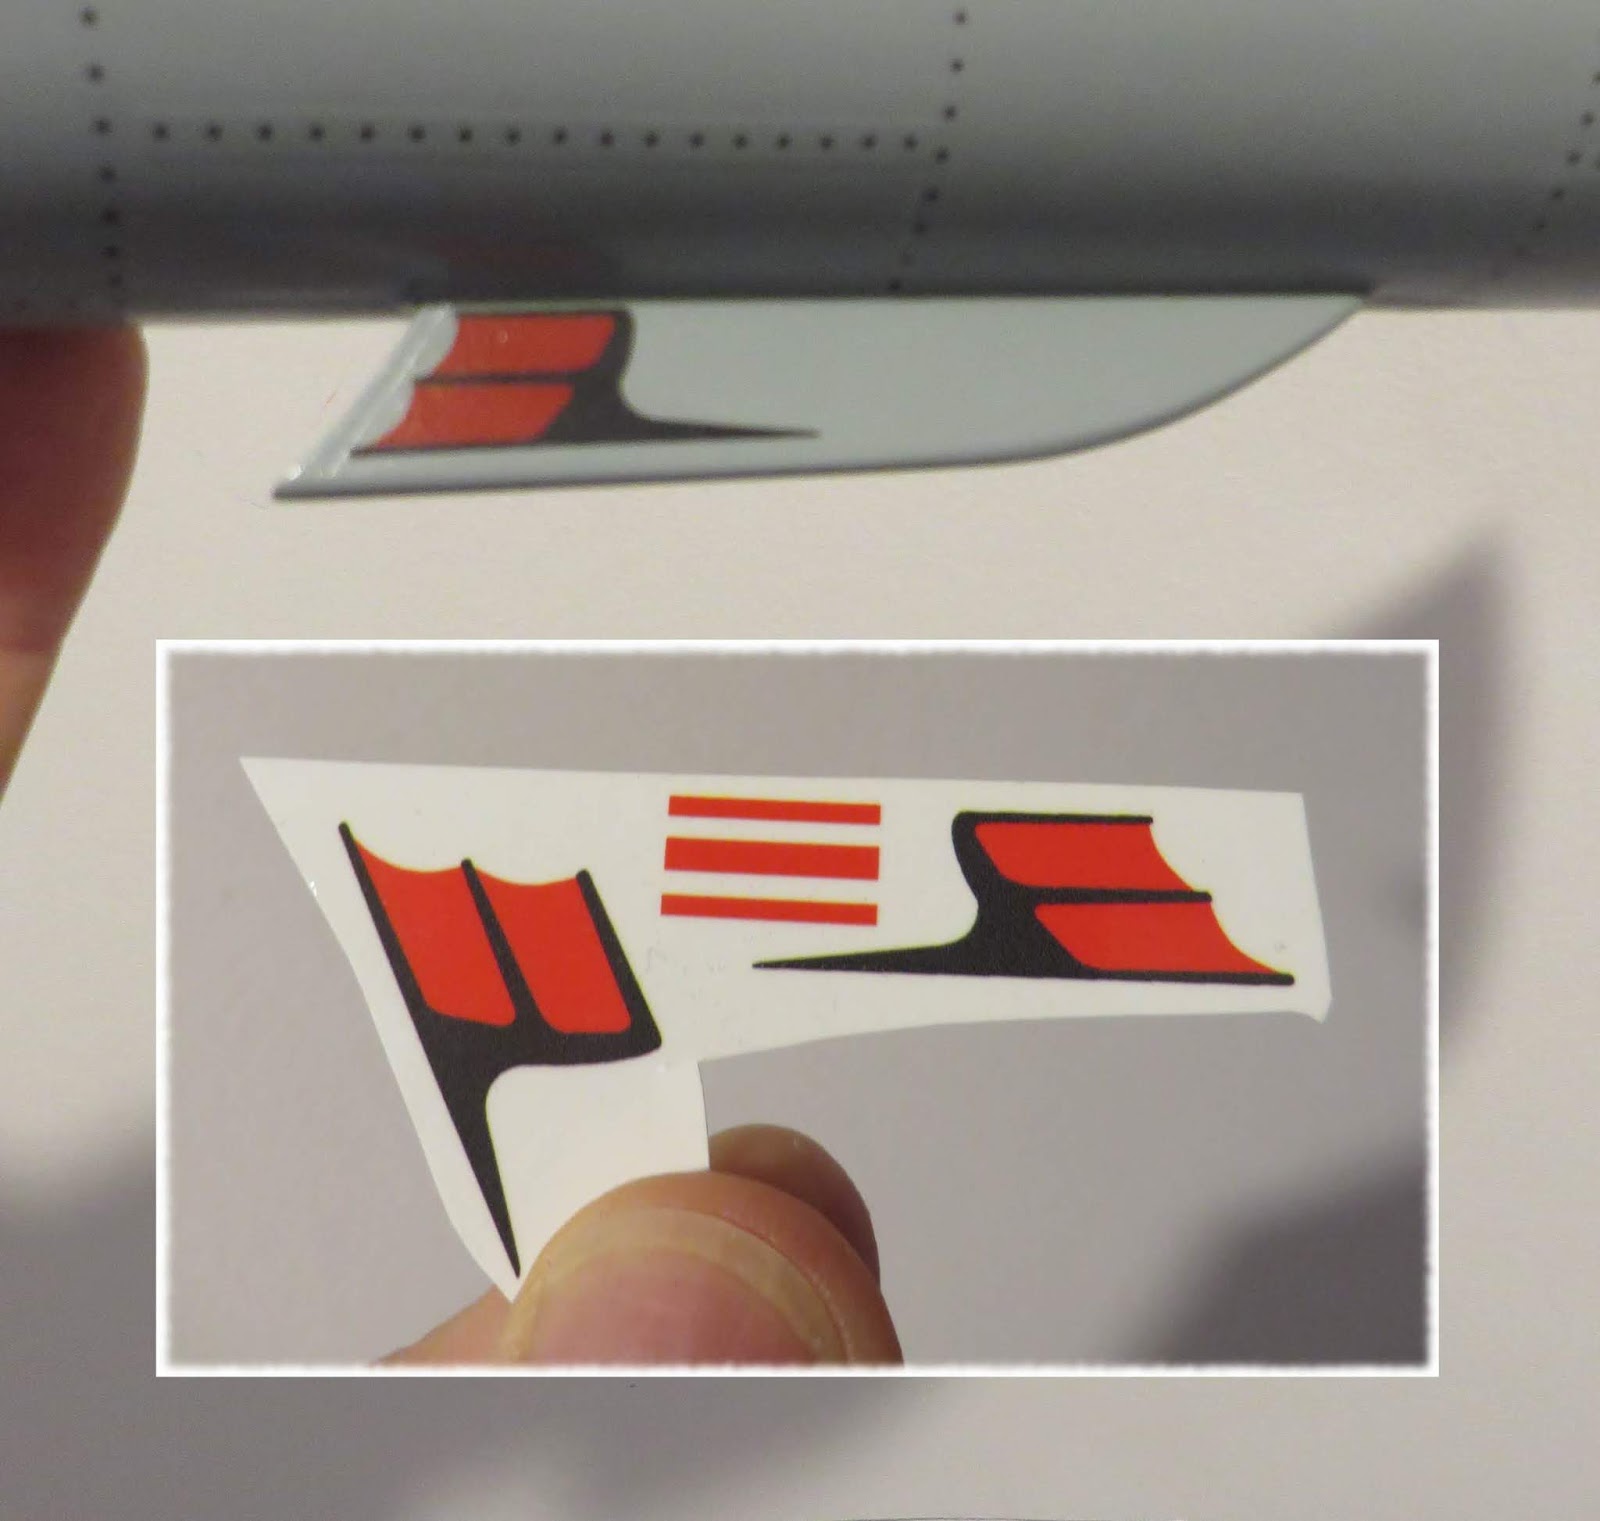
The removable fin was slipped on to align the rivot decal lines with the other fins.

I used a dry strip to check the angles so they were consistent with the other fins and straight out from the lines on the body tube.

In a June 15 comment, Scott Johnson asked for pictures of the detachable fin off and on the body.

Here's the hook fin by itself, it was masked off to allow the gloss finish to remain. The smoother paint makes it easier to slide on the fin.


The bottom in place. Decals and a dull coat applied.


I took an 18" parachute from one of the Estes clearance kits I bought a year ago. These newer parachutes have a vintage look.

This model might be entered in the NARAM Classics event. Even though the original kit had a 1980s print chute, I wanted the parachute to look more traditional.

Wednesday, June 27, 2018

Estes Dragon Ship 7 #1345, Part 19, Engine Mount and Nose Cone Paint


I took a longer than normal dowel to apply a glue bead for the engine mount gluing.
Towards the bottom of the dowel is a pencil mark for a glue depth gauge.


From the rear, the engine mount is glued in place.
The engine hook is in line with the bottom removable fin.


This picture was posted earlier showing the difference in opacity between the black nose cone and the black wrap decal.
I wanted both of these blacks to match in density.


A mask template was cut out of paper, traced from a decal print.

This crescent shape follows the half wrap decal at the black / maroon color decal separation.

No sticky tape was used at the mask line, just the paper wrap. Sticky tape might lift the decal. Note the paper wrap mask is a double thickness. The Metallic Black Rusto paint is thin so two layers of curved, cut white paper were used. The mask edge is almost a very small blend.

When spraying the paper mask I was careful to shoot the paint directly above the paper line so no paint could go underneath.

This mask was a risk but it turned out better than I thought it would.

The Metallic Black also matches the black on the guns half way down the body.

Monday, June 25, 2018

Estes Dragon Ship 7 #1345, Part 18, Back To It! Fins and Guns


Before masking off the removable fin root edge, the raw edge balsa got a "sealant" wipe of medium CA glue and very light sanding.

The bottom removable fin had the curved root edge masked off for the gray spray paint.

Before spraying the model an overall dull coat, The "hook" fin was masked off, leaving it with a gloss finish. I figured the smooth paint would allow an easier slip fit of the removable fin.
This mask line at the root isn't really critical, I used regular brown masking tape.

After the dull coat dried -

The launch lug guns had the paint scraped off for a better bond on the stand-offs. These were glued on to line up with the flame decals coming off the front.


Before gluing in the engine mount, the back end of the main body tube got some black applied with a Sharpie.

The rear engine mount centering ring is recessed about 1/16".

Wednesday, June 20, 2018

Estes Dragon Ship 7 #1345, Part 17, Almost Finished

My California trip threw a wrench in my build and blog post schedule. Here's where the Dragon Ship 7 is right now.
That bottom "hook" fin is being sprayed gray. The instructions don't say anything about rivet decals, but they'll be added to matche the other fins.
The model will get a overall dull coat. The silver engine mount will be glued in after that.


I hope to keep the nose cone gloss black. The black area on the front wrap decal should also be gloss black to match it. The launch lug guns won't be glued on until after the dull coat so they will remain gloss black.
I'll follow up with finished pictures soon.

Monday, June 18, 2018

Estes Dragon Ship 7 #1345, Part 16, Decal Fix


The decals were printed small and the top wrap didn't go completely around the body tube.
A strip of paper was wrapped around the body tube to get the circumference. That length was used to get the decal wrap close to the original length.

I hadn't sealed the decals so they were easy to lift.


Here's the new decals, a near perfect fit. Look close and your see there is a bit of clear extending over the top of the body tube.


After the decal dried the clear overlap was trimmed off with a razor blade after the decal dried.


I used a Sharpie marker around the nose cone shoulder lip so no white plastic would show with it slid into the body tube.


Saturday, June 16, 2018

Estes Dragon Ship 7 #1345, Part 15, Gun Trim

The masking tape strip on the launch lug gun standoff was lifted. The paint lip was sanded smooth.

The guns were painted metallic black instead of just gloss black.
The clear red decal stripes won't show up over black paint so strips were cut from chrome Monokote trim.


Here's how the guns will look set over the flame decals.


I thought this might happen, the ends of the trim strips lifted after an hour.

A small drop of medium CA was set on the seam area. The ends were pressed into the glue until it set up. The seams are all in line and will face the body tube, out of sight.

Friday, June 15, 2018

Estes Dragon Ship 7 #1345, Part 14, More Decals


The wing decals are slightly different size. Be sure to check the width of the rear skid fins. The get the wider wing decal. The smaller wing decal goes on the dorsal fin under the canopy.


Here's where I realized the decals printed small.
The two piece front tube decals didn't match up!

By now I'm annoyed. I'm going to leave all the other decals in place and reprint the front tube decals a bit larger.

Even with the decals a bit small they still look okay. There is more border around the edges of the wing decals.
All the root edges get a rivet line decal. The dots had to be pieced together around the canopy.


Here's how it came out. The red/orange isn't as bright as the kit decals would be. Those had a white background. Heck, it's a clone. There are usually compromises on a scratch clone. It still captures the feel of the original with the different red/maroon coloring.

I kept track of how many decals were applied. So far - 
88 decal pieces! These decals took 7 3/4 hours! 
I thought the Estes Interceptor was rough, those decals took 4 hours. 
There are still rivet lines to go on the detachable fin.

Thursday, June 14, 2018

Estes Dragon Ship 7 #1345, Part 13, Rivet Line Decals


There are lots of rivet lines on the model.
Measure and cut one to size. You can cut a second decal to the same length. When fitting decals between the fins you will always have two equal lengths on either side of the fin.

The rivet lines are small and narrow.
Use tweezers to dip the decal in water. Don't let it sink to the bottom of the glass.
TIP: Hold it with the tweezers then float the decal on the top surface of the water. It's easier to pick up if it is floating at the top.
Let soak for about 15 seconds, then let if set on a paper towel for a half minute before trying a transfer to the body.


Where I could, a wrapped strip of paper was used to help set the rivet line straight.


This is not an easy model to trim. Getting the rivet lines between the fins took time.
I was starting to figure out why this model was only in production for two years.

Wednesday, June 13, 2018

Estes Dragon Ship 7 #1345, Part 12, Paint!

The model got an overall shot of gloss white and some smooth sanding. This was repeated two more times.

I tried to find a lighter gray than what I had on hand. I took the plastic cap from a can of Rusto 2X Gloss Winter Gray to Hobby Lobby, and looked through all the Tester's Master Modeler colors. There was no lighter gray paint.


A trip to Lowe's, then Home Depot - no luck.
I was concerned the home print decals would come up too dark against the gray color.
I had some spare red decals left over from the Saros build. The transfer on the gray paint looked good, ending up a sort of red/maroon.


Earlier on, the instructions tell you to scribe pencil lines onto the tube for easier decal placement. These slight indent lines are still visible after the model is painted.

I didn't want the lines on the model. I figured I could measure the 2" spans and line up the decals by eye.


There are a LOT of rivet dot decal lines on the model.
This might be one of the first steampunk model rocket designs.

Tuesday, June 12, 2018

Estes Dragon Ship 7 #1345, Part 11, Nose Cone Weight


The Semroc parts list shows a clay nose cone weight. It's listed as the original parts number CB-M4 at 6 grams.
Notice this is the "4" designation.


Looking at the Estes Custom Parts Catalog, nose cone weights are listed as NCW-1, NCW-2, NCW-3 and NCW-4.
The heaviest one is the NCW-4 at .354 oz.


6 grams of clay weight equals .21 oz. With the forward fins it didn't look like this was enough weight.
I played it safe with the NCW-4 weight at .35 oz.
This is a guess on my part.

Monday, June 11, 2018

Estes Dragon Ship 7 #1345, Part 10, Removable Fin Fitting


You can almost see the curvature sanded into the root edge of the bottom removable fin. Earlier the side pieces were glued on a little higher than the root edge of the center fin. This allowed me to sand the curve without reducing the fin height.


The instructions have you glue the front of the "hook" fin (auxiliary fin attachment lug) at 2 1/8" from the rear. On my build it didn't leave the trailing edge (of the removable fin) in alignment with the end of the body tube.

I glued on the hook fin so the tapered box was even with the end of the body tube.


Here's how the bottom fin slides on.

In a Rocketreviews.com article, the builder said his removable fin fit was tight. It has to be tight enough to stay on at ejection, but also easy enough to remove for display.
I'll be careful with the paint layers when finishing the rocket.