Thursday, September 30, 2021

Estes Super Mars Snooper #7309, Build Part 19, Black On Lower Body

I thought I would have more control spraying the engine vanes area separately.  There are a lot of inside surfaces that needed to get black paint coverage. 
The upper shroud (between the fins) is also black and will be painted afterwards.

With Florida Summer humidity, the gloss black dried flat on the shroud areas. 


Sometimes you can polish up a humid dull finish to a shinier surface.

Some automotive polishing compound was applied and rubbed of with a Q-tip.
Any remaining white residue was brushed out with a chip brush.

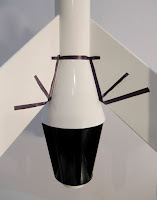
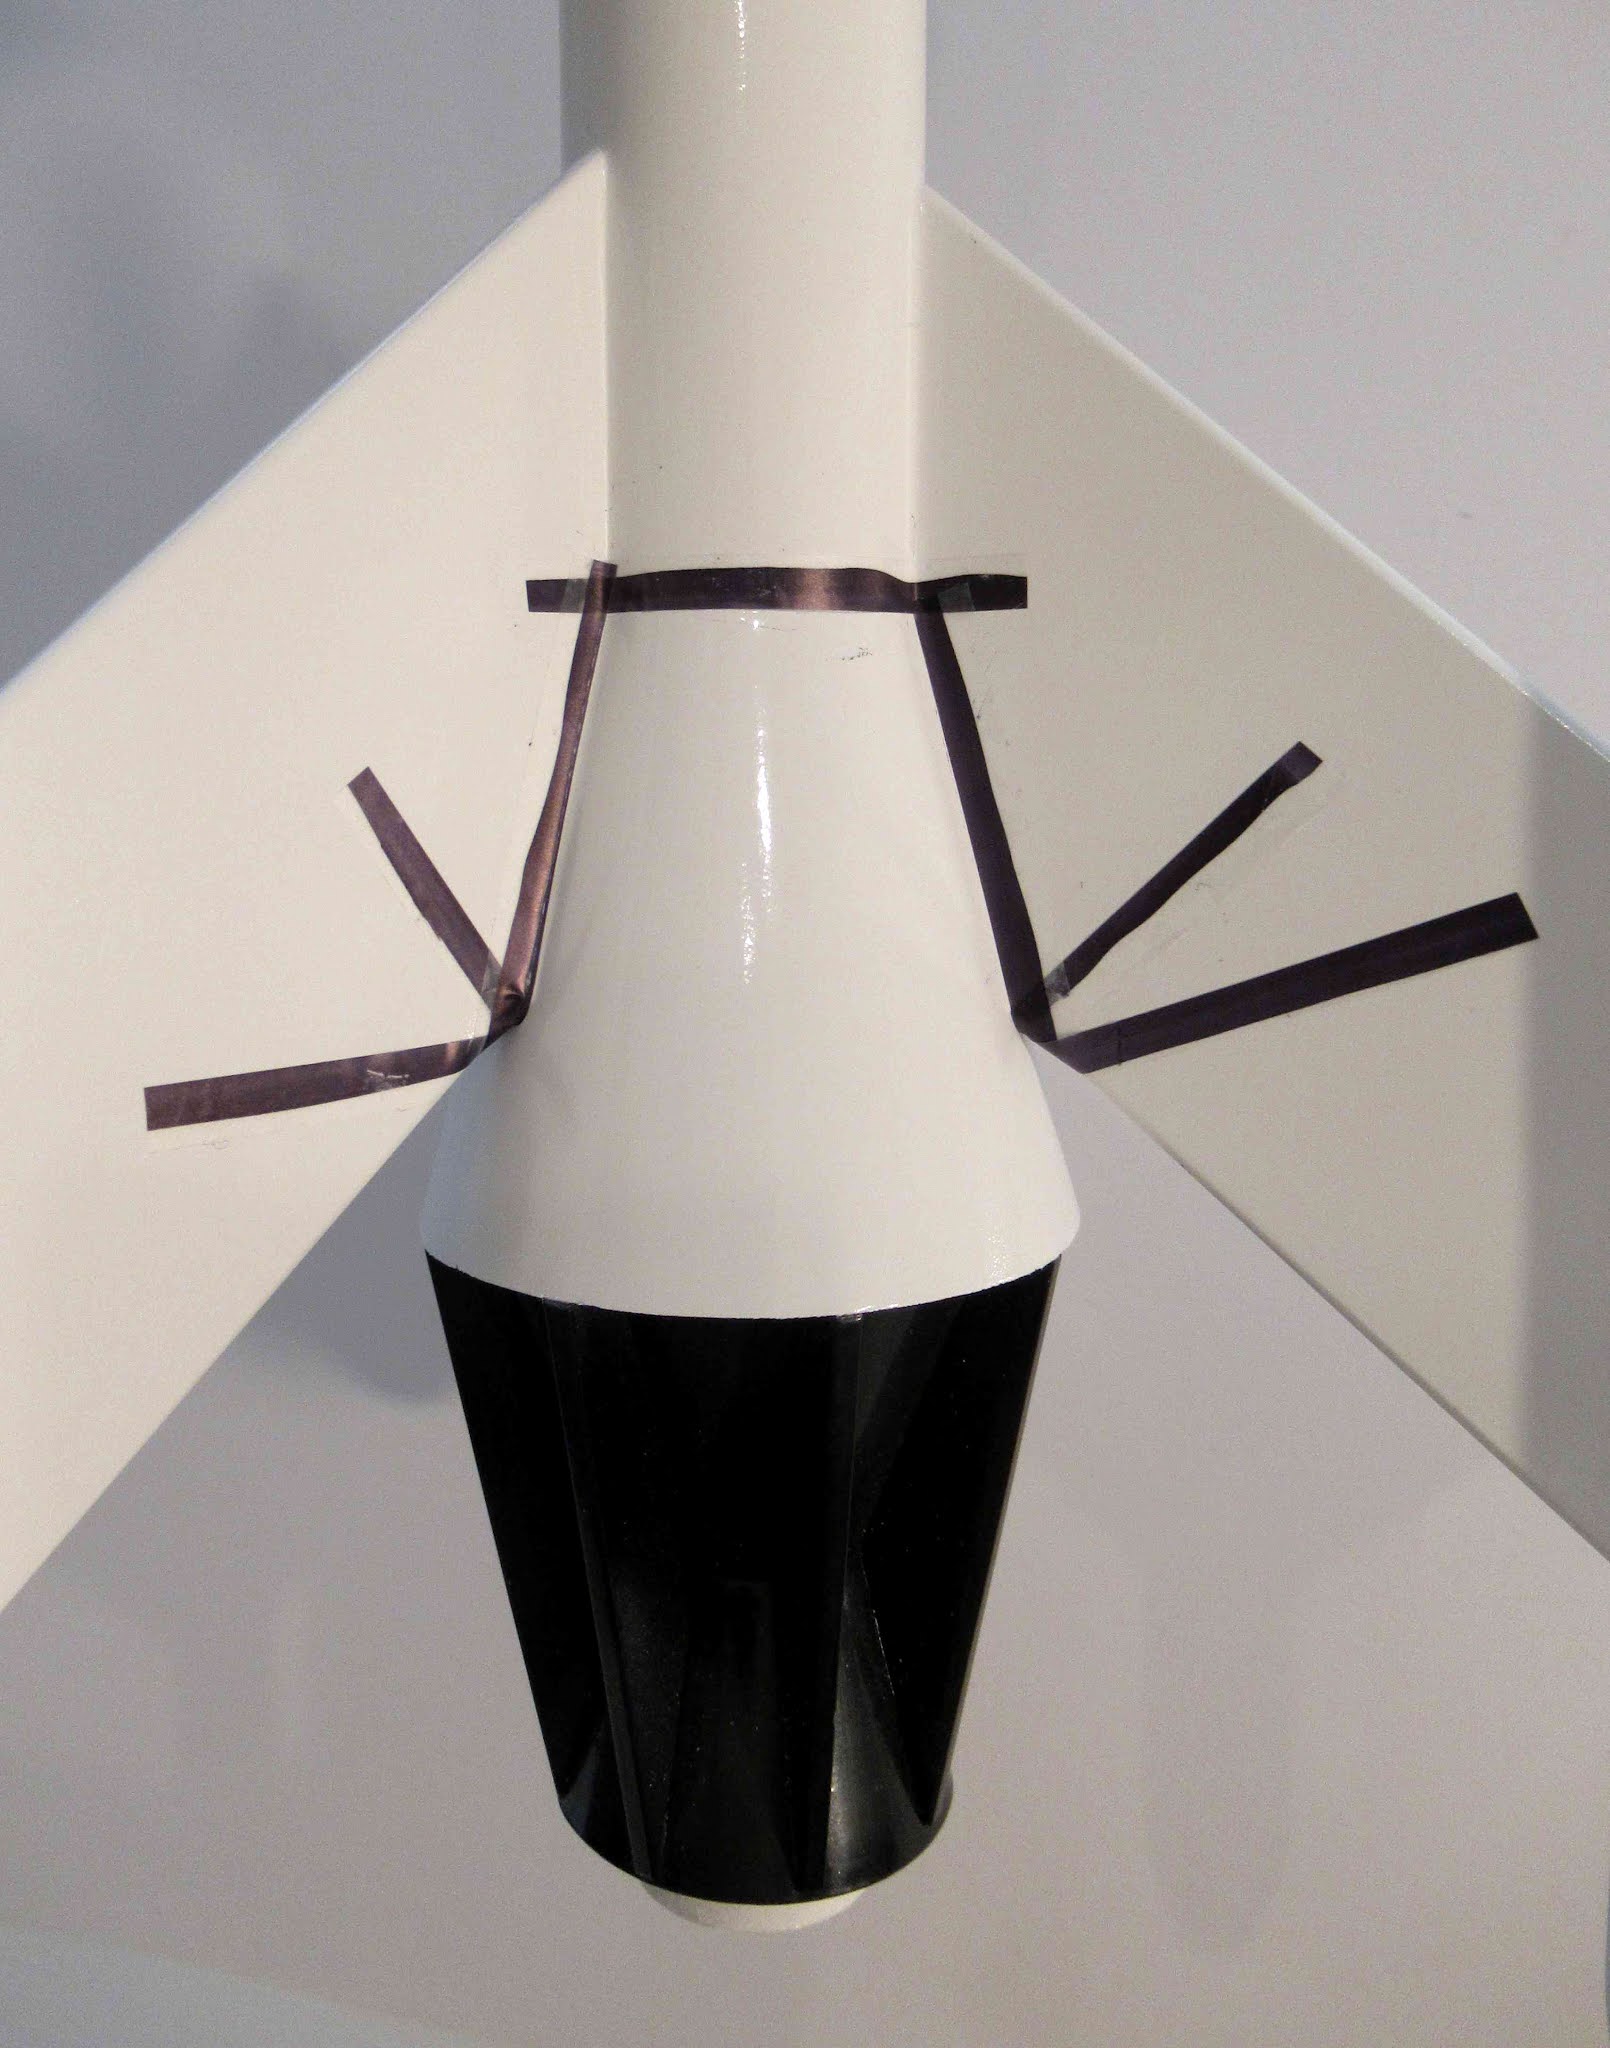
Here's the Scotch tape mask on the upper shroud.


The rest of the fins and pods were covered with tape and plastic grocery bags. 
I also covered the lower vanes area with a tape mask (not shown here) so it would remain polished and shiny. Sometimes overspray can dull a finish gloss.

Wednesday, September 29, 2021

Estes Super Mars Snooper #7309, Build Part 18, Upper Fins Mask

This is one of the three sides with the Scotch tape in place.

The black marked side is facing in. The cut "tapered arrow" point is on the inside.

It takes some time to get the strips straight. Sight from the rear to be sure the tape goes in a straight line.

The remaining open area in the center gets a long triangle of masking tape.

To keep any over spray out of the tube, an engine casing on a dowel goes in the rear. A rolled piece of paper slides in the top.

The nose cone was also painted blue.


This is a finished picture of the upper section of the larger Super Mars Snooper. 

Notice the fin corners are rounded off, just like the original design from the mid 1960s.

Tuesday, September 28, 2021

Estes Super Mars Snooper #7309, Build Part 17, Upper Fins Mask

Well, for whatever reason -
I can't find pictures of the upper body white/blue mask on the camera flash card. So . . . 
I went back to the December 2011 build of my Mars Snooper clone.

To see Post #29 of the build: CLICK HERE
To see Post #30 of the build: CLICK HERE

The same masking techniques were used on the smaller Mars Snooper and the Super Mars Snooper build. This is almost a reprint of the older posts with pictures from the 2011 build.


To find the centers between the fins, a piece of paper was pressed into the root edges of two facing fins. The root edges were marked and the paper folded between the pencil tick marks.
This guide was set back between the fins and the center line drawn at the top of the body tube.


Three Scotch tape strips were stuck down to the glass on my patio door.
A 1/4" thick black line was drawn down the center with a permanent marker.

With a knife a straightedge the strips were cut down the middle of the marked line.
The top half was cut to an long "arrow point". The strip on the left has one side removed.

I went to Ace Hardware with the kit face card in hand to match the blue on the Mars Snooper picture. Ace Royal Blue Premium Gloss Enamel looked to be the right shade. 
The nose cone also blue - spray it at the same time.

Monday, September 27, 2021

Estes Super Mars Snooper #7309, Build Part 16, Cleaning Up The Launch Lug Joint


Trim down the launch lug edge being careful not to go too deep and into the shroud.

A sharpened dowel was used to lift the Mylar skin out so it could be sanded off.


There's a little roughness on the shroud edge where the lug end was sanded down. This will be smoothed out in the next step.
Some CWF was applied and sanded to fill the joint. (See next picture.)


I wanted to direct some filler/primer just on the rough lug area.

The rest of the shroud was taped off and the open area hit with a coat of filler/primer.


The lug joint area under the shroud lip was also sprayed. There is a raised glue fillet around the lug that will be sanded.

Sunday, September 26, 2021

Estes Super Mars Snooper #7309, Build Part 15, Glue & Trim Launch Lug


I rolled a clean dowel over the raised glue tab area. 
A fin will go over this cardstock step. I'll get a better glue bond if the seam were more flat.


A rubber band was wrapped around the low end to keep the launch lug in the glue at low half circle cut in the shroud and ring.


Here's the top end of the lug.
This will take some careful trimming.

Use a new, sharp single edge razor blade to cut off the launch lug.


Don't cut to the surface of the shroud yet. Cut a bit high then trim the lug closer afterwards. You'll be better able to see the lug edge after the initial cut is removed.

The top of the lug will probably be long after the first cut.

Saturday, September 25, 2021

Estes Super Mars Snooper #7309, Build Part 14, Fitting The Vanes


The fit of my vanes wasn't great.
I had to go back, sand and re-fit the root edges of all eight vanes.
On the left is the before, on the right after fitting.

I marked each position line and the root edge of each fitted vane.


This picture shows the pencil marks on the root edges.

I was building three kits - All the vanes were a little different and I didn't want to lose track of their individual (best fitting) positions.


After all the fitting - 
The top corner of the vanes didn't reach the lip of the upper shroud. Ack!
This led to more sanding of the outside edge to get the tops to match up to the edge of the bottom shroud.
The sanding removed the filler/primer and CWF grain fill. More CWF!


After the CWF was sanded down, the fins were taped with the outside edge facing up for a spray of filler/primer and more sanding.

Friday, September 24, 2021

Estes Super Mars Snooper #7309, Build Part 13, Gluing Up The Fins


Here's how those cut lines in the root edge line up with the nose cone/body tube joint.


The instructions usually recommend Super Glue (CA) for gluing wood to plastic joints.
This fin is a combination joint - 
Half is balsa to body tube, the other half is balsa to plastic.

I used Beacon Fabri-Tac for the plastic to balsa side and wood glue for the balsa to body tube side. See NOTE below.


Here's the fin assembly setting in the assembly jig.


Fillets followed - 
Wood glue on one side, Fabri-tac on the other.
Under a bright light you can see the Fabri-tac fillet on the plastic nose cone side. After a light coat of gloss white, the fillet ridges were sanded with 400 grit.

NOTE: I got an email from Bernard Cawley about some fin breaks on recovery. I used Fabri-tac for the balsa to plastic joints, but you might be better advised to use CA glue as the instructions recommend.

Thursday, September 23, 2021

Estes Super Mars Snooper #7309, Build Part 12, Lug Positioning & Fin Jig


The highest shroud is slid down and seated in the glue from the last post.

Double check the alignment by sliding the launch lug through the holes. Don't glue the lug in yet. Let the shroud dry.


The launch lug is longer than what you will need. 
It will be glued in place and the ends trimmed.

This isn't the kit launch lug, I was using a longer 3/16" diameter lug from my spare parts.


The outside fins have a line burnt into the root edge for positioning on the pod tube/nose cone joint.

I have already filled the fins and the cut line was also filled in. I drew a dot at the root edge line position using a fine point Sharpie.


Now you can get out that fin assembly jig.

Wednesday, September 22, 2021

Estes Super Mars Snooper #7309, Build Part 11, Gluing (Almost) All The Shrouds


Two 50/55 rings are glued onto the top and bottom of the internal BT-50 tube.

On the right is a dry fit of the BT-55 tube. The tube slides over the lower ring.

The marks on the BT-55 tube must align with the cut lines on the centering ring.

I marked a glue application dowel for a internal ring of glue inside the BT-55 tube. The dowel was set beside the shroud assembly and marked with a pencil for a glue depth mark.

The BT-55 tube is slid down and over the lower centering ring.
A glue fillet is then applied around the base of the tube/centering ring joint.


Here the BT-55 tube has been glued on.

Three internal support balsa triangles are glued on the centering ring cut and pencil marks on the tube.


I didn't want to use much glue on the outside edges of the support pieces. Too much glue could distort the cardstock shroud and show on the finished model.

Glue was applied, then the excess removed and smoothed with a Q-tip.
Note the small line of glue around the outside edge on the right side picture.

Continued next post -

Tuesday, September 21, 2021

Estes Super Mars Snooper #7309, Build Part 10, More Shroud Fitting


Here's the first dry fit of the shrouds.

Notice the joint between the two shrouds is a little off. 


You can reduce the high spots with a little sanding on a block.


This is what I was shooting for - a cleaner, tighter joint.


And check the launch lug slide and alignment before gluing up the shrouds.


This shows a little more glue than what was needed.

When the shrouds were slid together, I had to quickly remove the excess with a Q-tip.

Monday, September 20, 2021

Estes Super Mars Snooper #7309, Build Part 9, Shroud Forming


The Mars Snooper kit was always a challenge with three shrouds that required a good fit and had to line up for the long launch lug to slide through. This assembly will take a few daily posts.

I did my regular shroud forming in the heel of my hand by pressing a clean dowel over the shroud.

Think of the dowel as a hand on a clock. The dowel is rotated in an arc counter-clockwise while pressing into the shroud. 
I also use the dowel when gluing on the tab, it gives me something to press against. Pressing the burnisher against the dowel also rounds over the glue tab and shroud edge.

TIP: Try using less glue when gluing together cardstock shrouds. It will dry faster using less. Just be sure you have a uniform film of glue that covers the entire contact area.


Again using the dowel inside the shroud for burnishing the glue joint.
Dry fit all the centering rings before applying any glue!

TIP: You'll get a better fit by sanding an angle onto the edge of the rings. Sand the same angle as the sides of the shroud it will fit into.
The slight edge slant can prevent distortion of the cardstock shroud. Sometimes you can see a ring impression if too much placement pressure or glue is used.

Sunday, September 19, 2021

Estes Super Mars Snooper #7309, Build Part 8, Lug Hole Cutting

Here's how the larger 3/16" tracing looked. It sat a little higher up than the 1/8" lug hole.
Those tight rounded ends are difficult to cut with a #11 X-Acto blade. I prefer to cut them with a rotary punch.

TIP: Don't punch through without a test. Set the punch barrel and lightly press the handle not cutting through the cardstock. Just make a light circular impression. Check the placement of the embossed hole. Chances are it will be a little off.
Adjust your punch and cut through this time.


On the left are the end punches.

Cut the sides with a sharp knife joining the two punched holes.


Run your index finger around the outside cut you made earlier. You'll probably feel some high spots.

Before forming the shroud, run some 400 grit around the sides cleaning up the curve.

Saturday, September 18, 2021

Estes Super Mars Snooper #7309, Build Part 7, Lug Hole Adjustments


One of my Super Mars Snooper kits was pre-production, some little changes were made before the final kit was released.
I received two different sets of laser cut centering rings. One was cut for a 1/8" launch lug, the other was cut for the final 3/16" lug size. I had to enlarge the 1/8" diameter hole. 


I filed down the edge of a 3/16" brass tube to a fairly sharp edge.

This was used to cut a new, wider hole in the smaller 1/8" size rings.
Center, press and turn the sharpened tube until it cuts through.


A half round diamond file was used to get the 3/16" lug fit to a good friction fit.


One of my shrouds was cut for the 1/8" lug size.
The 3/16" correct shroud was placed over the smaller shroud and the oval trace with a sharp pencil.

Thursday, September 16, 2021

Estes Super Mars Snooper #7309, Build Part 6, Seam Filling


The new nose cone and transition molds are very clean!
You've really got to look close to find the seams.

It just took a little sanding to smooth them out.


Body tube seam filling - 

Here's two BT-55 lower tubes from two kits.
On the left is the thinned CWF filler applied by dragging a knife blade down the seam, a little at a time. Dip and drag, dip and drag down the seam.

On the right side is a filled tube seam, sanded to surface.

I do a two-step tube fill process.
After the CWF has been sanded down, Duplicolor filler/primer is sprayed.

On the right side is the filler/primer sanded to surface. Look close to see some gray filler/primer left in the seam, filling what recess that was left.
The CWF fills about 75% of the seam, the remaining 25% is filled by the filler/primer.


As mentioned above, the nose cone and new adapter were very clean.

After lightly sanding the filler/primer, there was really no seam to fill.