Showing posts with label E Scout Ship Nova. Show all posts

Tuesday, October 3, 2017

Estes Scout Ship Nova Build #1392, Finished


After all the vinyl was applied the model got a light dusting of flat clear coat.
The original kit had yellow and green decals. The yellow and blue are a better combination keeping with the blue windows on the Starship Nova sister ship.
This model is smaller than the Starship Nova, the finished length is just under 15".

I really like that the rear raised engine tube visually balances against the drop nose at the front.

Monday, October 2, 2017

Estes Scout Ship Nova Build #1392, Build, Part 10, Nose Cone Vinyl

A yellow ring goes around the nose cone tip. It'd be hard to judge how far down to set it without a few test wraps.

A thin ring of masking tape was set around the tip for alignment.


The vinyl is set down, here the clear layer is still over the yellow ring.


The "09" decal spacing would be hard to get consistent on both sides.
A tape wrap and a horizontal piece was set down. The height of the 09 was visually placed.

Estes Scout Ship Nova Build #1392, Build, Part 9, More Vinyl


With the nose cone painted black, it's hard to see the molded window lines. I set down some masking tape and marked the centers with pencil for easier alignment.


The border was cut close to the decal edges where it tucks into the root edge and goes just inside the rounded leading edge.


Sometimes the image wants to stick to the clear overlay when it is being lifted.
Use the tip of your knife to stick down the corner, then lift up the clear layer.

Sunday, October 1, 2017

Estes Scout Ship Nova Build #1392, Build, Part 8, Stickershock Vinyl Trim, TIP

The client bought vinyl decals from Stickershock. The original kit had yellow and green decals. The vinyl was yellow and blue, a better combination. On the backing sheet the yellow looked a bit orange.

I don't have a lot of experience with vinyl, so I'll take it slow and cautiously. There is plenty of border area on the sheet.
TIP: Never start with a large decal, practice with a smaller piece first.


If you haven't seen this type of vinyl before, it's sandwiched between two outer layers.
On the left the white backing is peeled off. On the right I set it on my knife blade for placement on the model.

With the clear piece over the top of the image it's easy to see the placement area.
Lightly burnish the vinyl decal, you don't have to burnish the clear border area.
The clear top layer is pulled up leaving the printed vinyl image.

Saturday, September 30, 2017

Estes Scout Ship Nova Build #1392, Build, Part 7, Black Paint


This design makes sense when you look at the side profile. The raised engine in the rear is a good balance to the dropped nose in the front.


Except for the interior of the engine tube, the entire model is sprayed black.
Here's the model after the first coat of black was lightly sanded with 400 grit.


A rolled up piece of paper was used to block paint from getting into the tube.


There was a little bit of black that got into the tube. This was lightly scraped out and more fluorescent orange was applied.


The model is ready for decal trim.

Friday, September 29, 2017

Estes Scout Ship Nova Build #1392, Build, Part 6, Fin Gluing


TIP: Carry the fin alignment lines around the end edge of the body tube. These fins are even with the end of the body tube so the line down the body tube will be covered up.

GOTCHA: The instructions tell you the the wings and standoff should project straight away from the body tube.
Later on in the instructions, a drawing shows the correct angle of the wings. They don't mention sanding an angle in the root edge for better gluing.

The small launch lug is tucked into the root edge of a wing.
The pencil lines show where two narrow lines of glue will be applied.


I used my fingertips to form two narrow beads of glue for a cleaner joint.


Fillets are applied with Titebond M&TG.
The ends of the fillets were tapered around the end of the lug with a Q-tip.

Thursday, September 28, 2017

Estes Scout Ship Nova Build #1392, Build, Part 5, Engine Paint


I wanted this one to match the fluorescent engine in the Starship Nova. Both of these models are being built for the same client.

Here's the fluorescent orange I used on the other model.


A white coat was set down first. TIP: Always apply a white coat before using any fluorescent color.

I used a brush to reach all the way into the center area of the tube.


It took about five light coats of the acrylic orange to get full coverage. Allow each coat to dry before the next.


The fins were glued onto the body tube, the longest 3 1/2" long fin goes on top.


From the bottom you can see where I scraped of the paint to glue it on the standoff.

Tuesday, September 26, 2017

Estes Scout Ship Nova Build #1392, Build, Part 4, Parachute Re-Size


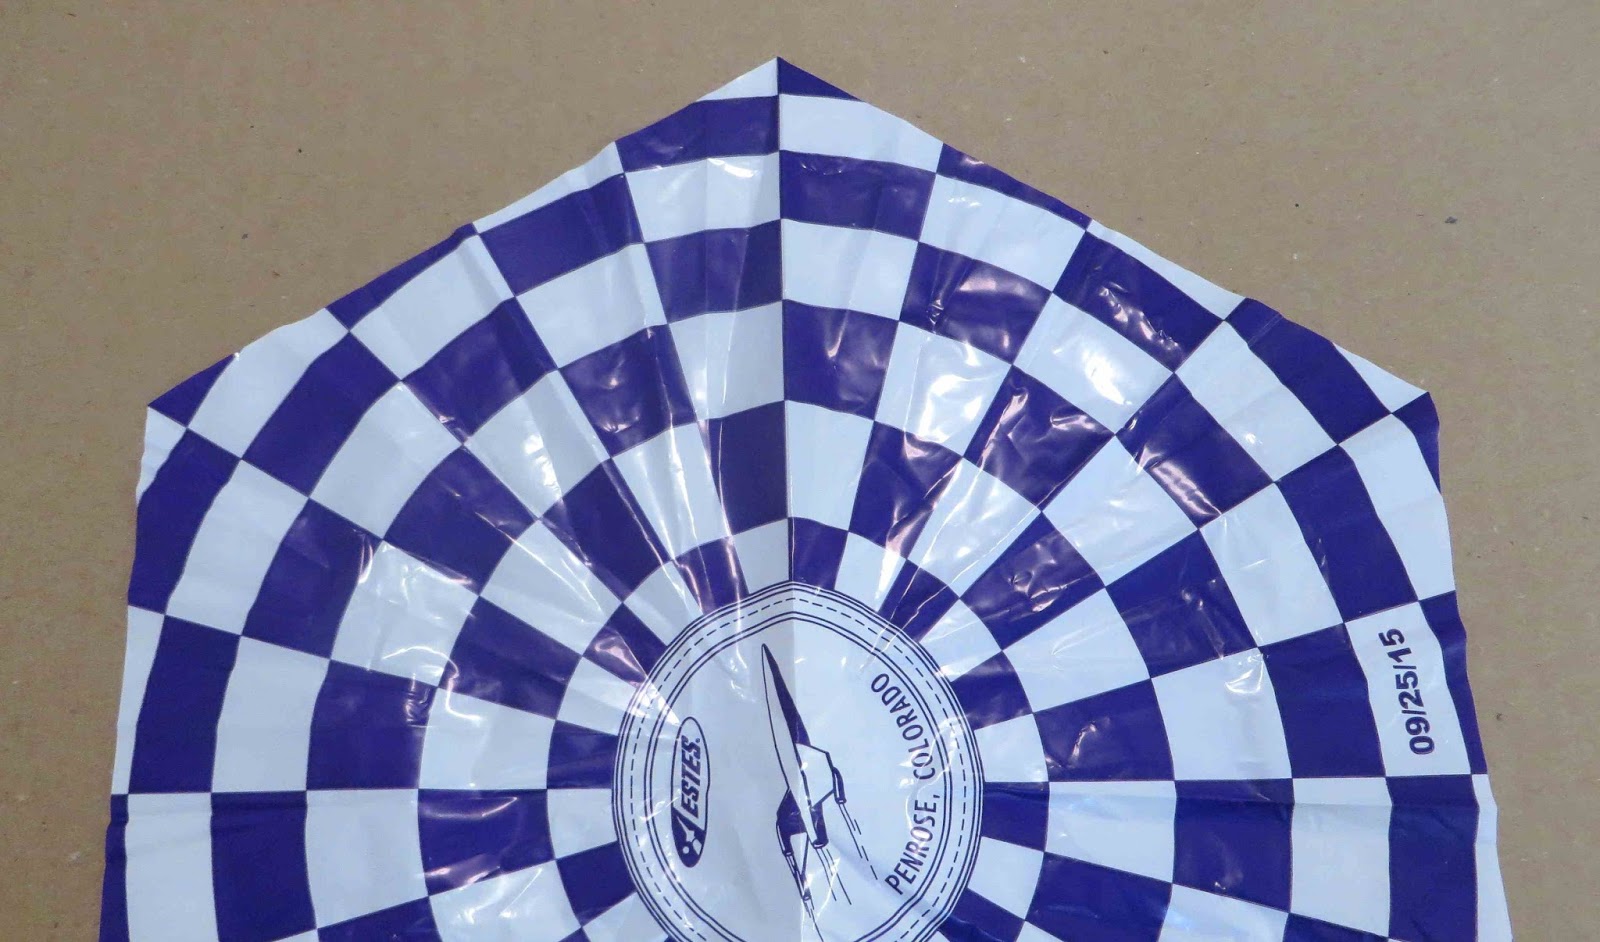
This model is only 15" tall. The Starship Nova kit chute is 18" in diameter, too big for this model.

One thing I've never noticed - 
From corner to corner the 18" parachute is actually 17 1/8" diameter.


The chute will be re-sized to around 14" wide.
I can use the original parachute, Simply count to the center, four blocks of the checkerboard print. Cut off the six sides with a sharp knife and straightedge.


Here's the 14" down-sized parachute ready for new tape disks and shroud lines.
The kit supplied shroud lines broke with an easy tug and were replaced with #10 cotton embroidery thread.

Estes Scout Ship Nova Build #1392, Build, Part 3, Nose Cone and Fins


The nose cone tie lug is thin. Instead of cutting out the center square, I rounded the hole using a rat tail diamond file.


The fins were already filled with CWF and sanded. I thought they were like the Starship Nova and had square edges. Good thing I double checked the instructions - the leading and trailing edges were rounded!
I went back, rounded the correct fin edges and filled the fins with CWF again.


The fins were taped down to some cardboard and sprayed with primer/filler. The launch lug is also getting a shot of primer/filler.

The root edges of the wings are butted up against each other to keep the primer/filler off the root edges.


The same pieces after most all the primer/filler has been sanded off. The only primer/filler left is in the remaining balsa grain.

Estes Scout Ship Nova Build #1392, Build, Part 2, Engine Mount


The BT-20 engine mount tube needs a slit cut for the upper bend of the engine hook.
TIP: For more support when cutting, I slipped the engine block into the top of the tube.


These engine mount parts came from the Starship Nova kit. The old Nova Scout Ship didn't use a split centering ring.
To allow movement of the engine hook (there is very little hook movement on a 20/50 mount) the ring positions were moved.


The glue on the split ring dried while slipped into the BT-50H body tube.
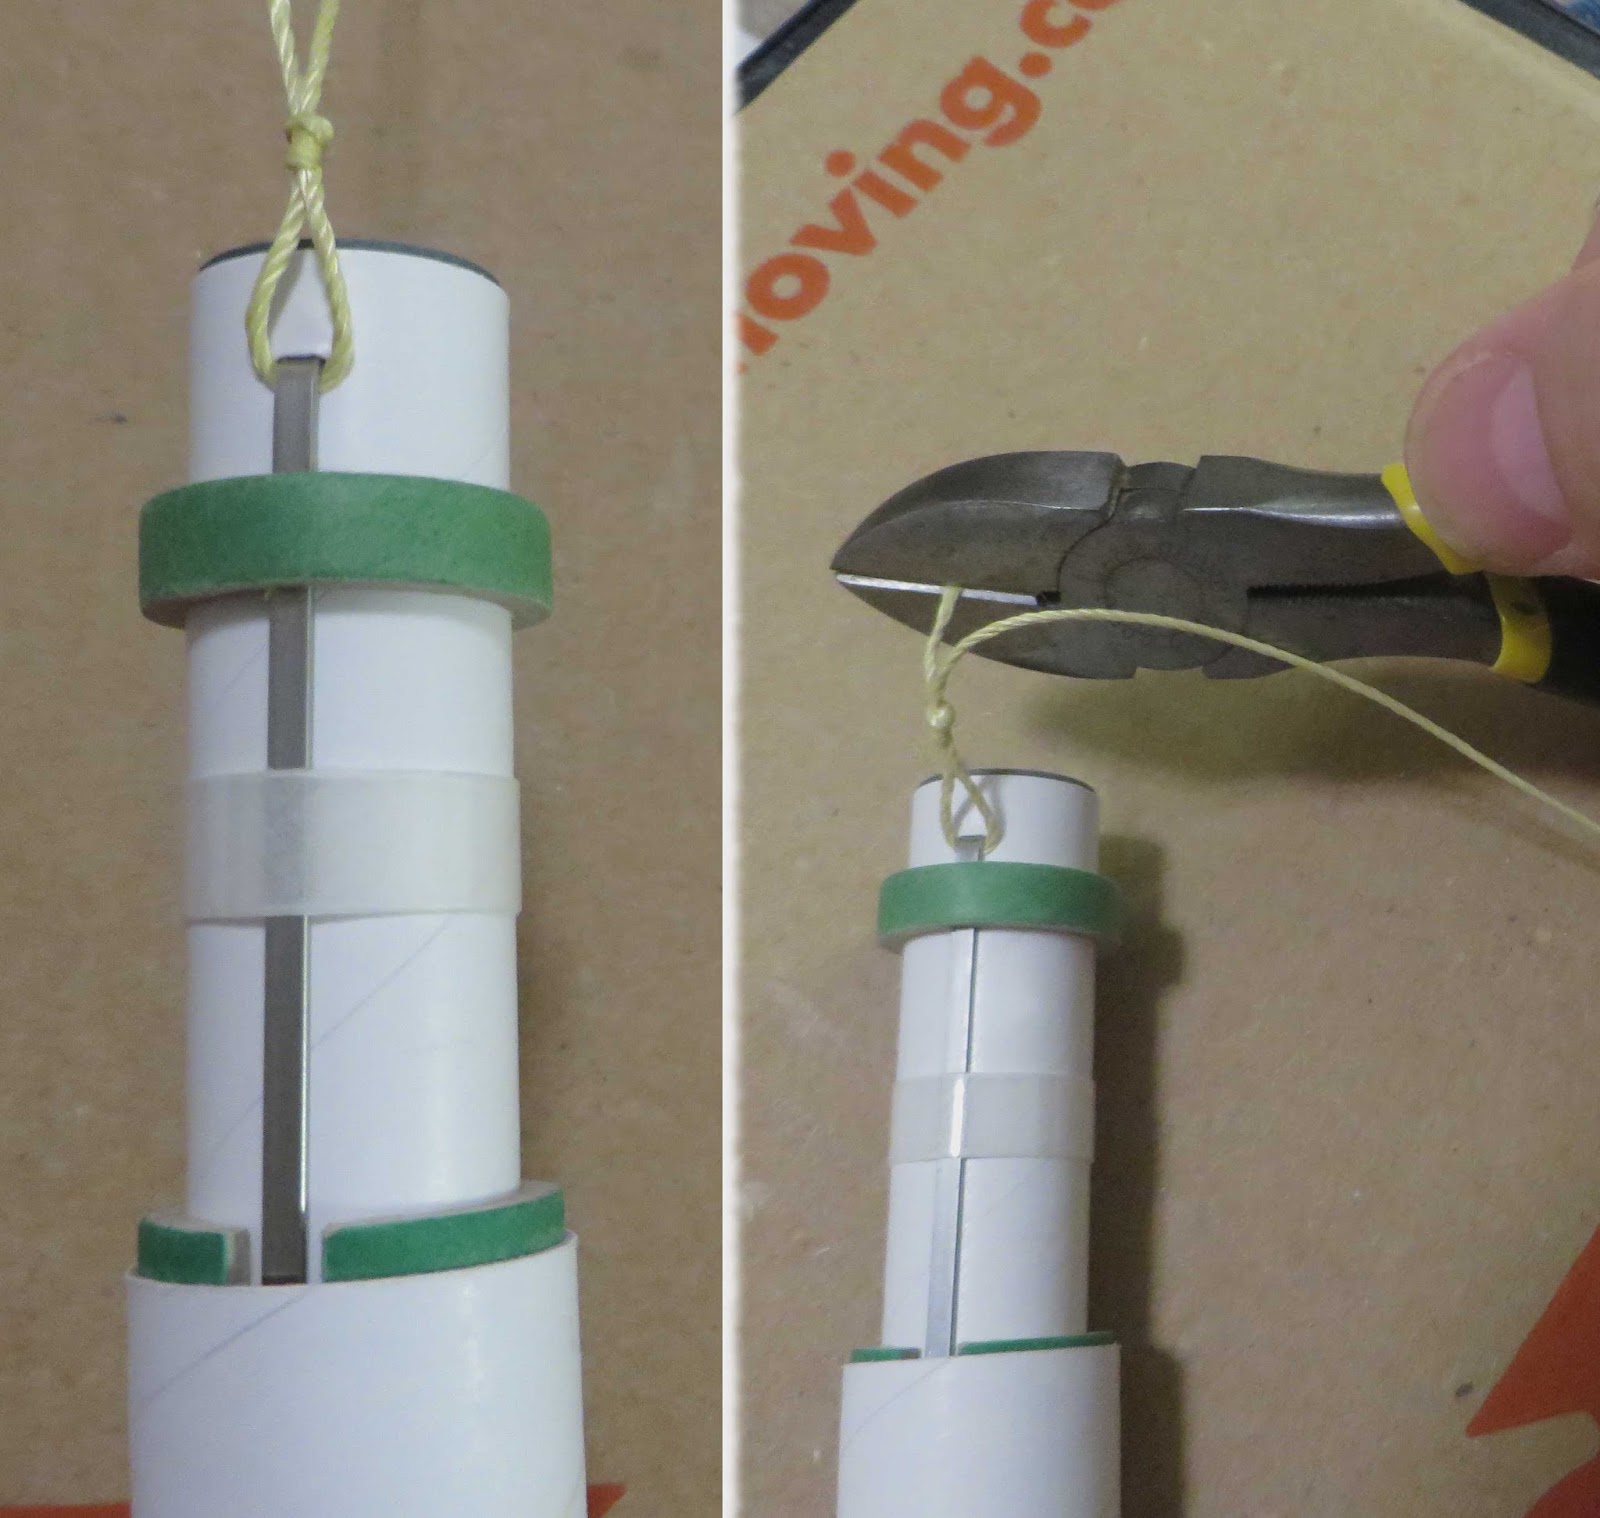
The 150 lb. Kevlar was tied around the upper bend of the engine hook.
TIP: Cut the loose end of the Kevlar cleaner by using wire cutters instead of scissors. Kevlar is like wire anyway, why not?


Here's the finished mount, a combination of old and new.

Friday, August 4, 2017

Estes Nova Scout Ship #1392 Scaling Questions


I have a client who wants a Starship Nova and it's sister ship the Nova Scout Ship built.
Now that Estes has re-released the Starship Nova with the drop-down nose cone, the Nova Scout Ship can be cloned.
I posted on TRF and YORF but so far, nobody has a Nova Scout Ship to check the fin dimensions. All I really need is the root edge of the main wing fins and everything else could be sized.
If I can't get sizes from an original kit, what is the next step?

The instructions can be found on oldrocketplans.com - CLICK HERE
There are fin tracings but no 1" reference square. I printed the fin patterns but am not sure they are the correct size when printed out. They seemed large.
PLEASE: For the benefit of all the rocket clone builders out there, please draw a 1" reference box on all submitted fin tracings!

Catalog and face card pictures are usually taken at an angle, not very valuable for fin sizing.
On page four of the instructions there is a decal placement picture, two shots, straight on. While the resolution isn't great, I can get an idea how close the fin templates are.


I copied the page and dropped it into my Corel Draw software.
A box was drawn with a height of .976" or the outside diameter of a BT-50. The rocket picture was enlarged until the body tube was the same height (diameter) as the .976" high box.
This also enlarged everything else in scale and gave me close to the top intake tube length at 3.5" long. That also gave me the standoff length, close to 2.7" long.

The overhead view is a second chance to get more sizes.
Again the picture was enlarged to the body tube diameter of .976". That enlarged the main fin root edge to 4.17".

These approximate sizes were a double check to see if the PDF sizes were close. They weren't! I'll have to cut off about 1/4" from all sides.
The wing fin at the bottom shows the outline closer to the correct size.

You can use this method to get an idea of the original fins sizes when you clone a model rocket. (If the online PDF doesn't include a 1" reference square) While it may not be exact, it's much closer than what the PDF printed out.

EDIT: BAR Geezer pointed out something obvious in his comment below. The top fin root edge is the same length as the 3.5" long tube at the top rear. I didn't see this and it would have made my scaling problem much easier!
I loaded the art into Corel Draw and reduced it until the root edge of the top (rudder) fin was 3.5" long. Done!