Showing posts with label E Hornet. Show all posts
Saturday, February 1, 2014
Estes Hornet Build Part 10, Decal Fix and Finished
I added a tapered black strip to the top side of the thin band to match the 3/32" fin thickness.
The Centuri logo replaced the Estes logo like the first run of the kit.
A classic clean design with a long history.
First, a Centuri branded kit using Estes BT tubing. Then out of production.
Semroc released their version of the Magnum Hornet without the stylized hornet "bug" at the top of the decal.
Finally, re-released as a Classic kit with the Estes name.
Friday, January 31, 2014
Estes Hornet Build Part 9, Correcting The Black Fin?
At the bottom is the thicker band I thought was used for connecting the name to the fin.
(Look close and you can see the the production date pressed into the decal. It's almost in the image area!)
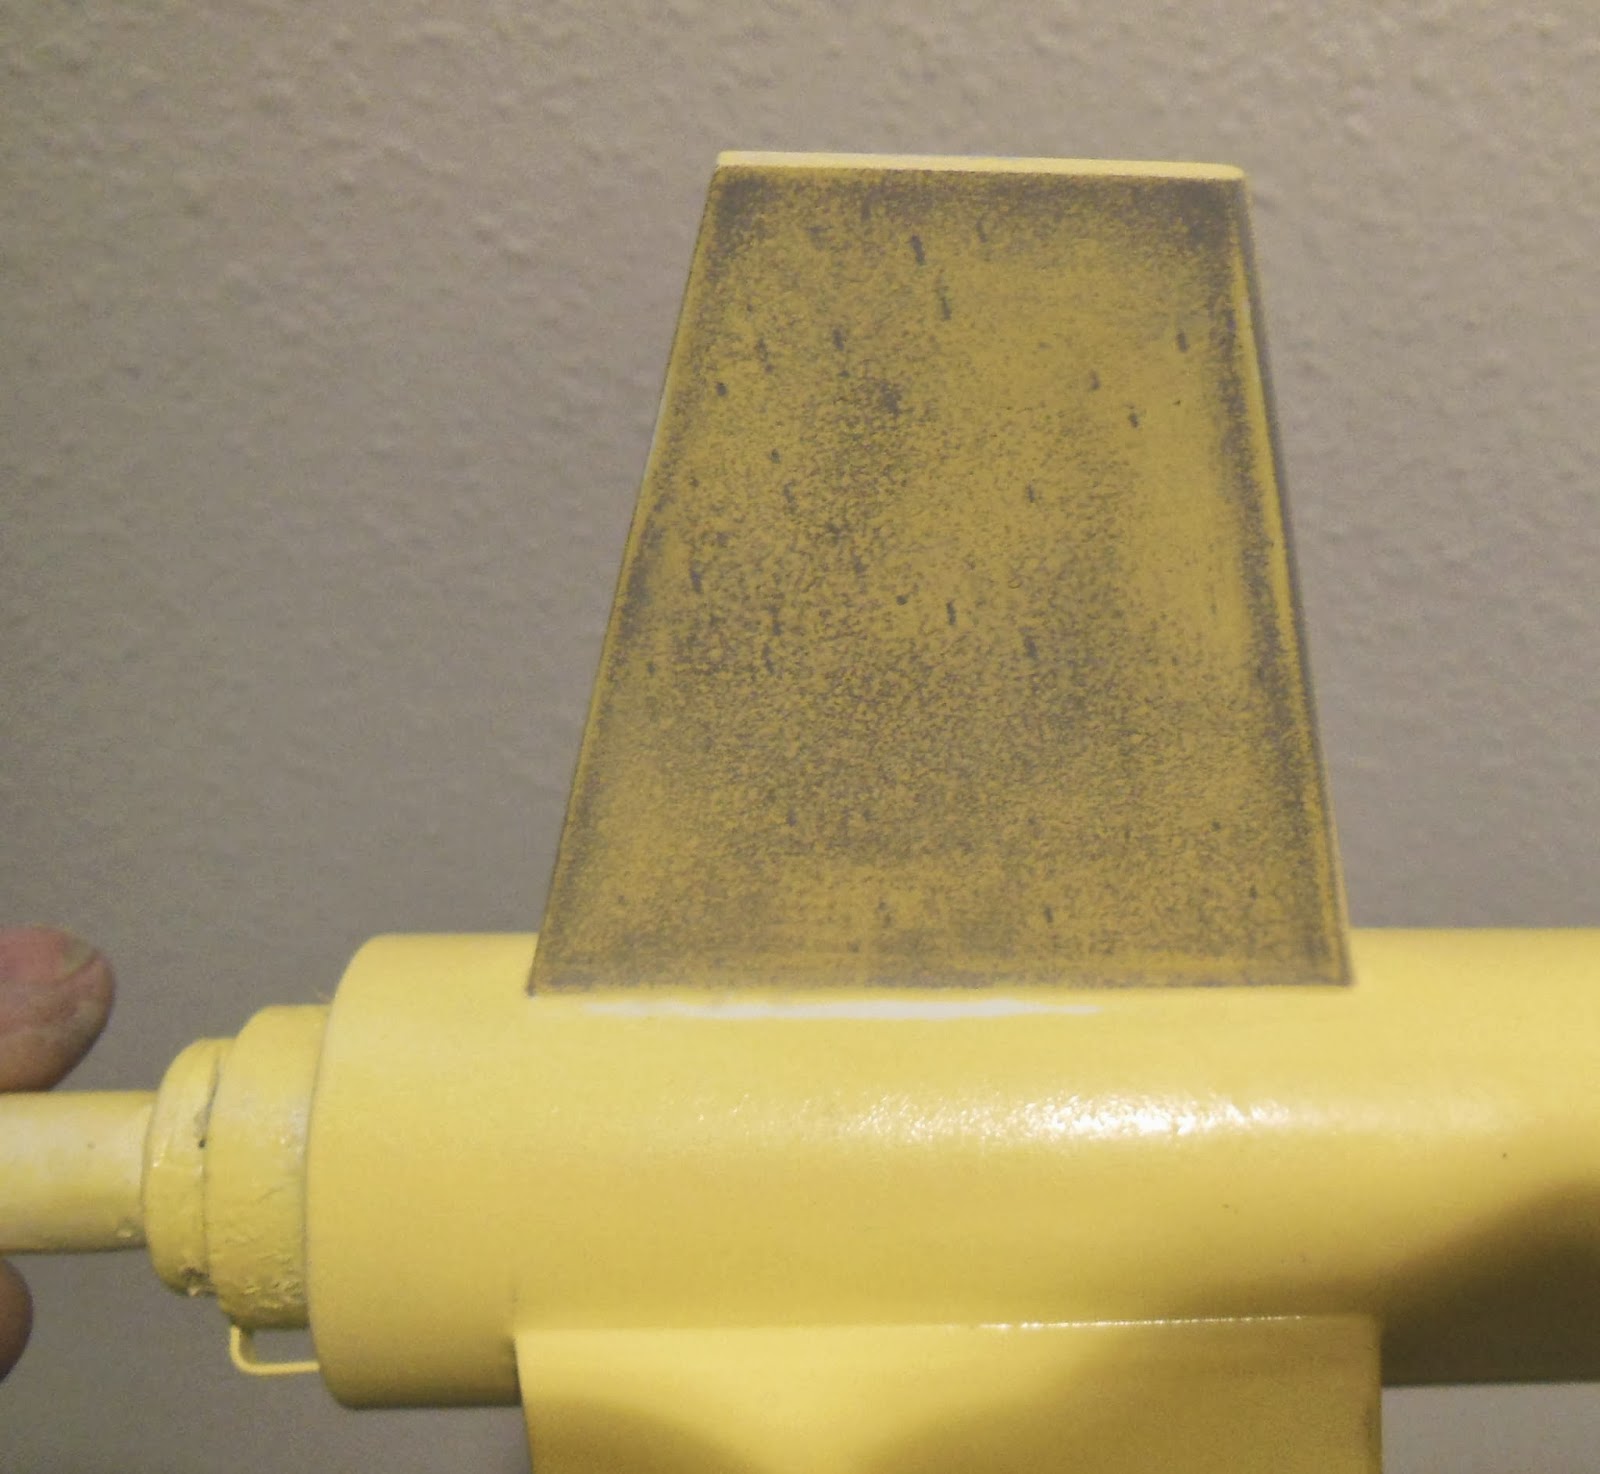
After spraying the paint "ledge" was lightly sanded so it wouldn't show under the decal.
There is tape on either side of the black paint tip so I won't sand into the yellow beside it.
Thursday, January 30, 2014
Estes Hornet Build Part 8, Masking the Black Fin
The rounded leading edge was masked with small pieces of Scotch tape set down to a half round circle.
I should have looked ahead and studied the decal sheet. I thought the wider black band band trailed back behind the clear strip going through the word "Hornet". It turns out the wider black band goes around the body tube behind the fins.
The correct decal strip going back from the "Hornet" name is not as wide as the 3/32" fin thickness.
The sharp trailing edge corners were slightly rounded off.
I've learned in the past it looks better with the tips knocked off.

To cover up the large areas I use grocery bags cut into squares.
A piece of masking tape is set on the edge, half on the bag.

The taped bag edge is stuck down to the Scotch tape already on the root edge fillet.
The bag is wrapped around the body and other fins.

More masking tape pieces held the bag piece closed and covered any open spots.
Now it's ready for the black paint.
I should have looked ahead and studied the decal sheet. I thought the wider black band band trailed back behind the clear strip going through the word "Hornet". It turns out the wider black band goes around the body tube behind the fins.
The correct decal strip going back from the "Hornet" name is not as wide as the 3/32" fin thickness.
The sharp trailing edge corners were slightly rounded off.
I've learned in the past it looks better with the tips knocked off.
To cover up the large areas I use grocery bags cut into squares.
A piece of masking tape is set on the edge, half on the bag.
The taped bag edge is stuck down to the Scotch tape already on the root edge fillet.
The bag is wrapped around the body and other fins.
More masking tape pieces held the bag piece closed and covered any open spots.
Now it's ready for the black paint.
Tuesday, January 28, 2014
Estes Hornet Build Part 7, Refill!
The raised wood grain pores were still visible!
Earlier the raised grain was sanded down and more CWF applied.
After a thick coat of primer/filler I thought everything was smooth.
I couldn't really see the grain until looking under direct sunlight after the first coat of yellow.
The weird thing is, the grain pores can only be seen on the right side of each fin!
I'll try one last time to fill the pores but I can't use CWF now, the wood is sealed and it wont stick.
I'll have to use another shot of primer/filler.
I only want the gray filler on the right side of the four fins.
The tube was masked above and below the fins.
On the lower left of the picture you can see the piece of paper with tape running across the top. This was pressed into the root edge overhanging and covering the fin below it.
One side of a fin was sprayed and the taped paper mask removed.
The tube was turned and the same piece off paper taped down to the next fin root edge.
Here's the primer filler on the single fin after the mask was removed.
Just one side of all four fins was hit with primer.
Mentioned earlier, one side on the "wood" fin sheet had the deeper raised pores.
After wet sanding with 400 grit you can see the primer in the grain pores.
I hope this finally fills everything.
The fin will get another white undercoat an wet sanding.
More yellow will follow.
The nose cone was painted black.
TIP: Don't tie on the shock cord until after the nose cone and rest of the rocket is painted. Keeping things separate makes painting and masking easier.

Earlier the raised grain was sanded down and more CWF applied.
After a thick coat of primer/filler I thought everything was smooth.
I couldn't really see the grain until looking under direct sunlight after the first coat of yellow.
The weird thing is, the grain pores can only be seen on the right side of each fin!
I'll try one last time to fill the pores but I can't use CWF now, the wood is sealed and it wont stick.
I'll have to use another shot of primer/filler.
I only want the gray filler on the right side of the four fins.
The tube was masked above and below the fins.
On the lower left of the picture you can see the piece of paper with tape running across the top. This was pressed into the root edge overhanging and covering the fin below it.
One side of a fin was sprayed and the taped paper mask removed.
The tube was turned and the same piece off paper taped down to the next fin root edge.
Here's the primer filler on the single fin after the mask was removed.
Just one side of all four fins was hit with primer.
Mentioned earlier, one side on the "wood" fin sheet had the deeper raised pores.
After wet sanding with 400 grit you can see the primer in the grain pores.
I hope this finally fills everything.
The fin will get another white undercoat an wet sanding.
More yellow will follow.
The nose cone was painted black.
TIP: Don't tie on the shock cord until after the nose cone and rest of the rocket is painted. Keeping things separate makes painting and masking easier.
Estes Hornet Build Part 6, White Undercoats and Sanding
The fins and launch lug both got two fillets with Titebond M&TG.
Here's the model assembled. After primer sanding it's ready for a white undercoat.
The finished model is yellow and black. You'll need a white undercoat for the light yellow color.
With the white paint on you can see the Titebond M&TG boogers at the leading edge joint.
These can be sanded off using 400 grit wrapped around a Q-tip for cushioned sanding.
The front and back end of the body tube look really rough but this will be easily smoothed off with 400 grit.
The roughness of the body tube came after the filler primer was sanded down to the surface.
After 400 grit wet sanding this rough tube won't be noticeable. Some of the newer white body tubes just sand rough like this.
Here's the root edge fillets and launch lug fillets after wet sanding with 400 grit.
Remember, only wet sand after the tubes are considered sealed with paint. CWF is water based and does not seal tube seams or balsa.
Wet sanding is more like damp sanding. Be careful at the tube ends, don't let water get inside the tubes!
Monday, January 27, 2014
Estes Hornet Build Part 5, Some Minor Snags
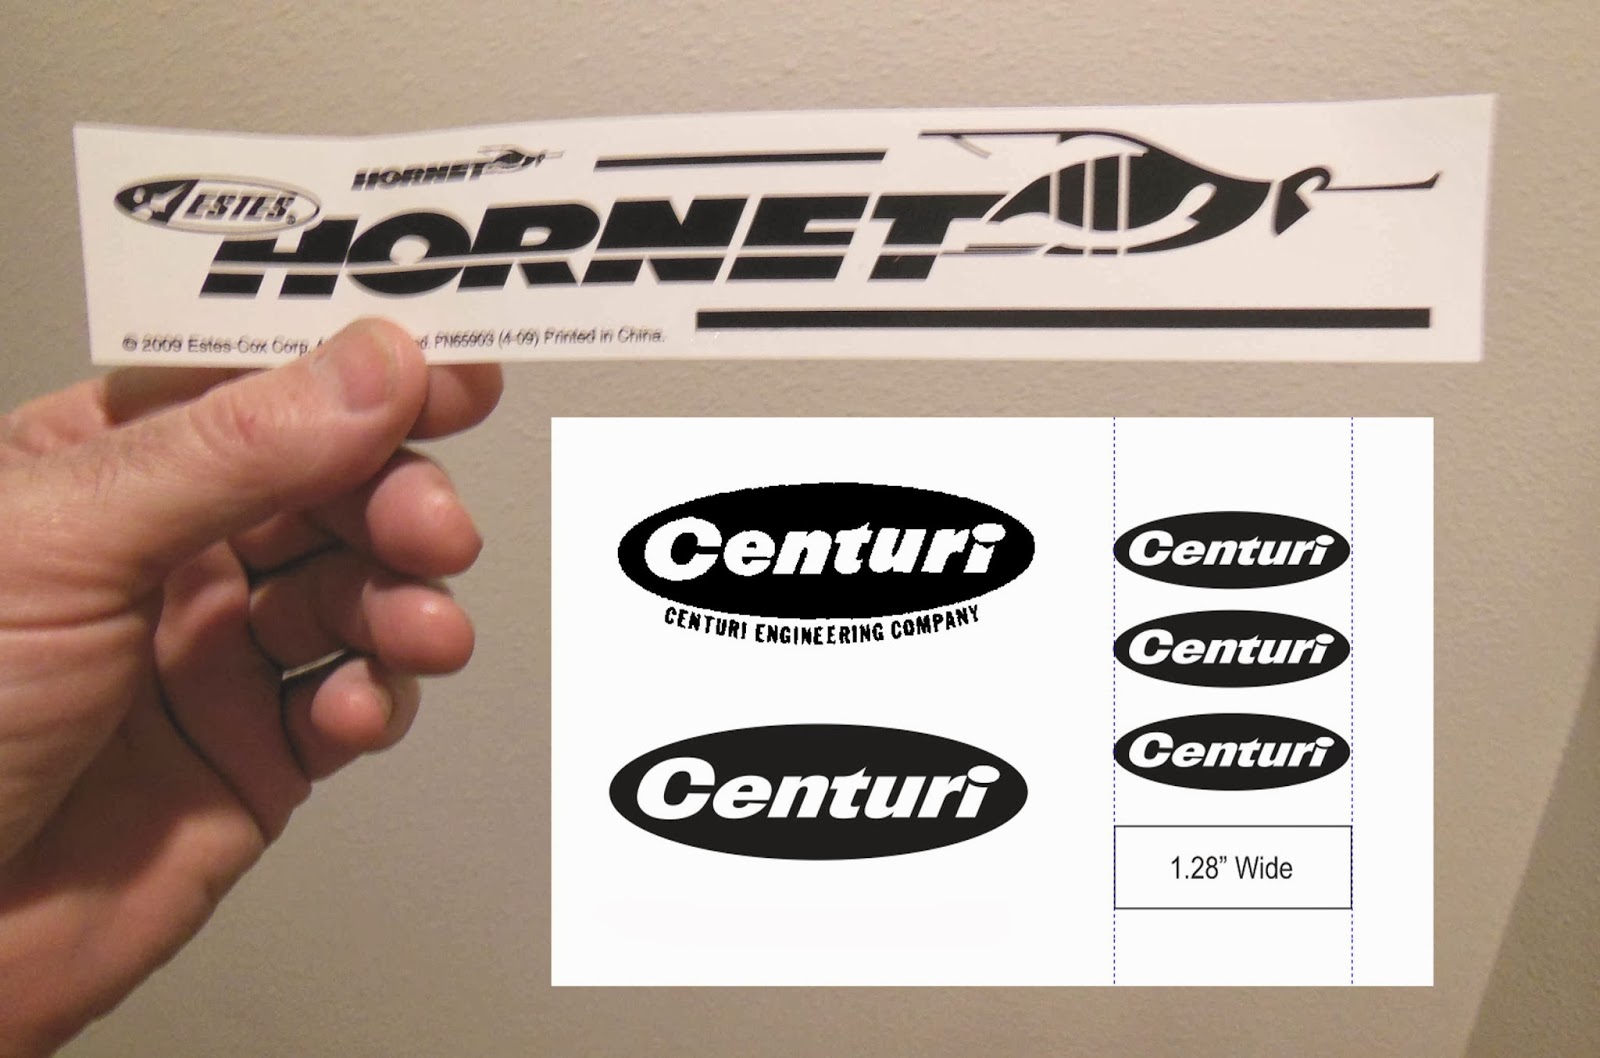
The Hornet was originally a Centuri design. I wanted to use the Centuri logo in place of the Estes name.
I checked online but couldn't find a sharp version of the logo.
I ended up doing a font search and re-drawing it. This one did take some changes to the fort I found. The "T" and "I" took the most time.
Enlarge the picture and compare the two larger Centuri logos. The upper one is what was found online. Below it is the redraw.
The Estes logo is about 1.28" wide. I sized the Centuri logo to that width.
The logo isn't 100% accurate, but it's close and much sharper than anything I could find.
Here I've sanded the primer and tube where the lug will glue for better adhesion.
The fin root edge areas were also sanded with 220 grit.
There was a very slight dent in the tube above the launch lug. This is more like a manufacturing blemish and not a crimp that would require replacement of the tube.
This was filled with CWF.
The dent was so shallow I wanted to be sure the CWF stayed on the tube.
After sanding to surface a thin coat of CA was wiped on.
I checked online but couldn't find a sharp version of the logo.
I ended up doing a font search and re-drawing it. This one did take some changes to the fort I found. The "T" and "I" took the most time.
Enlarge the picture and compare the two larger Centuri logos. The upper one is what was found online. Below it is the redraw.
The Estes logo is about 1.28" wide. I sized the Centuri logo to that width.
The logo isn't 100% accurate, but it's close and much sharper than anything I could find.
Here I've sanded the primer and tube where the lug will glue for better adhesion.
The fin root edge areas were also sanded with 220 grit.
There was a very slight dent in the tube above the launch lug. This is more like a manufacturing blemish and not a crimp that would require replacement of the tube.
This was filled with CWF.
The dent was so shallow I wanted to be sure the CWF stayed on the tube.
After sanding to surface a thin coat of CA was wiped on.
Sunday, January 26, 2014
Estes Hornet Build Part 4, Launch Lug and Nose Cone Filling
TIP: To save time on later builds,
I went head and filled four 3/16" lugs at the same time.
Four lugs were slid down a dowel and tape was placed over the ends to keep them in place.
CWF filler was brushed over all the lugs at the same time.
The filler on the nose cone shoulder is sanded even with the body tube.
Sand carefully so you are just removing the filler and not sanding down the body tube.
I went head and filled four 3/16" lugs at the same time.
Four lugs were slid down a dowel and tape was placed over the ends to keep them in place.
CWF filler was brushed over all the lugs at the same time.
The filler on the nose cone shoulder is sanded even with the body tube.
Sand carefully so you are just removing the filler and not sanding down the body tube.
Estes Hornet Build Part 3, Fin Fillling
The fin stock was warped, right out of the bag!
After brushing on the thinned Carpenter's Wood Filler I'll have to let these dry under a heavy book.
The grain was raised after the CWF had dried.
These fins might require a little more primer filler after this is sanded down.
Here's the same fin after sanding to surface.
You can't see any raised grain but you can feel it with your finger.
I don't think these fins are actually balsa, but probably tung wood.
They are harder than balsa and filling the balsa grain is different.
I hope the primer filler will seal and fill the leftover grain pores.
Saturday, January 25, 2014
Estes Hornet Build Part 2, Engine Mount
Set the centering rings in place and pencil mark the rings directly opposite the engine hook.
These rings are fairly thin and fitting the tube will be tight.
A round hole was filed in both the rings to fit the plastic (Kevlar) tube.
Cut the low end Kevlar tail even with the end of the engine tube.
You want a tail to grab onto when the Kevlar is pulled for checking it's condition or replacement.
Note the upper end of the plastic straw is not all the way to the front end of the engine mount tube. I try to keep the end a bit away from the ejection charge heat. The red plastic guide tube extends a little past the centering rings on both sides.
The inset picture shows the finished 24mm engine mount. The engine hooks are hanging over the back end of the mount.
Complete directions for installing a Replaceable Kevlar Line are in the Apogee Peak Of Flight Newsletter HERE
I'm not showing the build of the 18mm engine mount, no need as everybody knows how to make one.
I did end up using the supplied blue engine mount tube. This blue tube seemed to be stronger with a shinier outside surface than what I'd seen in the past.
These rings are fairly thin and fitting the tube will be tight.
A round hole was filed in both the rings to fit the plastic (Kevlar) tube.
Cut the low end Kevlar tail even with the end of the engine tube.
You want a tail to grab onto when the Kevlar is pulled for checking it's condition or replacement.
Note the upper end of the plastic straw is not all the way to the front end of the engine mount tube. I try to keep the end a bit away from the ejection charge heat. The red plastic guide tube extends a little past the centering rings on both sides.
The inset picture shows the finished 24mm engine mount. The engine hooks are hanging over the back end of the mount.
Complete directions for installing a Replaceable Kevlar Line are in the Apogee Peak Of Flight Newsletter HERE
I'm not showing the build of the 18mm engine mount, no need as everybody knows how to make one.
I did end up using the supplied blue engine mount tube. This blue tube seemed to be stronger with a shinier outside surface than what I'd seen in the past.
Friday, January 24, 2014
Estes Hornet Build Part 1 Parts
This model was originally a Centuri kit released in 1982.
This was the start of the conversion from Phoenix to Penrose, some Centuri branded kits were using Estes parts.
This model used a Estes BT-55 and was a "D Engine Convertible.
Recommended engines were a D12-7 and B and C 18mm engines
This catalog page is from the Ninfinger site HERE
The Estes reissue kit is made for 18mm engines, B4-4, B6-4 and C6-5.
I'll be making this one like the original Centuri version for 24mm D engines.
Some upgrades will include a replaceable Kevlar engine mount and a Centuri logo in place of the Estes name.
I won't be using the thin blue engine mount tube.
Because this model will use 24mm engines a 3/16" launch lug will replace the supplied 1/8" lug.
Here's the parts needed for the 24mm engine mount with replaceable Kevlar.
Clockwise from the left:
Generic plastic cotton swab tube, 2050 ring for the engine block,
135 lb. Kevlar, two 50/55 centering rings, 2 3/4" long BT-50 and the finger tab engine hook from the kit.
The finished model is for sale on EBAY right now - HERE
This was the start of the conversion from Phoenix to Penrose, some Centuri branded kits were using Estes parts.
This model used a Estes BT-55 and was a "D Engine Convertible.
Recommended engines were a D12-7 and B and C 18mm engines
This catalog page is from the Ninfinger site HERE
The Estes reissue kit is made for 18mm engines, B4-4, B6-4 and C6-5.
I'll be making this one like the original Centuri version for 24mm D engines.
Some upgrades will include a replaceable Kevlar engine mount and a Centuri logo in place of the Estes name.
I won't be using the thin blue engine mount tube.
Because this model will use 24mm engines a 3/16" launch lug will replace the supplied 1/8" lug.
Here's the parts needed for the 24mm engine mount with replaceable Kevlar.
Clockwise from the left:
Generic plastic cotton swab tube, 2050 ring for the engine block,
135 lb. Kevlar, two 50/55 centering rings, 2 3/4" long BT-50 and the finger tab engine hook from the kit.
The finished model is for sale on EBAY right now - HERE
Tuesday, January 21, 2014
Centuri HORNET on EBAY
I have a Centuri (Estes)
HORNET
up for bids on EBAY HERE
This model was built from the Estes reissue Classic kit.
It sports the Centuri logo and is made for 24mm engines just like the original.
An 18mm engine mount is also included.
Make a bid and help the blog stay online!
Subscribe to:
Posts (Atom)