
Showing posts with label Fluorescent Paint. Show all posts

Saturday, June 6, 2020

Estes Doorknob, #9720 Build, Part 9, Phosphorescent Orange


Trust me - DON'T USE THIS PAINT!

I've had mixed success with Krylon. I had terrible results with this.
It's hard to find day-glo orange paint. I found this at Michael's and bought two small cans.


On the left is the first mask for the day-glo orange.

The paint went on very rough and spattered. Usually flat paints go on pretty smooth.
I tried some light sandpaper to smooth it out before the next coat. THE PAINT CHIPPED OFF!
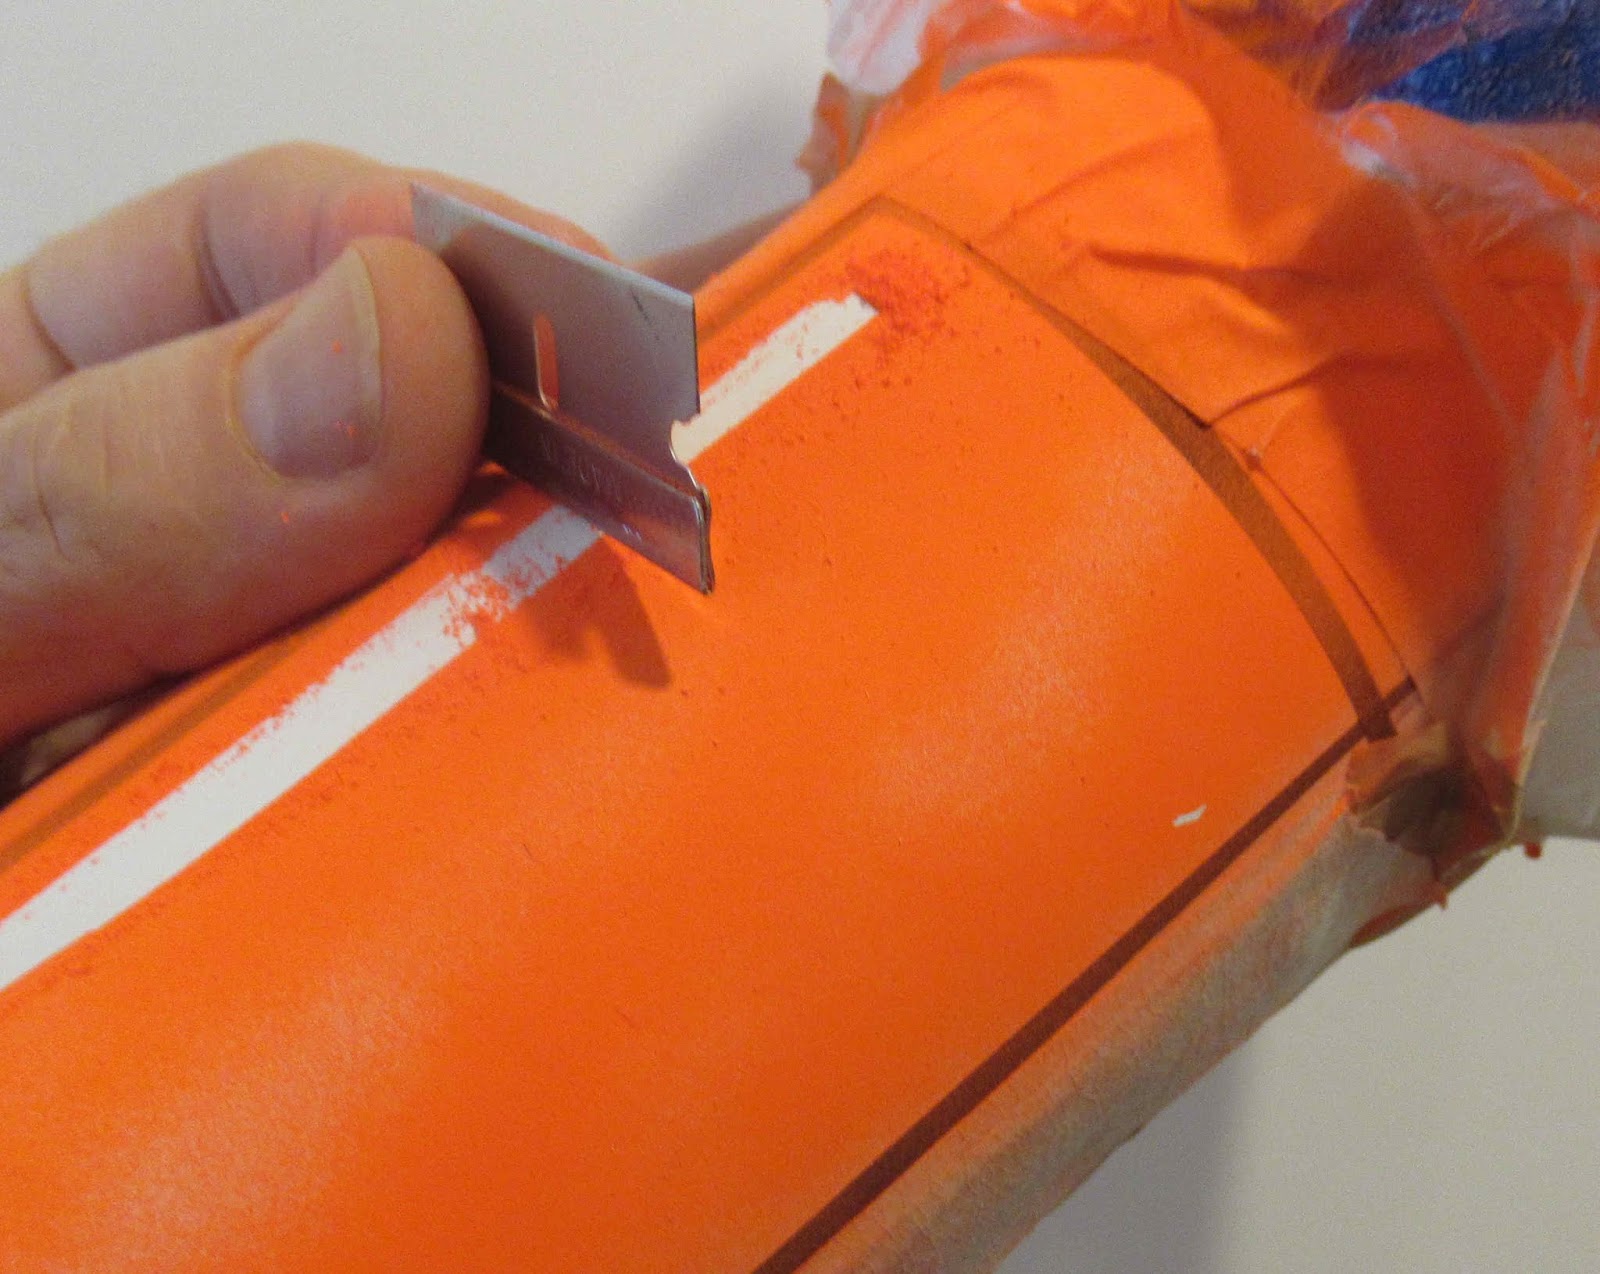
I used the back of a single edge razor blade to remove the paint. I didn't scrape it off, just pressing the smooth back of the blade chipped off all the paint! What a mess.

The same masking tape was still used again. The paint came off a little too easily.
I tried to find another brand of day-glo orange with no luck.

On a whim, I compared the Ace Hardware Store Rocket Red to the crappy Krylon orange.
There was no difference in color. The Ace Rocket Red is more of an orange - look at the comparison next to the can caps!
I ended up using the Ace Rocket Red on the model.

Sunday, August 4, 2019

Semroc USS Andromeda KV-97, Part 13, Black Paint Prep

 The engine tubes were masked off for the fluorescent paint and the entire model was sprayed gloss black. After the decals are applied the rocket will end up a coat of flat acrylic. Paint it gloss for now so the decals will transfer and stick onto the model.

The surface of the card stock pieces seemed rough. After the first black coat they were sanded smooth with 400 grit.


Around the rings it's tough to sand and smooth the fillets. While sanding I must have nicked the balsa with a folded corner of the sandpaper.

I did a very shallow fill with some CWF. The picture on the right is after sanding.


I used a Sharpie to blacken the sanded CWF filler. You can get away with this on an overall black surface.
The Sharpie ink was lightly sanded with 400 grit.


The interior of the hollow engine tubes should be painted with white. With a white undercoat the upcoming fluorescent paint will glow.
Some white enamel was brushed on the inside tube walls.

The engine tubes will get a fluorescent orange acrylic paint applied with a brush. Then mask off the orange and spray the model a final gloss black.

NOTE: I will have to take a break on this one! Semroc is sending me two sets of decals and metallic trim. When those arrive we'll finish up the build.

Saturday, September 15, 2018

Streamer D Rocket Build, Part 4, Kevlar Notch and Paint

The fins are glued on a bit forward of the end to allow a wrap of tape for engine retention.

The root edge of one fin is marked for a notch. The Kevlar line is knotted and glued on the root edge so the model will hang parallel to the ground under the streamer. This adds even more drag during recovery.


I made a small notch where the Kevlar will be attached after the rocket is painted.


Here's the finished build ready for fluorescent green paint.
I know, green paint? Not the best color for finding a model on the ground. This model will have a long, wide chrome Mylar streamer. It shouldn't be hard to find.


As shown before, fluorescent paint is flat and a rough finish. You can polish and smooth the flat finish by rubbing it with a soft cloth. That will bring it to a satin finish with less drag. The smoother finish will also help with decal adhesion.

Wednesday, May 30, 2018

Apogee Payload Altitude Rocket Build, Part 9, Paint and Weight

I didn't use CWF in the body tube seams.
Primer/Filler was sprayed and most all of it sanded off.

I wanted to paint the model with fluorescent paint, but you have to use a white undercoat with fluorescents.
The trouble is - fluorescent paints are flat and the surface is rough. This flat finish adds surface drag.

TIP: You can shine up a flat finish with polishing compound. After you polish, additional gloss is obtained with a soft cloth and lots of elbow grease. This is not a full gloss finish, but a decent semi-gloss shine.
TIP: Putting a gloss clear coat on a fluorescent finish will diminish some of the "glow". A fluorescent will end up looking closer to a normal orange paint. Still a glowing color, but not as effective.


The small 8" parachute is partially packed inside the red coupler.
It's fine and will be pulled out at ejection.


My model weighed in at .45 oz.
On the Apogee website their finished model weight is .54 oz.

Maybe the thinner, airfoiled fins and omitting the engine block helped out!

Sunday, August 20, 2017

Estes Starship Nova #1371 Build, Part 18, Fluorescent Paint TIP


The new, wider fairing was glued onto the split engine tube.

CA glue was applied with a Q-tip. After drying the fairing was lightly sanded smooth with 400 grit.


The exposed end surfaces were blackened with a Sharpie.

These inside areas would be very hard to get to with a spray can after gluing onto the rocket body.


The housing are set in place and a light pencil line was traced around the housing. Go light with the pencil, you don't want to scar the balsa.

Masking tape was set down a little inside the pencil line.

It took quite a few coats of hand painted fluorescent paint to get a good coverage.
TIP: Only use fluorescent paint over an opaque white surface!


Here's the inside of the engine surface after about four coats of fluorescent orange. Paint, lightly sand the high spots and paint again.

Thursday, March 30, 2017

Estes Nike Smoke #7247 Build, Part 15, Which Fluorescent Paint? TIPS

Questions in a comment from BAR Geezer -

Hey Chris, Two questions for you:
1. Are you using Rustoleum Specialty Fluorescent paint?
2. Was the base coat on the fins the same gloss white as the rest of the rocket? I sprayed fluorescent paint on a glossy undercoat once and it slid around and cracked! Got better results with a flat undercoat.
Did you use several light coats, drying in between? How many coats? Inquiring minds want to know! Thanks.
______________________________________________________________________

Well, that was four questions!
These are worth doing a post on, the right fluorescent color (especially the Red-Orange) is hard to find.


I went with two different brands. Ace Hardware was the only store that had the "Rocket Red" color which actually dries a Red/Orange color.
The Rusto Fluorescent Yellow was from Home Depot.

Here's the catalog numbers and bar codes from the back. Red is on the left, Yellow on the right.


The base coat was Rusto 2X gloss white.
I don't use flat colors (even on scale models) because they get dirty too easily.

I didn't have any problems spraying the fluorescent paints on the gloss white.
Fluorescent paints go on very thin, they almost look like water colors when applied. I probably did four light coats, I didn't use a "wet" final final coat with the fluorescents.
I usually let the first light sprays dry for five to ten minutes between coats.

Always read the directions and follow the recoat time recommendations. Recoat times will vary between different vendors and type of paints from the same manufacturer.