Showing posts with label FK MMX Crayon. Show all posts

Wednesday, July 23, 2014

The BIG Fix, FlisKits MMX Crayon, Part 2

The replacement lug was cut from the back end of a ball point pen ink tube. The walls of the ink tube are thicker than a MMX lug but slide easily over a Micro launch rod.

The paint had torn off around the old lug glue area.
This was touched up with a black Sharpie.

The lug was roughed up with sandpaper for a better bond.
The lug was glued on using medium CA. (I know, the glue joint will get brittle over time. I'll just keep an eye on it.)

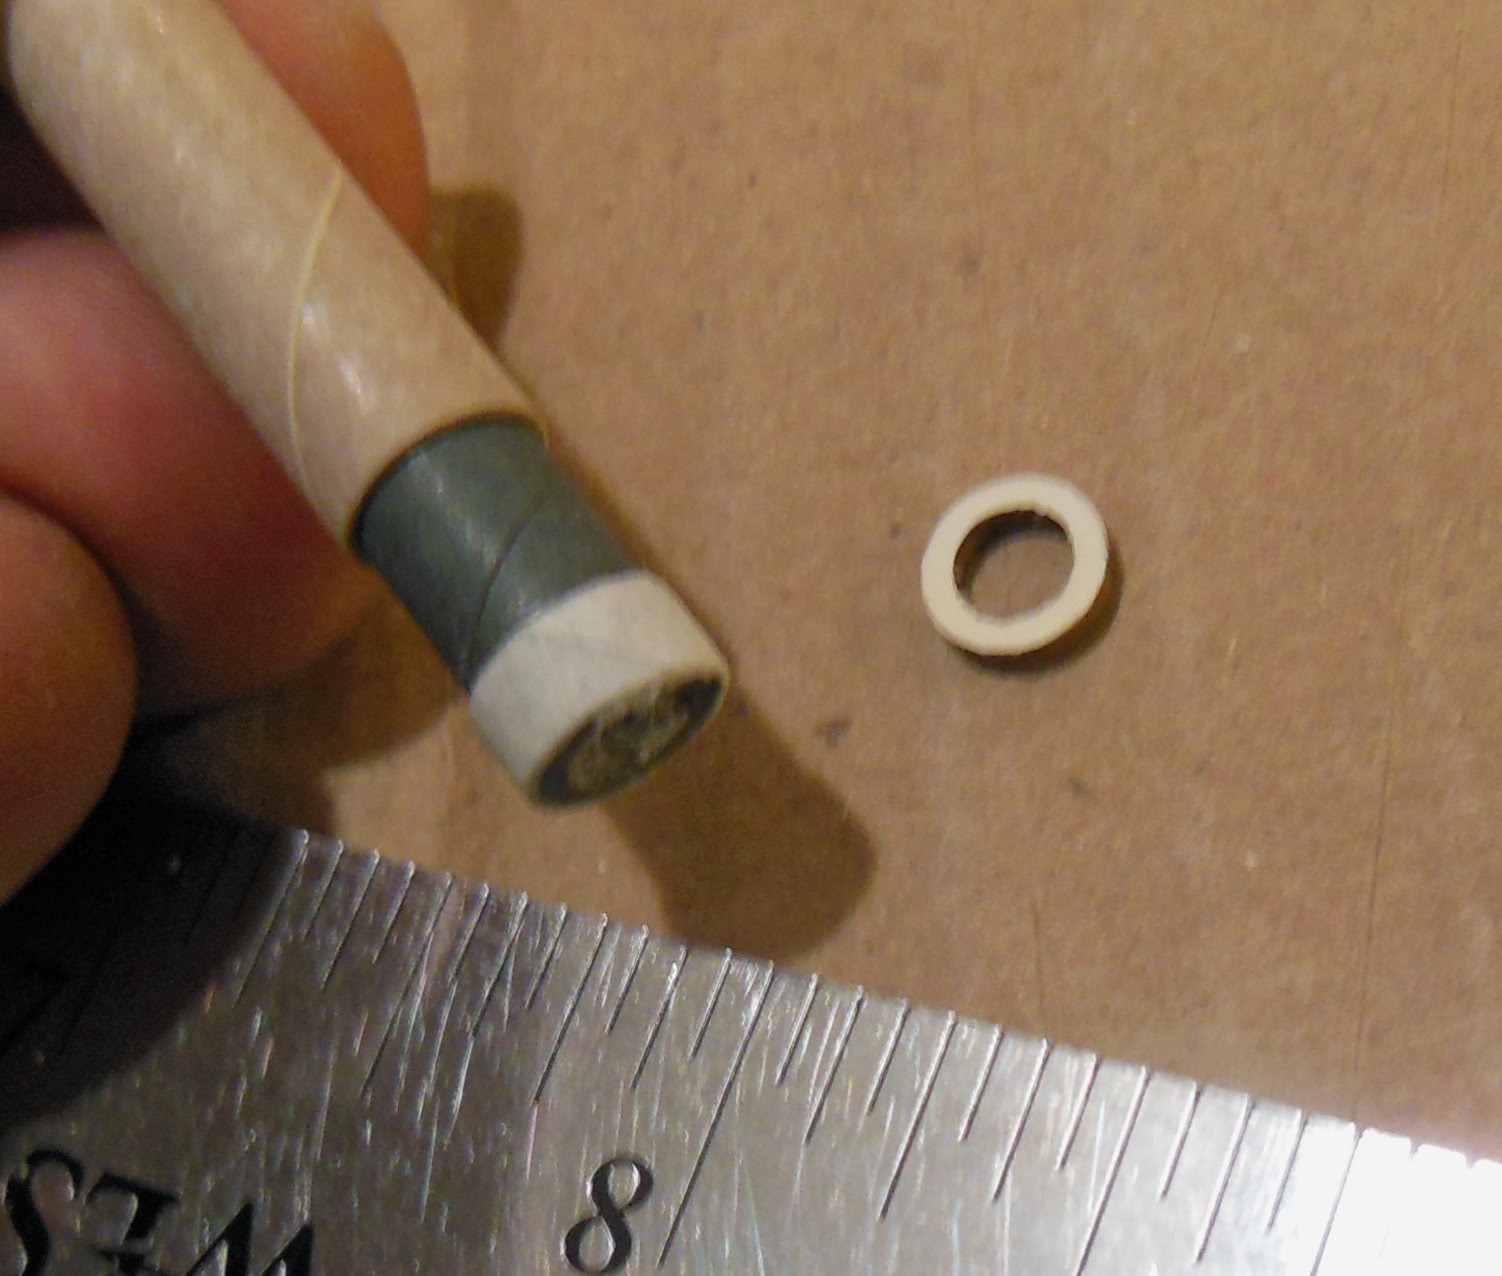
The new wrapped rear ring was a little high and the fit too tight.
Before sanding down, it got a coat of CA applied with a Q-tip.


The CA hardens the ring and prevents it from unrolling when sanding to size.
A four-sided fingernail file and 400 grit brought it down to the right diameter.
The hardened CA polishes well and made a very smooth surface.


Fixed and ready for flight!

Sunday, July 20, 2014

The BIG Fix, FlisKits MMX Crayon, Part 1

On it's third launch, my Fliskit Crayon lost a launch lug and the rear centering ring. The clear fins had already been re-glued a few times. The CA glue used on the fins was starting to cloud up the root edges.

I didn't have another MMX centering ring or launch lug. Instead of waiting for a mail order, I'll fix it with something close by.

I've wrapped MMX centering rings before. It's easy to do with 110 lb. card stock.
A long strip was cut the same width as the ring still on the model.

A glue stick was wiped down the back.


This was wrapped around the engine mount approximating the outside diameter of the top ring.
To line up the wrapped layers, the mount was slid into the upper section Crayon. The wraps were pressed against the end of the body tube with the side of a hobby knife.

A white glue fillet was applied and the excess wiped off with a Q-tip.
Don't glue the ring to the upper section. The upper section was just used for positioning.

Saturday, February 8, 2014

FlisKits MMX Crayon Build Finished


Even when downsized, the fins still look big!
This was a quick, fun build.
If you ever want to see how well MicroMaxx engines can perform try one of the 3FNC Micro models from FlisKits.


With gloss paint under the construction paper wrap, it really looks like a crayon!
It's a perfect match for my MMX SkyWriter.

Here's the FlisKits Crayon next to a newer Crayola crayon I found.

The paper wrap design I found online is a little different.
The MMX model is only slightly larger than a real crayon.

Friday, February 7, 2014

FlisKits MMX Crayon Build Part 6, Fin Glue and Shock Cord


Line up the launch lug on the marking guide and mark for the fins.


A thin line of paint was scratched off for better adhesion.
The scratched line was just a little shorter than the root edge of the fins.
A drop of medium CA was set down on a scrap piece of cardboard.
Just the root edge of the clear fin was dragged through the drop.

Set the fin on the scratched line.
Start with the corner of the trailing edge even with the end of the tube.


The other end of the shock cord got an overhand knot.
There isn't enough room between the engine mount tube and the inside wall of the BT-3 crayon tube for a full square knot.
This overhand wrap will hold the Kevlar when it is set into a glue fillet at the base of the upper centering ring.


The streamer is taped onto the Kevlar line.
I try to arrange the model so the upper section won't be swinging and hitting the fins or engine mount when the model is hanging by the streamer.

The 12" streamer might be a little long, we'll see how easily it slides out of the upper section.
When prepping for flight, put the shock cord in the upper crayon section then follow with the rolled up streamer. At ejection the shock cord will be above the streamer and help pull it out.

FlisKits MMX Crayon Build Part 5A, Email

From: J. Brian Coyle
To: HANS MICHIELSSEN
Sent: Thursday, February 6, 2014 7:07 PM
Subject: Fliskits MMX Crayon

On today's blog You wrote:
"The print on the ends didn't really match up.
If it were drawn again I could probably get it closer."

Brians response:
Have looked at any Crayola's recently?   Their wrappers *never* line up!
I'd say mis-aligned is TRUE SCALE.  :-)

Thanks Brian, I'll sleep better tonight.

Thursday, February 6, 2014

FlisKits MMX Crayon Build Part 5, Crayon Wrap

Before gluing the wrap, pre-curl the paper. Set the paper in the heel of your hand and roll over it with a dowel.

The back of the wrap got a coat of clear glue stick.
The edge was set down on a pencil line down the body tube.

Continue rolling the wrap around the tube smoothing it out as you go.

The print on the ends didn't really match up. If it were drawn again I could probably get it closer.

The end seam will want to lift.
Put a bit of white glue on one side of your knife and slide it under the lifted edge. It takes very little glue to hold down the edge.
Roll over the edge with a clean dowel to set it down.

Wednesday, February 5, 2014

FlisKits MMX Crayon Build Part 4, Paint and Shock Cord


It would be easier to paint the model before the clear fins are glued on.

The upper and lower sections got a shot of gray primer/filler and smooth sanding with 400 grit.
Be sure to mask off the exposed engine tube and centering rings.

The lower half was painted black,
the upper crayon painted red.

Some paint was scraped and sanded off the crayon side for better adhesion of the wrap.

The thin shock cord was switched out for some thicker cord.
The small nail holds the knotted Kevlar end in the nose cone.

Press in the nail, remove the nail.
Knot the Kevlar and press the knot into the hole.
Add some white glue.
Press in the nail pushing the Kevlar knot into the nose cone.

Tuesday, February 4, 2014

FlisKits MMX Crayon Build Part 3, Fin Cuts and Fill


The fin pattern seemed pretty large, I scaled them down a bit.

I've lined up the edge of the clear stock with the root edge of the pattern.
There's no need to cut all the way through. Score the plastic and crack the plastic apart.


The model has three fins.
You have plenty of extra material left over. Cut out extras and keep them handy.
These fins are very thin and super glued on the body tube.
There's not much of a root edge, they could pop off on a hard landing.


The balsa nose cone shoulder edge was rough and needed to be built up.
Some filler was brushed over the edge. The nose cone was pressed and turned into the tube end forcing the filler into the shoulder. Pull out the nose cone and you can see the lip filler is raised over the side.
After sanding the shoulder should be more squared off.


I went ahead and filled the tube seams.
The small lug was set over a toothpick tip and filler brushed on.

Monday, February 3, 2014

FlisKits MMX Crayon Build Part 2, Engine Mount


The tiny engine block is glued into the BT-2.5 tube using a MMX engine casing.
For a "stop" some tape was wrapped 1/8" on the bottom of the casing.
A ring of glue was set inside with a dowel.
The engine block was set in the tube and pressed into place with the casing up to the tape ring.


The fin marking guide is wrapped around the 6" long BT-3.
The tube is cut at the height of the marking guide at 1".
Because it is such a small diameter tube I wrapped masking tape around the tube for a cutting guide line.

The centering rings are glued onto the BT-2.5 tube at 1/8", 1", 1 1/4" and 1 3/4".
The two lower rings are under the 1" length of BT-3 making the engine mount.
The upper rings slide into the upper longer length of BT-3 Crayon section.


Here's the finished engine mount, the lower section of the model.

Sunday, February 2, 2014

FlisKits MMX Crayon Build Part 1, Parts

I haven't built a MMX rocket in a while.
They are great first launch of the day models to test the controller, rod angle and winds.
This one is almost a minimum diameter and should be fast with good altitude.

Parts quality is very good.
The engine mount tube is a BT-2.5, just under 2" long.
The crayon tube is a 6" long BT-3.
The streamer is red plastic, 1/2" X 12" long.

Clockwise from the top:
The Kevlar shock cord is thin, the line in my MMX Honest John has burned through. I'll replace this line with something slightly thicker.
There is plenty of clear fin material, make extra fins.
The body wrap is printed on red construction paper.
The four centering rings and engine block are small but very well cut.
The small nail holds the shock cord in the nose cone base.
Finally, the crayon balsa nose cone.


While the FlisKit crayon wrap looks great I went and redrew a Crayola crayon logo wrap. I simply wanted it to look like a Crayola.