Showing posts with label Egg Capsule. Show all posts

Monday, February 8, 2021

Quest Courier #Q2011 Build, Part 3, Egg Capsule & Fins


The egg capsule is molded in one piece. A thin segment is cut off to separate the two halves.

Pay attention to which recess lines are to be cut. 
You remove a thin strip of scrap plastic.


Here's the egg capsule slid together.
A wrap of electrical tape will hold the top and bottom together for flight.

This is the same capsule used on the Magnum Sport Loader, a favorite Quest kit. On the Magnum, the payload is lengthened with a segment of body tube for a  possible two egg launch.

Three fins and the launch lug standoff were cut out of 3/32" thick basswood.
The leading edges were rounded off with 400 grit.

The basswood fin shown here has had a coat of filler/primer and sanding.

I had to give the basswood parts a second shot of filler/primer and more sanding to fill the grain.

The fins are taped down to scrap cardboard for a second application of filler/primer. The fins and standoff have been set tight together to keep the paint off the root edges.

Monday, August 20, 2018

NARAM Egg Lofter Build, Part 3, Egg Capsule Prep


The supplied Kevlar line is laced through the drilled holes and securely tied. I used a square knot. The knot is inside the lower capsule half.
The knot was "set" with a small drop of white glue.


A larger single hole is cut into the flat bottom of the 18mm shoulder.
Again draw a circle with a pencil. Cutting through the shoulder base took more time than I would have expected.

After cutting out the center, the edges were rough.
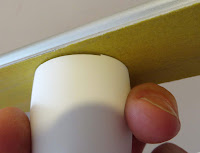
Sandpaper was wrapped around a tapered dowel and the edges cleaned up.

The shoulder was set on the capsule over the pencil circle. The Kevlar is fed through the hole in the shoulder.

Once I was sure the shoulder was centered, liquid plastic cement was brushed around the shoulder/base joint.

The Kevlar line seemed long so another knot was tied, closer to the shoulder hole. The excess Kevlar was cut off.

Sunday, August 19, 2018

NARAM Egg Lofter Build, Part 2, Egg Capsule Prep


The cut edges of the capsule halves were a little off. The cut ends have to be flat for the end to end taped fit.
It's a simple fix to sand off the rough cuts with 200 grit on a sanding block.
Two holes are "drilled" at the bottom of one capsule half.
Don't blindly drill the holes with the tip of a knife, take a moment to mark the locations with a pencil. You might find yourself erasing and remarking the hole locations a few times. Leave a little space between the two hole locations for strength.

Start the drill with the tip of an X-Acto knife.


Widen the holes and clean up the edges with a small diamond rat tail file. You want the hole edges clean and strong. Sometimes vacu-form parts can get thin.
In preparation for gluing on the shoulder:
Set the shoulder over the end with the drilled holes. Center it as best as you can visually and trace around the joint with a pencil.
Chances are the traced circle will be a little off center. Erase the circle and try again.
The pencil traced circle will assure that the shoulder will be centered.

Saturday, August 18, 2018

NARAM Egg Lofter Build, Part 1, Parts


I'm basing my C engine Egg Lofter design on the old Competition Model Rockets Robin design.
To see the CMR catalog: CLICK HERE

I'm really doing a lot of guessing with my competition designs. I know you have to keep them light and aerodynamic.
The only NAR competition I did was in 1975 and 1976. Over the years some things have changed, other elements haven't really changed at all.

I'll base my model height and body tube diameter on the Robin design. Note the CMR tube walls were a little thinner than the equivalent Estes sized tubing. I'll be using Estes tubes in these builds.


The model itself is very simple except for the Egg Capsule.
Years ago, CMR was the main source for lightweight, vacu-form nose cones. CMR also made the larger egg carrying capsules.

Apogee now sells vacu-form capsules. This parts pack has shoulders for both 18mm and 25mm models.


This build is one I put together for the recent NARAM. After a two hour tour of Estes, I got back to the launch field too late to fly it!