Showing posts with label S Andromeda. Show all posts

Monday, June 29, 2020

Semroc Andromeda Chrome Wrap Fix, Tips, Part 2


Here's the original Estes instruction illustration showing the spacing of the chrome bands.

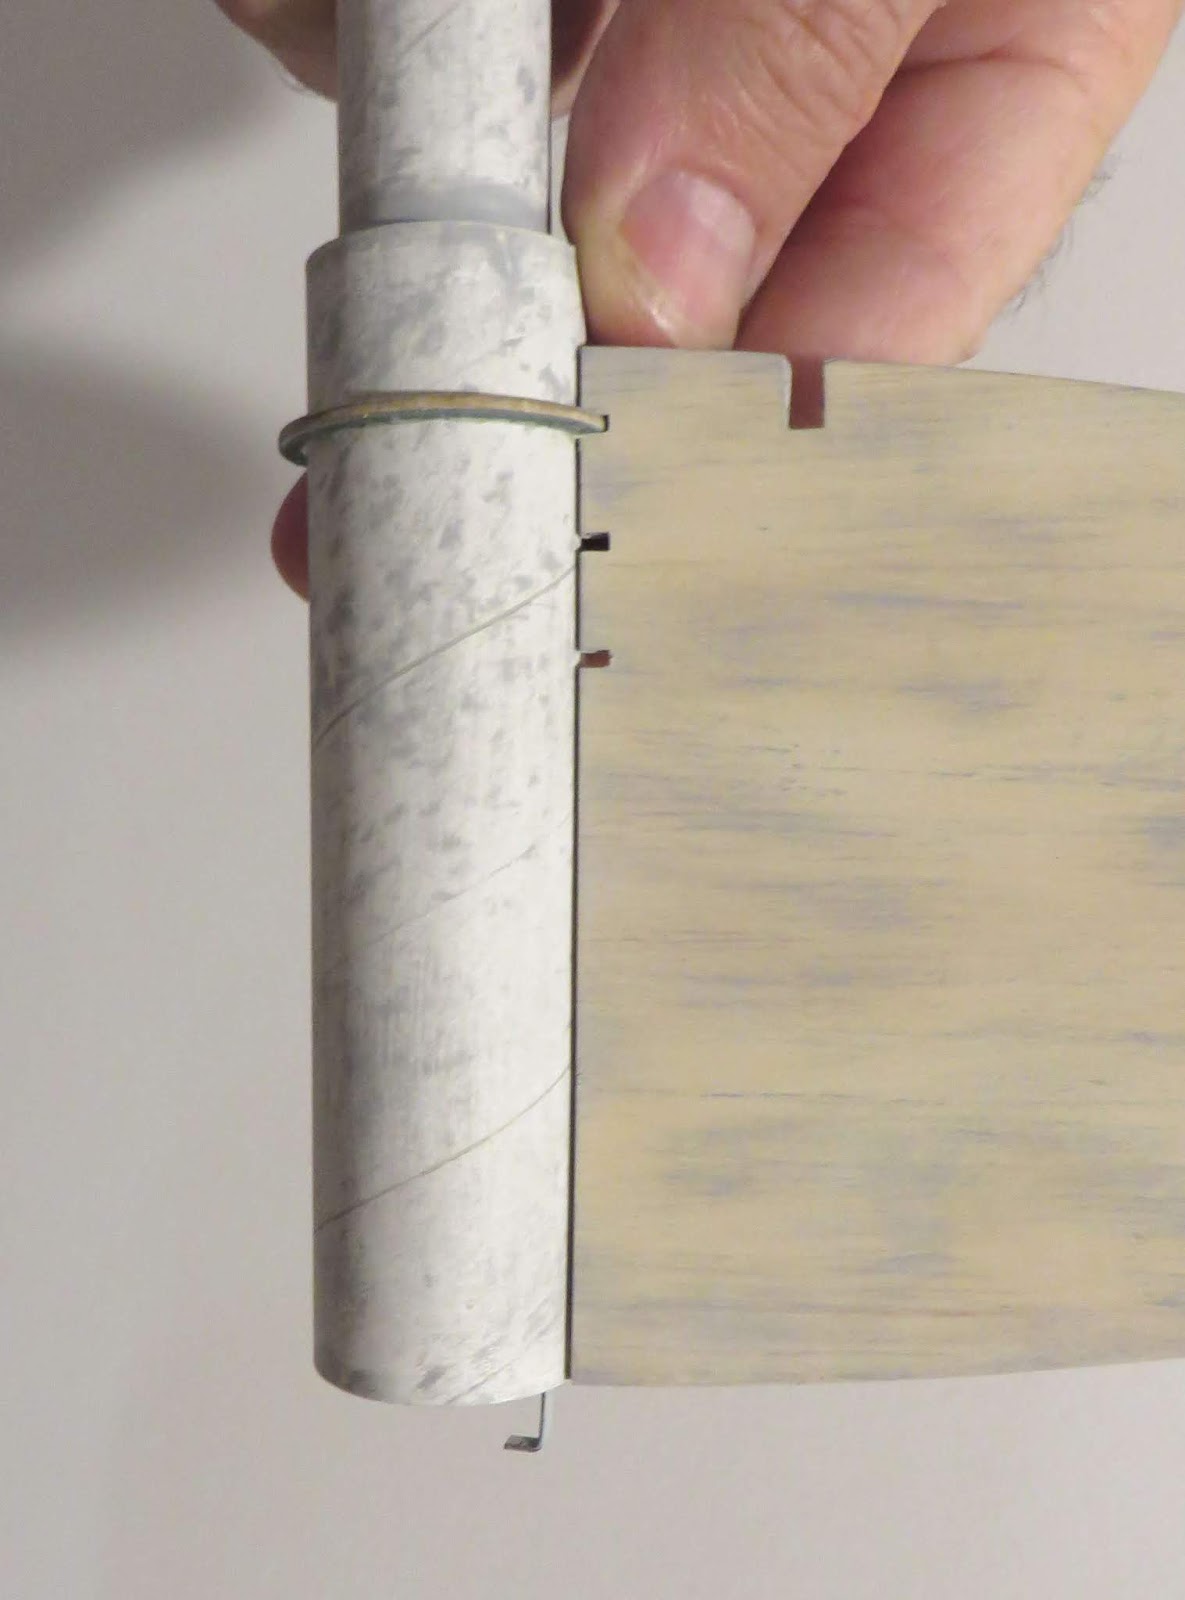
The low wrap is 1 1/2" above the centering ring joint. The second wrap goes 1/4" above that.
On the left, the first wrap is in place, using the top edge of a masking tape wrap for a reference line. Why use a tape wrap? Getting a sticky wrap to meet up at the start point never seems to happen on the first try. The tape wrap gives you a straight around the tube reference.

After the first chrome wrap is set, a 1/4" wide masking tape strip was set above the lower wrap.
The upper chrome wrap is set down above the tape strip.


Here's the final decal art using the widest black band decal from the first three draws.

This decal print is available as a PDF if you are a Patreon blog supporter.


Here's the overlay decals on top of the chrome trim.
This is the same technique I've used in the past to "print" over chrome.

The width of the vertical bar wrap worked and is even all the way around. Sometimes things work out, it just takes me a year and a half to fix it.

Sunday, June 28, 2020

Semroc Andromeda Chrome Wrap Fix, Tips, Part 1

My Semroc Andromeda was a pre-production kit, given to me to help produce the instructions. I got the kit at NARAM 60, almost two years ago.
I built the kit without problems as I did the line drawings. All went great, until I applied the (laser burned) chrome wrap. The black striping was cut a little to deep. I couldn't transfer the wrap onto the model without it breaking up into many strips.
The model sat finished, without the chrome wrap for quite a while. I finally got around to making a wrap yesterday and applying it tonight.
I've used this technique before when a printed chrome piece was needed.

I drew up three roll bar rectangles. The middle set was drawn to the width of the kit supplied wrap. Past experience has taught me to make a few more, one a bit narrower and a third wrap a little wider. The width difference was almost 1/16".
This gives me some room to play with and adjusts for tube diameter and paint thickness.
These were printed up on to clear decal paper.

I first cut Monokote chrome trim piece to the width of the wrap supplied in the kit. It turned out to be about 1/16" short! Maybe the third, wider decal wrap will fit.

A second test piece of chrome trim was cut to allow a slight overlap. When a  chrome wrap overlaps itself, it's very hard to see the seam.
Notice in the above picture, a wrap of masking tape is set around the tube for a straight, around the tube reference line. The upper side of the tape is 1 1/2" from the top of the centering ring.

When rolling on the chrome piece, leave most of it on the backing. Try not to touch the sticky underside.
Roll the chrome on, smoothing out any trapped air as you go. Keep the bottom edge of the chrome wrap on the top of of the tape.

More tomorrow-

Thursday, October 24, 2019

Semroc Andromeda Build, Part 17, Applying The Decals

In the instructions you are given placement measurements.
Here I'm leaving most all of the decal on the backing paper. The right side of the "A" in Andromeda is set on the 9/16" spacing before the backing is slid back to the left with the decal remaining on the surface.

Always, always, always wet the area where the decal will end up. You want to have some water underneath the decal surface so it will slide for positioning, especially on this textured, metallic finish.

The largest "wing" decal is in two pieces. Be sure to set the decal into the root edge/body tube joint.

Again, use a damp Q-tip to work out the air bubbles and get a better surface seal on this textured paint.
At the bottom the two decals butt up at the fin root edge.


Be very careful with the metallic wrap.
When I peeled off the back, the stripes were starting to split.

Wednesday, October 23, 2019

Semroc Andromeda Build, Part 16, Checking Out The Decals


Here's the water slide decals and the chrome wrap.
The chrome wrap is interesting, Randy Boadway told me the black stripes were laser burnt into the Mylar.

These are real "old school" screen printed decals. Notice the clear coat border around the decal ink in the light reflection. It's not an overall clear coat.


This makes the decals easier to handle. You can cut them a little larger - the only image that will transfer is the clear coat area and inked image underneath.

The Metallic black spray paint has got a slight textured surface. I did a test transfer using the Semroc logo. It seemed to adhere okay, I did have to roll over the decal skin with a damp Q-tip to work out the air.
NOTE: These decals will stick better to a smoother, gloss surface. There wasn't any "silvering" like you could see when placing a water-slide decal on a flat finished paint surface. But - it did take more time to get the decal surface to "seat " on the metallic paint.

Tuesday, October 22, 2019

Semroc Andromeda Build, Part 15, Mask & Paint

The interior of the engine tubes were hand painted earlier with fluorescent orange acrylic.
The interior color isn't very smooth, next time I'd probably spray the fluorescent orange. These were capped over with masking tape to keep out the black paint. The bottom tape "cap" is before trimming with scissors. The upper tape has been roughly cut to the edges of the round tube end.


Here's a closeup of the radiator rings with the metallic paint applied.
The reflections of all the metal specks don't allow all the rough spots and glue blobs to show as much.


One of the rear "sail fins".
This metallic paint shows off best in direct sunlight.

The areas that will get decals will be polished with rubbing compound to smooth the surface and help decal adhesion. Decals stick pretty well to this paint, but there is a slight texture to the finish.

Semroc Andromeda Build, Part 14, Decals and Paint Choices

Back to finish up the Semroc Andromeda - 

I had assembled the Semroc Andromeda earlier on the blog. I was waiting on the decals, I understand Semroc had some delays finding a vendor to make them, silk screened-old style. These decals have some white ink on them, they will go on over black paint.
The black stripes on the metallic tube wrap aren't printed, they are laser burned!


I assembled this one to produce the line drawings for the Semroc kit instructions. I didn't really put in as much time as normal, filling and smoothing the glue fillets.

I'd spray on some black, then sand glue boogers. I had difficulty smoothing out the tight areas between those centering rings outside the tube.

I had to do some camouflage. Gloss paint will show every little dip and rough surface.
I can't spray the model flat black, decals won't stick to matte finishes. I did the next best thing.

TIP: I've had great luck with the Rustoleum Metallic paints in the past. While it isn't a real shiny gloss finish, decals have adhered pretty well before. The little metallic speck reflections will cover the imperfections.

Sunday, August 4, 2019

Semroc USS Andromeda KV-97, Part 13, Black Paint Prep

 The engine tubes were masked off for the fluorescent paint and the entire model was sprayed gloss black. After the decals are applied the rocket will end up a coat of flat acrylic. Paint it gloss for now so the decals will transfer and stick onto the model.

The surface of the card stock pieces seemed rough. After the first black coat they were sanded smooth with 400 grit.


Around the rings it's tough to sand and smooth the fillets. While sanding I must have nicked the balsa with a folded corner of the sandpaper.

I did a very shallow fill with some CWF. The picture on the right is after sanding.


I used a Sharpie to blacken the sanded CWF filler. You can get away with this on an overall black surface.
The Sharpie ink was lightly sanded with 400 grit.


The interior of the hollow engine tubes should be painted with white. With a white undercoat the upcoming fluorescent paint will glow.
Some white enamel was brushed on the inside tube walls.

The engine tubes will get a fluorescent orange acrylic paint applied with a brush. Then mask off the orange and spray the model a final gloss black.

NOTE: I will have to take a break on this one! Semroc is sending me two sets of decals and metallic trim. When those arrive we'll finish up the build.

Saturday, August 3, 2019

Semroc USS Andromeda KV-97, Part 12, Lugs and Detail Pieces


Here's the rear and front launch lugs glued in place.
Some of the fin details have been glued in place. There are small positioning dots burnt into the sail fin surface. As mentioned before, mine was a pre-production kit. The dots were a little outside the border width of the detail pieces. This has also been fixed in the production kits.

Here's the back end showing the detail pieces and the toothpick antennas glued to the small fin.

On the engine tubes I've placed some masking tape pieces. This will keep the black paint out for the fluorescent interior paint later.

The entire model will be painted an overall black so no white undercoats are needed. The only white will be hand painted inside the engine tubes for the fluorescent paint to follow.

Friday, August 2, 2019

Semroc USS Andromeda KV-97, Part 11, Dots TIP and Launch Lugs


There are two small "dots" glued onto the body tube forward of the dowels.
These are cut from thick card stock. They won't fit the curvature of the body tube as they are now.


I drew a line down the center of the dot for a reference.
Set this line down the length of an X-Acto knife barrel or stiff dowel.
TIP: Press the sides around the barrel to give it a smooth curve.


Compared to the first picture you can see a difference in the fit.
You could glue these on without shaping them but there would be a gap requiring more fillet work.

My parts were from a pre-production kit and there were some small adjustments made.

The forward launch lug marking guide was high and the two lugs wouldn't be in line. This is an easy fix and corrected for the kit run.

Thursday, August 1, 2019

Semroc USS Andromeda KV-97, Part 10, Small Fins and Dowels


TIP: This is an optional step, but you can seal the conduit dowels before gluing them onto the rocket.
I dipped a paper towel in some clear varnish and wiped down the dowels. You can use most any clear liquid finish.

After the varnish dries, sand smooth with 400 grit.


Scrape away the clear finish off the gluing areas.

Set the low end of the dowel in the wing/fin notch and over the forward conduit support fins.

The front dowel end will have to be trimmed to the forward edge angle of the conduit support.
Glue the conduit dowel in place.


Fillets should be added all around. Around the rings fillets are hard to smooth out and remove the excess glue. I used quite a few Q-tips to get where my fingertip couldn't reach.


Use the ends of the assembly jig to glue and center the short tubes on the ends of the engine pylons.

Apply glue fillets after the root edge glue dries.

Wednesday, July 31, 2019

Semroc USS Andromeda KV-97, Part 9, Fin Alignment


The large wing fins are glued on using the larger assembly jig.
Set the engine end tube into the large jig, the front of the rocket is set into the upper jig for support.

Glue the root edge. Set the fin onto the jig and slide into the body tube setting the rings into the notches.


The front end dowel support standoffs are glued on using the smaller forward support.


The smaller triangle is used to set the 90 degree angle on the small antenna platform fin.


Use the same triangle to set the engine pylon fin.


Tuesday, July 30, 2019

Semroc USS Andromeda KV-97, Part 8, Gluing The Radiator Rings


The trailing edge tip of the large wing/fin is even with the end of the body tube.
The picture shows how the top ring will fit into the root edge notch in the fin.


With the ring glue on, double check using the fin to be sure the back of the fin is even with the tube end.


Glue a ring, add a narrow fillet on each side, then glue on another ring.
TIP:You'll find it easier to fillet each ring individually as they are close together.
Use the same technique to glue on the second and third ring.

Here's all three rings in place prior to gluing on the two large and two smaller notched fins.

Monday, July 29, 2019

Semroc USS Andromeda KV-97, Part 7, Cleaning Up Parts


The short tubes have interior seams! You'll be able to see them on the finished model so of course, I'm filling them!

The launch lug ends were a bit rough, sand them smooth with 400 grit.


The heavy card stock pieces are laser cut.

These will need some cleaning up.


Sand the burnt edges flat on a block.

Look at the right side picture - the side wasn't cut flat. I sanded it down and evened up the line.


The notches in the wing fin fit over centering rings.
TIP: The edge of the card stock piece were pressed into the wing fin notches to square them up and make for a better fit.

Sunday, July 28, 2019

Semroc USS Andromeda KV-97, Part 6, Assembly Jigs


The assembly jigs are assembled as shown on the right. These just slide together, you don't really need to glue them.
The short tubes are used in the jigs now and glued on the small fins later.


The smaller jig is used in the front to glue on and center the dowel standoff support pieces.


The larger jig with the tubes is used on the back of the model.


You can lay the large flat wing fins on the jig for perfect alignment. The original Estes kit didn't have these tools!