Showing posts with label NW Firecat 4. Show all posts

Monday, January 14, 2019

The BIG FIX - New Way Firecat 4, Part 2

I'll be spraying new white paint over existing white paint so there is no need for a complex mask.

The root edge fillet and fin are still bare. With any luck, the Titebond M&TG will have covered the torn skin on the tube.

A grocery bag was slid on from the rear. A slot was cut for the fin to be exposed. The bag was torn back to open up one flat side of the tube up to the base of the launch lug standoff.

You can see the masking tape opening out, the edges are not pressed tight on the square tube edges. Being a square tube, I'm hoping the new white paint will blend at the edges.

After the first coat the was a small blob of paint in the finish. It was shaved off with a single edge razor blade followed by light sanding.


Here's the tape pulled up on the lower side.
The white paint blend turned out well.


Fixed and ready for launch!

Thursday, January 10, 2019

The BIG FIX - New Way Firecat 4, Part 1


From the December 1, 2018 R.O.C.K. launch:
"When I picked it up I noticed one of the upturned fins had torn off. A dent in the nose cone assembly told me it was hit from a snap-back ejection. The fin wasn't found anywhere near the landing area."


A new fin was cut from some tight grained 3/32" balsa.

Notice the notch in the TTW fin tab. There is two wraps of electrical tape over the engine hook so the root edge had to be fitted.

The torn area on the body tube was sanded as smooth as I could get it.


At first I tried rubber bands thinking the pressure could hold the fin as the glue dried.
The rubber bands didn't work, they pulled the fin to one side or the other.


Titebond M&TG was used for a wide fillet that could cover the torn body tube area. Two fillet runs were applied.
400 grit was wrapped around a Q-tip for round cushioned sanding.

Tomorrow - Masking and paint.

Saturday, March 31, 2018

New Way Firecat 4, Finished


This was fun, except for that minor glitch with the decals!
These are very sturdy models, a bit heavier than a comparable sized rocket. The square tubes are thick! I was surprised how well it performed at the schoolyard field with a B6-4.
If you haven't tried a New Way kit, you are missing out!

Thursday, March 29, 2018

New Way Firecat 4 Build, Part 15, Shock Cord Ties

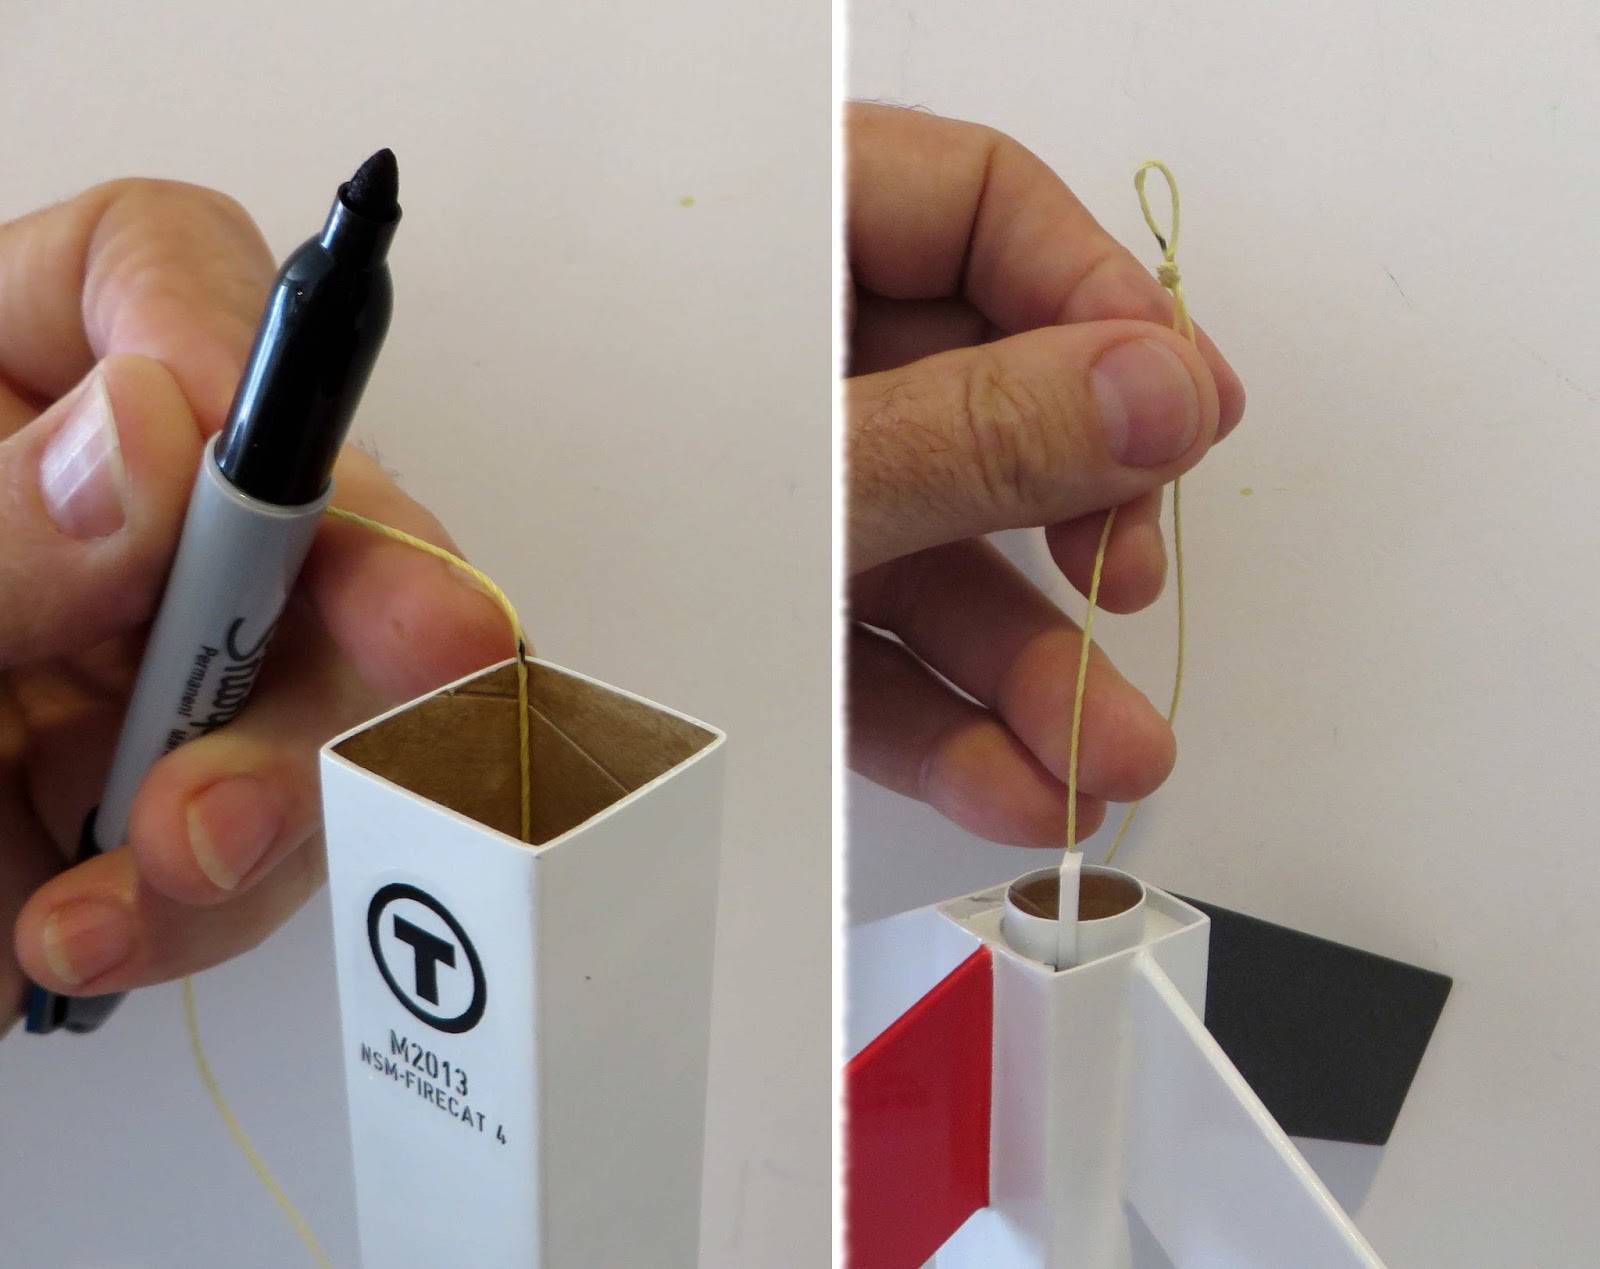
To be sure the Kevlar didn't extend beyond the body tube lip -
It was pulled tight against the top of the body tube and the Kevlar marked with a Sharpie.

This was fed out the rear, through the engine mount.
A loop knot was tied with the Sharpie mark below the loop.


The round elastic was attached with interlocking loops.

The line was fed through the engine mount, body tube and back out the top.
On the right you can see the loop knot is below the top of the body tube edge. No chance for a zipper!


An overhand loop knot is tied a few inches down from the nose cone. The snap swivel and parachute is clipped onto the loop.


Tuesday, March 27, 2018

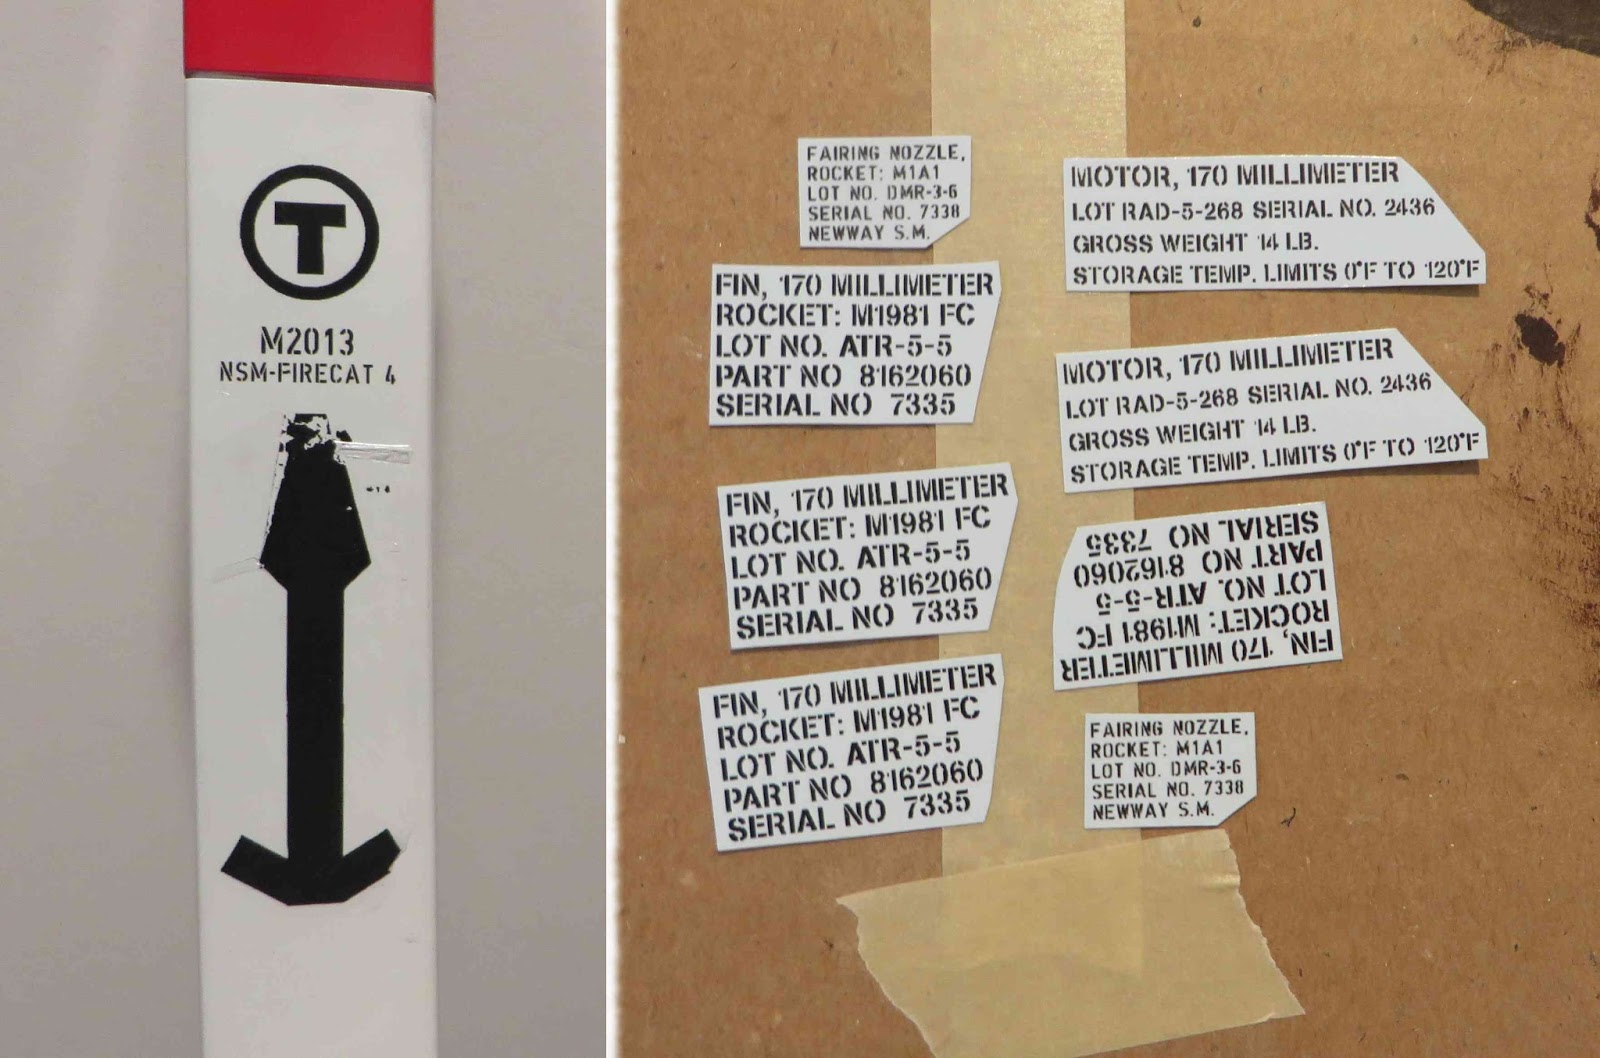
New Way Firecat 4 Build, Part 14, Decals - Uh Oh!

Everything was great - until the decals!

TIP: Always test the soak time and apply a decal (you probably won't use) on the model surface before using the "real" decals.
I tried a test soak and application using the NewWay logo on the decal sheet. It seemed thin but went on okay. The logo decal was removed and I proceeded to apply the others.

One side of the "T" and silhouette decal went on with a hitch. The other side broke up when it was slid off the backing. Apparently the clear coat was too thin.
I played it safe and clear coated the remaining decals.

Saturday, March 24, 2018

New Way Firecat 4 Build, Part 13, Nose Cone Mask


Here's how the fins came out.
So far, so good!


Masking the nose cone stripe was different.
Scotch tape, brown masking tape and copy paper.


When you pull the edge tape, lift it a little down and away from the mask line.

I used the Rusto Black Metallic paint. It doesn't always give a clean mask line, this time I had some very small paint tears.


On the left top you can see one of the small paint tear lifts.
On the right I used a ultra fine point Sharpie to clean up the line. Even though the Sharpie isn't a metallic ink, the area is small and it made for a good touch-up.

Thursday, March 22, 2018

New Way Firecat 4 Build, Part 12, Masking The Fins

As suggested in the instructions -
One side of fins 1 and 3 are red, one side of fins 2 and 4 are black.

It sounds simple but it's not an easy mask. Trying to get a straight line around the edges of the fin is tough.

I went the easy route, alternating red, white, black and white fins. It'll still capture the feel of the face card picture.

Using strips of Scotch tape (marked with a Sharpie before cutting into strips) the fin was outlined.
Going around the rounded leading and trailing edges requires five small pieces of tape set at angles.

The bulk of the rocket will be covered with a plastic grocery bag.
To get the right size slit over the fin, the bag was pulled and stretched over the outside edge of the fin.

The stretched plastic was cut off with scissors. This allowed the bag to be slipped over the fin and taped next to the Scotch tape mask.


Here's the masking tape holding the bag edge down to the outside of the Scotch tape edge.
The black fin on the opposite side got the same treatment.

Wednesday, March 21, 2018

New Way Firecat 4 Build, Part 11, Primer Filler Mask and Launch Lug


The thru-the-wall fin tabs and a bit of the side wall of the fin got masked for the shot of filler/primer.
I wanted the fillet area to be clear of the filler/primer for a better glue bond.


The square launch lug is glued to the standoff.
The standoff root edge is also thru-the-wall. The slot was a hair wide, it'll easily be filled with a fillet of Titebond M&TG.


I was tempted to glue the fins on so they would extend down.
This model should land on the engine extending out the back.

Tuesday, March 20, 2018

New Way Firecat 4 Build, Part 10, Engine Mount and Fin Grain Fill


The engine mount is glued in with 1/8" of the engine mount tube extending out the back.
The engine hook ends up being centered in a corner of the main air frame tube between the fin locations.


The tube seams were sanded with 200 grit followed by 400 grit. This tube had an overlap seam so no CWF was needed.

A fin was set to see how long the root edge was. I wanted to mask the gluing area so the primer/filler couldn't soak in and seal the tube from the glue.


Here's the main tube after spraying with the primer/filler and sanding.
The tube took two coats to fill the seams and smooth out the surface. These New Way tubes are rougher than a typical Estes style tube. In the end they can look good but there will probably be some  highs and lows in the surface.

The balsa fins only needed one pass with the Carpenter's Wood Filler.
TIP: After you sand the surface always go back and look at the fins under a bright light. You might find some areas that will need some more sanding.

Monday, March 19, 2018

New Way Firecat 4 Build, Part 9, Shroud Line Tying TIP


On the back of the small "Recovery Kit" envelope face card there is instructions for a shroud line knot.
I tried the knot but it didn't work for me. This knot will slide up and cinch up around the middle of the Tyvek attachment strip.
I went back to my usual Square Knot tie.


TIP: Shroud line ties normally face each other at the parachute attachment points.
You can have the long end loops face each other on the flat side of the chute.


For the left side of the parachute "flat" side -
Start as shown on the upper picture, tie a square knot for a shroud line end that will face to the right.


For the other right side -
Start as shown on the upper picture for a shroud line that will end up facing to the left.


I tie shroud lines this way to make the tangle free final attachments easier.

Sunday, March 18, 2018

New Way Firecat 4 Build, Part 8, Shroud Line Barbell Labels TIP

The shroud line attachment strips are new and different.
Tim at Apogee once called them "Nasal Strips". While they do look like the Breathe Right Strips, they are actually Jewelry Square Barbell Labels made from Tyvek.
If you've ever shopped for jewelry, you've seen these wrapped around the back of the ring with the size and price written on them.
You can't tear through Tyvek paper making these good for shroud line attachment. 

They are sticky backed.
So you can see where the adhesive is, I lightly marked the sticky area with pencil. There is no adhesive in the narrow center area where the shroud line is tied.

One half goes under the hole in the chute corner.
Fold the other half over the top leaving a open loop in the middle.


The open middle loop is where the shroud line is tied on.

This small open loop won't tear! The reinforced Tyvek paper is very strong.

Thursday, March 15, 2018

New Way Firecat 4 Build, Part 7, Gluing Up the Nose Cone


I tried the nose cone base on all four sides to find the best fit.
The pencil line was a reference when the top and bottom were glued together.

The body tube corners are slightly rounded.
After the nose cone base was glued on, the corners of the NC were rounded to match the tube.


The screw eye is turned and glued into the nose block with a washer.


It took two applications of CWF to get the nose cone assembly filled and the surfaces even.

Wednesday, March 14, 2018

New Way Firecat 4 Build, Part 6, Fitting The NC Base


Here's a dry fit of the nose block, short tube and main tube.
Do a dry fit can sometimes give you a better gluing order.


The instructions have you glue the square base directly into the nose cone base.

I slid the short tube over the nose block dry, then glued the bottom NC assembly onto the block.
The short tube was slid up into the lower NC half to assure it had a good fit against the body tube.

After the lower assembly had dried, the short tube was glued in place against the lower assembly.


The ends of the body tubes are laser cut. I sanded the ends square with a sanding block for a cleaner finish and better fit of the nose cone assembly.

New Way Firecat 4 Build, Part 5, Fitting The N.C. Shoulder

Here's the before and after fitting the built-up base to the solid nose cone.
On the left is before the top of the pieced base was sanded.
The right side picture is after the top of the base was sanded flat. You'll want the best fit of all the parts so there will be less to fill later on.


There is a short length of body tube at the bottom of the nose cone assembly. A square nose block fits into it.

Holding it up to the light you can see where the sides of the nose block should be sanded to fit the short tube better.


Here I'm slightly rounding off the corners for a slip fit into the short tube.

Tuesday, March 13, 2018

New Way Firecat 4 Build, Part 4, Nose Cone Taper Base


The nose cone base taper was different. You'd think the designer would simply flip over a pyramid shaped nose one.

The nose cone lower half is hollow, made up of four side pieces.


Here's the first two sides glued together, like two jigsaw puzzle pieces. 


You could use CA glue to tack the four sides but I used wood glue.

After all sides were in place, an internal fillet was applied using a Q-tip to smooth it out.

On the left I've just started sanding the top of the box flat. You can see the burnt laser edges are cut at an angle. This needs to be flat to better fit the bottom of the solid nose cone.

Monday, March 12, 2018

New Way Firecat 4 Build, Part 3, Engine Mount


This is the finished engine mount.
It's layout is standard except for the "centering squares" and the thick engine hook retaining ring.
Some 150 lb. Kevlar is tied under the upper centering square.

One thing to keep in mind, the flat sides of the centering squares must be in line with each other. I glued mine just the slightest bit out of line and it took some extra effort to get the mount into the main square body.

Saturday, March 10, 2018

New Way Firecat 4 Build, Part 2, More Parts


New Way kits include sandpaper and an emery board for fin shaping, a nice touch.
Long and short Q-tip style swabs are used to apply glue inside the body tube for the engine mount. 


The black print decals were sealed in a plastic bag.


The parachute package included Kevlar, a round shock cord, screw eye and a snap swivel.

The parachute is printed in a red and white checkerboard pattern.


Here's attention to detail -
Check out the peg hole in the package topper.