Showing posts with label Snap Swivel. Show all posts

Wednesday, May 10, 2023

MPC Lambda Payloader Build, Part 7, Lug Fit, Paint & Chute

I sanded a light curve into the bottom of the launch lug standoff.
I wrapped some 400 grit around a 1/4" launch lug and ran it up and down the length of the standoff. I should have also done this on the top side of the standoff before gluing on the lug.

TIP: If you ever need to sand a curve into the bottom of a standoff to better fit the body tube, sand with a smaller diameter tube than what you are gluing it on to. You'll get a better fit.


Here's the model ready for a white undercoat.

It does really remind me of the Estes X-Ray.


The lower body will initially be painted gloss white.

A painting wand (dowel with a glued on engine casing) is slipped into the engine mount. At the open top, a rolled up paper towel will keep paint out of the tube.
I didn't use the six separate red shroud lines included in the kit. I used the more recent three long "loop" method. It's difficult to get six separate lines evenly tied and attached to the plastic adapter loop. 

I also added a snap swivel.

The parachute was stored in a small zip bag with the snap swivel out the top. This prevents any tangles.

Tuesday, March 1, 2022

ASP Ram B Build, Part 11, NC Touch-up, Clay Weight & Parachute


On the left is the nose cone mask, a little rough.

I've mentioned before how good the Ace Hardware Premium Enamel is. It also takes brush touch-ups very well.
I sprayed some light gray into a cup and touched up some small areas that got scraped off when removing some of the silver.

The picture on the right shows the smooth touchup.

The balsa adapter is glued into the upper BT-20 tube. The clay nose weight is pressed into the tube and against the top of the adapter.

You are given more clay than will fit with the nose cone slid in place. Remove enough to slide the entire nose cone shoulder in.


The large screw eye was set in the adapter base and the shock cord tied on using a Duncan Uni Knot.

A overhand loop was tied in the shock cord about three inches from the screw eye. 

The eight sided Mylar parachute was clipped onto the loop in the shock cord.

Wednesday, April 22, 2020

Estes MRN Orbital Transport Laboratory Build, Part 16, Nose Weight & Shock Cord


The instructions called for one NCW-1 Lead Weight! LEAD - Between the lead weights and a square of asbestos on the Centuri LIA-50 launchers CLICK HERE, how did we ever survive rocketry in the 1960s and 70s?

The lead weight weighed in at 0.12 oz.


This model is short - I'd feel better if there was a bit more weight in the nose. The nose cone was drilled out for some clay weight.
Mark the center. Start the hole with small diameter drills and work up to larger ones. Don't go too deep.
TIP: Use a wrap of masking tape around the drill bit as a depth gauge. Be careful using a wood drill, balsa chips easily.

Nearer the outside of the shoulder base is the screw eye location.


I measured out some clay to .25 oz, twice the NCW-1 lead weight. This was pressed into the drilled hole.
TIP: Notice the screw eye turned to the side so it won't contact the body tube.


The 36" long shock cord was attached to the body with a tri-fold mount.

The other end was tied to the screw eye using a Duncan Uni-Knot.
An overhand knot was tied about 1/3 the way down from the nose cone. A 12" Odd'l parachute with attached snap swivel was clipped onto an overhand knot loop.

Tuesday, October 1, 2019

Estes Solo #7288 Build, Part 6, Ends & Edges


Small pieces of Scotch tape are placed inside to hold the ring to the card stock tube.

The inset picture shows the completed "glider".
The SOLO name decal is a sticker on a clear background.
When set on the blue body tube it's a little washed out. It probably needed a white undercoat, but that's a moot point.

TIP: When placing a sticker, lift it with the end of your hobby knife and place it using the knife, not your fingers. Don't touch the underside or you'll see your fingerprints through the clear backing.

TIP: I've marked the shock cord at the 1 1/2" depth where the tri-fold mount should end up from the top of the tube.
Drop it in up to the pencil mark, then press the glued mount in place.
The nose cone fit was a bit loose and took a wrap of tape for a better fit.


I attached the parachute to a snap swivel. The snap swivel was tied to the shock cord about 6" away from the nose cone. This is to keep parachute line tangles to a minimum.

Saturday, August 24, 2019

Snap Swivel Attachment

On YORF, David Stribling posted some scanned instructions for the TLP Hawk kit.
The Launch Pad instructions are clean and to the point -

TLP Hawk Instructions 1: CLICK HERE
TLP Hawk Instructions 2: CLICK HERE

Here's yet another way to attach a snap swivel to the parachute shroud lines:
It's more difficult to get the lines through the small end loop. This is the way Estes would have you attach the lines to a nose cone eyelet or screw eye, except at the snap swivel. It allows you to remove or change out the parachute if needed.

NOTE: The Launch Pad company (Kits and designs) are for sale!
Check out their large variety of missiles, over 50 kits! CLICK HERE

Friday, July 19, 2019

Centurion Project, Part 13, Tying It All Up!


CENTURION:
I glued the baffle into to the (shown upside down here) upper body tube. There is a pencil mark at the halfway point. The other lines are leftover paint lines when the model was spray painted white.


CENTURION:
The 1/4" wide shock cord was tied to the screw eye using a Duncan Loop Knot.


CENTURION:
The parachute shroud lines were laced through the latch end of the snap swivel. This method was suggested by Ed Mitton.
The other end was tied to an overhand knot in the shock cord with a double loop of some scrap shroud line.
COSMIC EXPLORER:
The 18" parachute seems a big large for this size model, a 15" chute would be better.
TIP: You are better off cutting out the spill hole before assembling the parachute. I had already assembled the chute.
On the left you can see a shroud line running underneath the spill hole location. Be sure to clear the shroud lines outside the perimeter of the spill hole before cutting the chute with your knife.


CENTURION:
I don't like overall covering a rocket with Future or acrylic finishes. Rockets can get sticky in humid weather.

TIP: I will roll a little Future over the open ends of the decals - just the joints and cut ends.

Sunday, June 23, 2019

Ed Mitton Snap Swivel Connection TIP

For the longest time I've been tying the parachute shroud lines to the small loop on a snap swivel. It's not the easiest way to attach them. You've got to tie the line ends onto the small loop with a separate string.

The large hook end is opened and is attached to a single overhand knot on the shock cord.


I saw this on Ed Mitton's blog - Blast From The Past.
This may be a better solution.

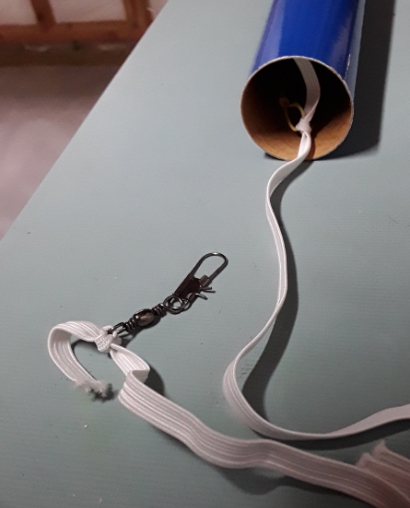
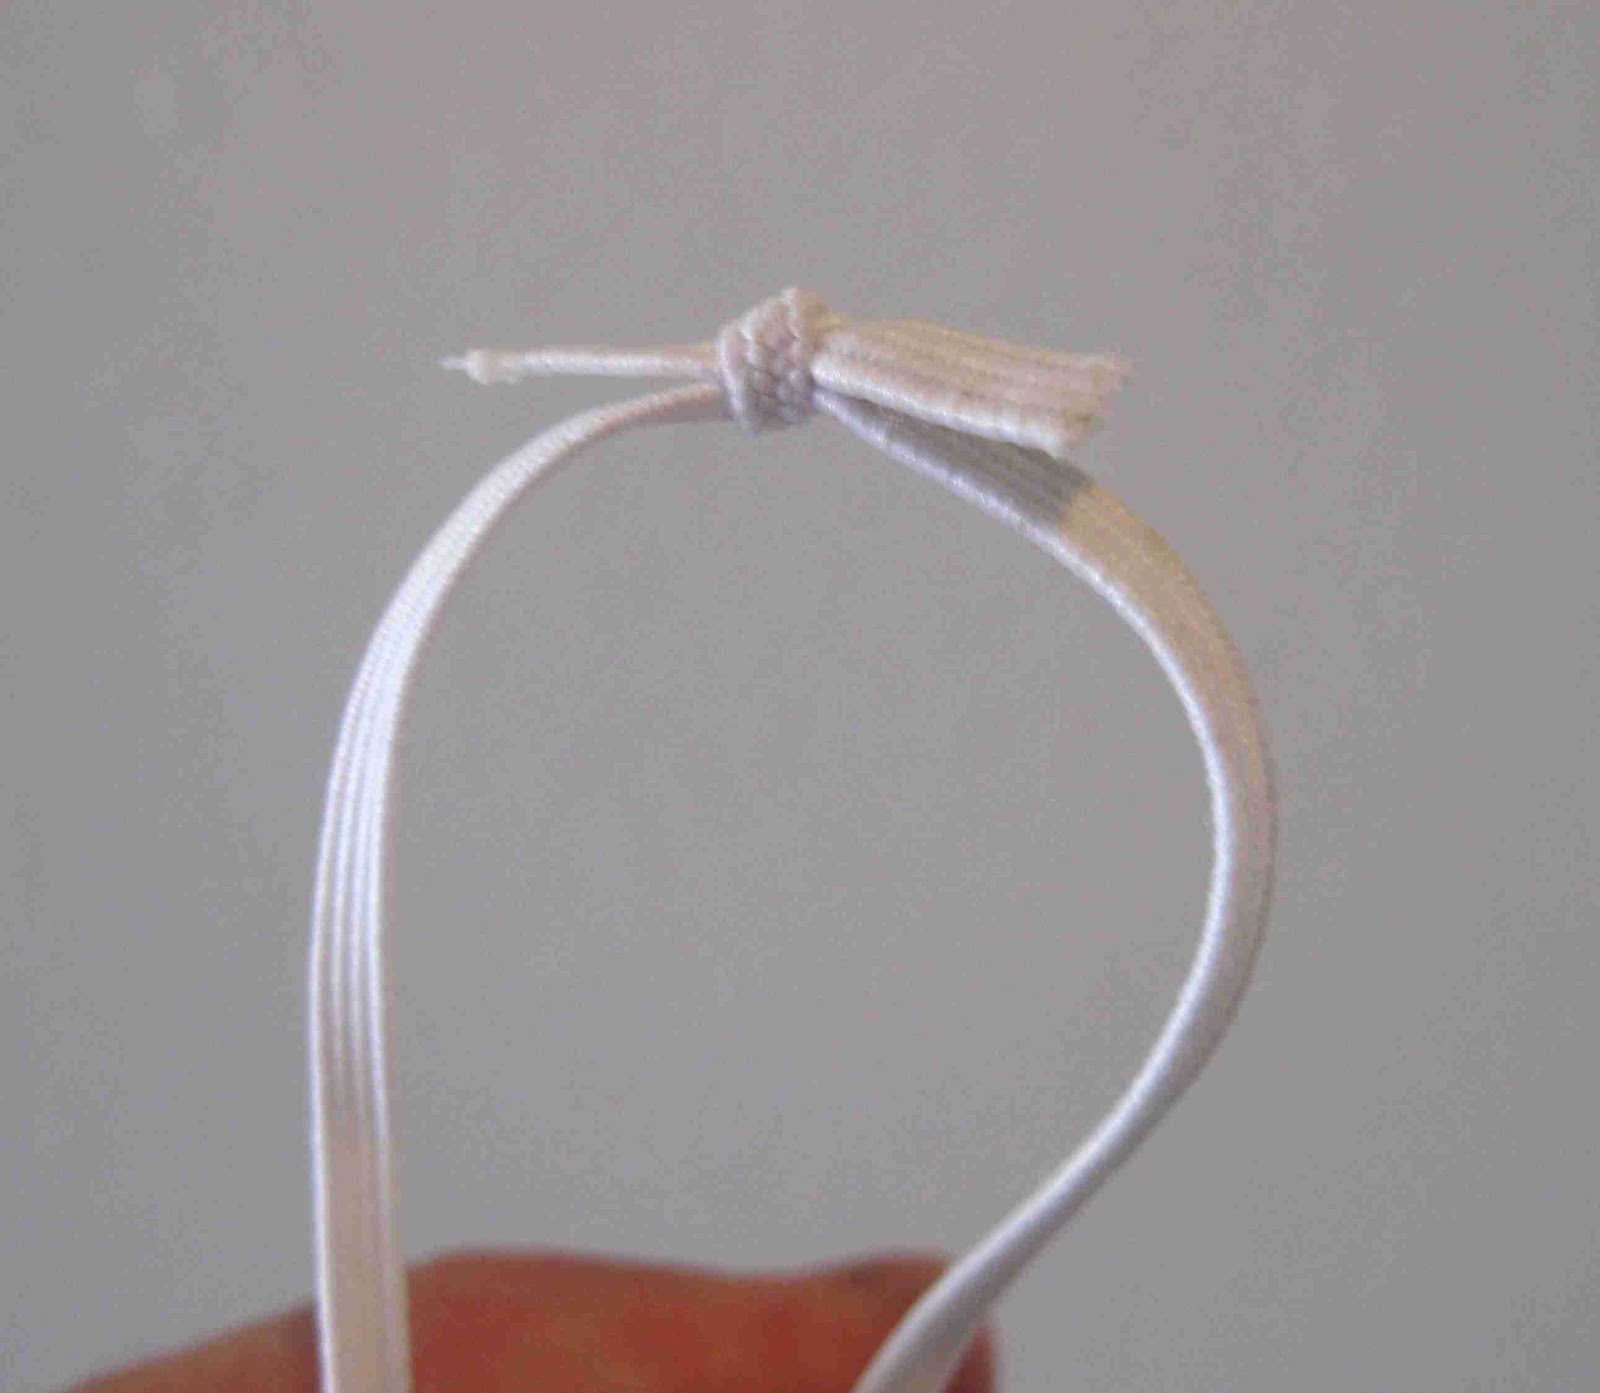
The elastic shock cord is fed through the small loop end of the swivel and tied off with a single overhand knot.
The parachute shroud lines are dropped into the open hook end.

To visit Ed's blog: CLICK HERE


I might add this at the center point of the shroud line loops - 
1. Tie a small loop at the center of the shroud line ends.


2. Slip the in loops side by side in the open snap swivel "hook"
3. Close the hook.

With shroud lines set up like this you have tangle free shroud lines!
Leave the snap swivel on the shock cord and in the rocket.
With the loops set side by side, there shouldn't be any tangled lines. If the lines get crossed up, it can be cleared by opening the hook and taking out the lines.

Monday, May 13, 2019

Estes Gauchito Build #1279 OOP, Part 8, Stickers!


On the left is the die-cut sticker outline. Why not just cut it out on the color edges? You won't notice the clear areas as much.

On the right are the corner tics for a tight border cut.

A strip of paper was wrapped around the body tube for equal placement of the stickers. Below the "I" in the word "PRIZE" is a penciled center line. An "X" sticker like this is also on the opposite side.

The paper strip was used again, raised up for the Angentina flag.


There was an additional sticker with the recommended engines. Some might put it on the outside surface but I hid mine inside the body tube.


A longer elastic shock cord was added.
The parachute was tied to a snap swivel. The snap swivel was attached about 1/3 the way down from the nose cone to prevent parachute shroud line tangles.

Sunday, December 24, 2017

True Modeler's Rocket Kits NASA Scout Build, Part 14, Tying It All Together


A line of glue was set inside the body tube and the mount slid in place.
The instructions say that the rear ring should be flush with the end of the body tube, but pictures of the LTV Scout show the rear plate slightly recessed. This allows you to add a glue fillet in the centering ring/body tube joint. This engine mount bond has to be strong, the engine is a friction fit.
The snap swivel was very small and replaced with a larger one.

The 1/8" wide elastic shock cord was too short at only 15" long. I replaced it with some long 1/4 rubber. A short shock cord would allow the upper and lower sections to hit each other on descent.

The shroud lines easily broke with a pull. Those were replaced with all cotton embroidery thread.


The black nylon parachute was a nice bonus, not your usual plastic sheet parachute.


The balsa adapter turned out fine.

The small card stock adapter was a different story. Even after putting in the extra time, the fit and joint weren't great.

Saturday, February 25, 2017

Thick Shroud Line Attachment -- TIP

I never attach parachute shroud lines directly to the nose cone. If the nose cone passes through any two lines your parachute lines are tangled. I'll add a longer shock cord and tie the cute on about 1/3 the way down (and away) from the nose cone.
Snap Swivels are about 10 for $1.00 pack at WalMart. Save yourself from tangles and be ready to easily switch out a smaller parachute when the winds are up.

The shroud lines on my Big Betty kit were too thick to go through the small eyelet on a snap swivel. I could eventually get all three loops through, but sometimes it's easier just to tie them on the eyelet using some thick rug and button thread.


The outside shroud line loop is tied onto a length of strong thread. Tie the thread to the center point of the shroud line.


The strong thread is tied to the center point of the second center shroud line loop, next to and beside the first one already tied on.

The picture shows the third shroud line loop being slid down the strong thread. At the apex of the "bend" you can see the center mark made with a marker.

The third shroud line is tied to the thread. I doubled over the thread through the loops again for strength.

You now have two loose ends to tie onto the small swivel eye.
No tangles and the swivel is ready to attach to a loop tied on the shock cord.

This is the same method I used to tie the parachutes to snap swivels on the Estes Saturn V build.
The shroud lines in the reissue kit were also too thick to go through the swivel eyelet.

Monday, January 12, 2015

Why Snap Swivels?

Of course - With a snap swivel you can swap out a smaller parachute or streamer for a windy day or small field.
What's stopping you? Snap swivels are only about 10 cents each. Well worth the extra dime if you get the model back on a smaller parachute or streamer.

I also use snap swivels to help clear tangles in the shock cord and shroud lines after a flight.
Recently I flew my two engine cluster rocket, the Jolly Roger. To compensate for the wind I taped the two 12" parachutes so they wouldn't fully open and the rocket wouldn't drift far.
When I picked up the model, the shroud lines were a tangled mess! Both parachute shroud lines were twisted and intertwined. (I should have taken a before picture!)
If the shroud lines were looped through and permanently tied to the screw eye, I'd never be able clear the mess.


With both chutes removed from the shock cord loop the snap swivel end was closed.
The two parachutes were separated from each other.
If the swivel hook is left open, it might grab a line or two while your are trying to untangle.
Instead of spinning the twisted lines I ran my index finger through the lines from the canopy up to the swivel. It's simply quicker this way.


Here's the shroud lines after clearing the twists.
No tangles here, it looks like I had just assembled the parachute.

As explained before on the blog,
TIP: Don't attached the shroud lines by looping them through the screw eye. (Most all kit instructions show it done this way.)
If you attach the lines too close to the nose cone, the nose cone will flip in and out of the shroud lines after ejection making many tangles.
Tie a loop knot in the shock cord about 1/3 the way down from the nose cone.
Clip your snap swivel on the loop.
Note - this shows two 12" parachutes side by side with no tangles.


Here's how the nose cone should hang, not close enough to swing in and out of the shroud lines.
This is an easy practice to adopt and worth the time saved after a tangled recovery.

Tuesday, April 1, 2014

MPC Vostok Build, Part 6, Vostok Capsule


The lead weight glues into a recess at the bottom of the capsule.
I won't be painting the cosmonaut and detail pieces inside the capsule.
In the end the clear display half of the capsule will be painted. All the interior parts won't be seen.
They are inside for the extra weight probably needed for stability.

The inside of the bubble window was roughed up.
The rough inside window was blackened with a permanent marker.
If masked well, the outside of the window will be a glossy, blacked out window.


The base of the upper capsule halves weren't even after gluing together.
Like most all of the plastic parts, some sanding was needed for a flat gluing edge.


The original parachute shroud lines were used.
These weren't four looped lines, but eight single lines.

Getting all eight ends into the small end of the included snap swivel took some time.

Monday, November 12, 2012

Custom Solar Explorer Build Part 26 Loose Ends


The shock cord seemed a little short for me, they usually are.
Rather than cut a new piece of elastic, I simply tied on another scrap piece.

A square knot was tied and with about 3/8" of loose tail on either side.
Don't pull it tight yet!

I attach the snap swivel through the back loop of the square knot.
If you left the knot a little loose it's easy to slide the wire through.

Close up the swivel and it's ready to go!

All knots should be periodically checked before flight to be sure they haven't loosened up.
I don't like using glue on a elastic to "set" the knot. White glue dries hard and could wear down the elastic.


The end is tied off on the nose cone shoulder lug.

TIP: On a nose cone like this, there is an open slot below the tie off loop.
If the elastic were left long it might get caught between the shoulder and body tube.

Leave the end a little long and tie an overhand knot near the end.

With tweezers, force the knotted end into the slot.
The knot will keep the long end inside the nose cone shoulder.

That wrap of masking tape will be replaced.
It still has some red paint dust on it from some wet sanding.
The nose cone was just a little loose in the BT-50 tube and needed 1/2 wrap of tape around the shoulder.

Sunday, November 28, 2010

Parachute Attachment TIP

Awhile back I read a forum post about tangled shroud lines, asking how to untangle them.
You can eliminate some tangled lines by moving the parachute attachment point away from the nose cone.

With the nose cone so close to the shroud lines, the nose cone can pass through the open lines at ejection.
If you've ever seen a slow motion video of how violent an ejection charge can be, you would understand how the nose cone could get tangled in the lines.

Every low power kit instruction I've seen has you tie the parachute to the screw eye.
I'd suggest tying an overhand loop knot in the shock cord, one third the way down from the screw eye.

Attach the parachute's snap swivel to the loop and you are ready to go!


With the parachute tied on 1/3 the way down the shock cord, your rocket will fall in three separate parts, all tethered together by the shock cord. First to hit the ground is the tail end of the rocket, the nose cone and finally the parachute. This is the same way many mid and high power rockets are built for recovery.

If your rocket has a tower or tall nose cone, adjust the distance down the shock cord so the longer nose cone won't be banging against the body tube during descent.