Showing posts with label Fin Fitting. Show all posts

Saturday, September 12, 2026

Estes Cosmic Interceptor Build, Part 24, Fitting The "T" Brace


The T pieces fit into a notch in the vertical S pieces. They sit high on the body tube and have to be sanded to fit. The T pieces should end up flat, parallel to the face of the large wing. 

The upper picture shows the start of the sand, a small bit has been sanded away. 
The bottom picture shows the angle sanded down so the T piece sits flat.


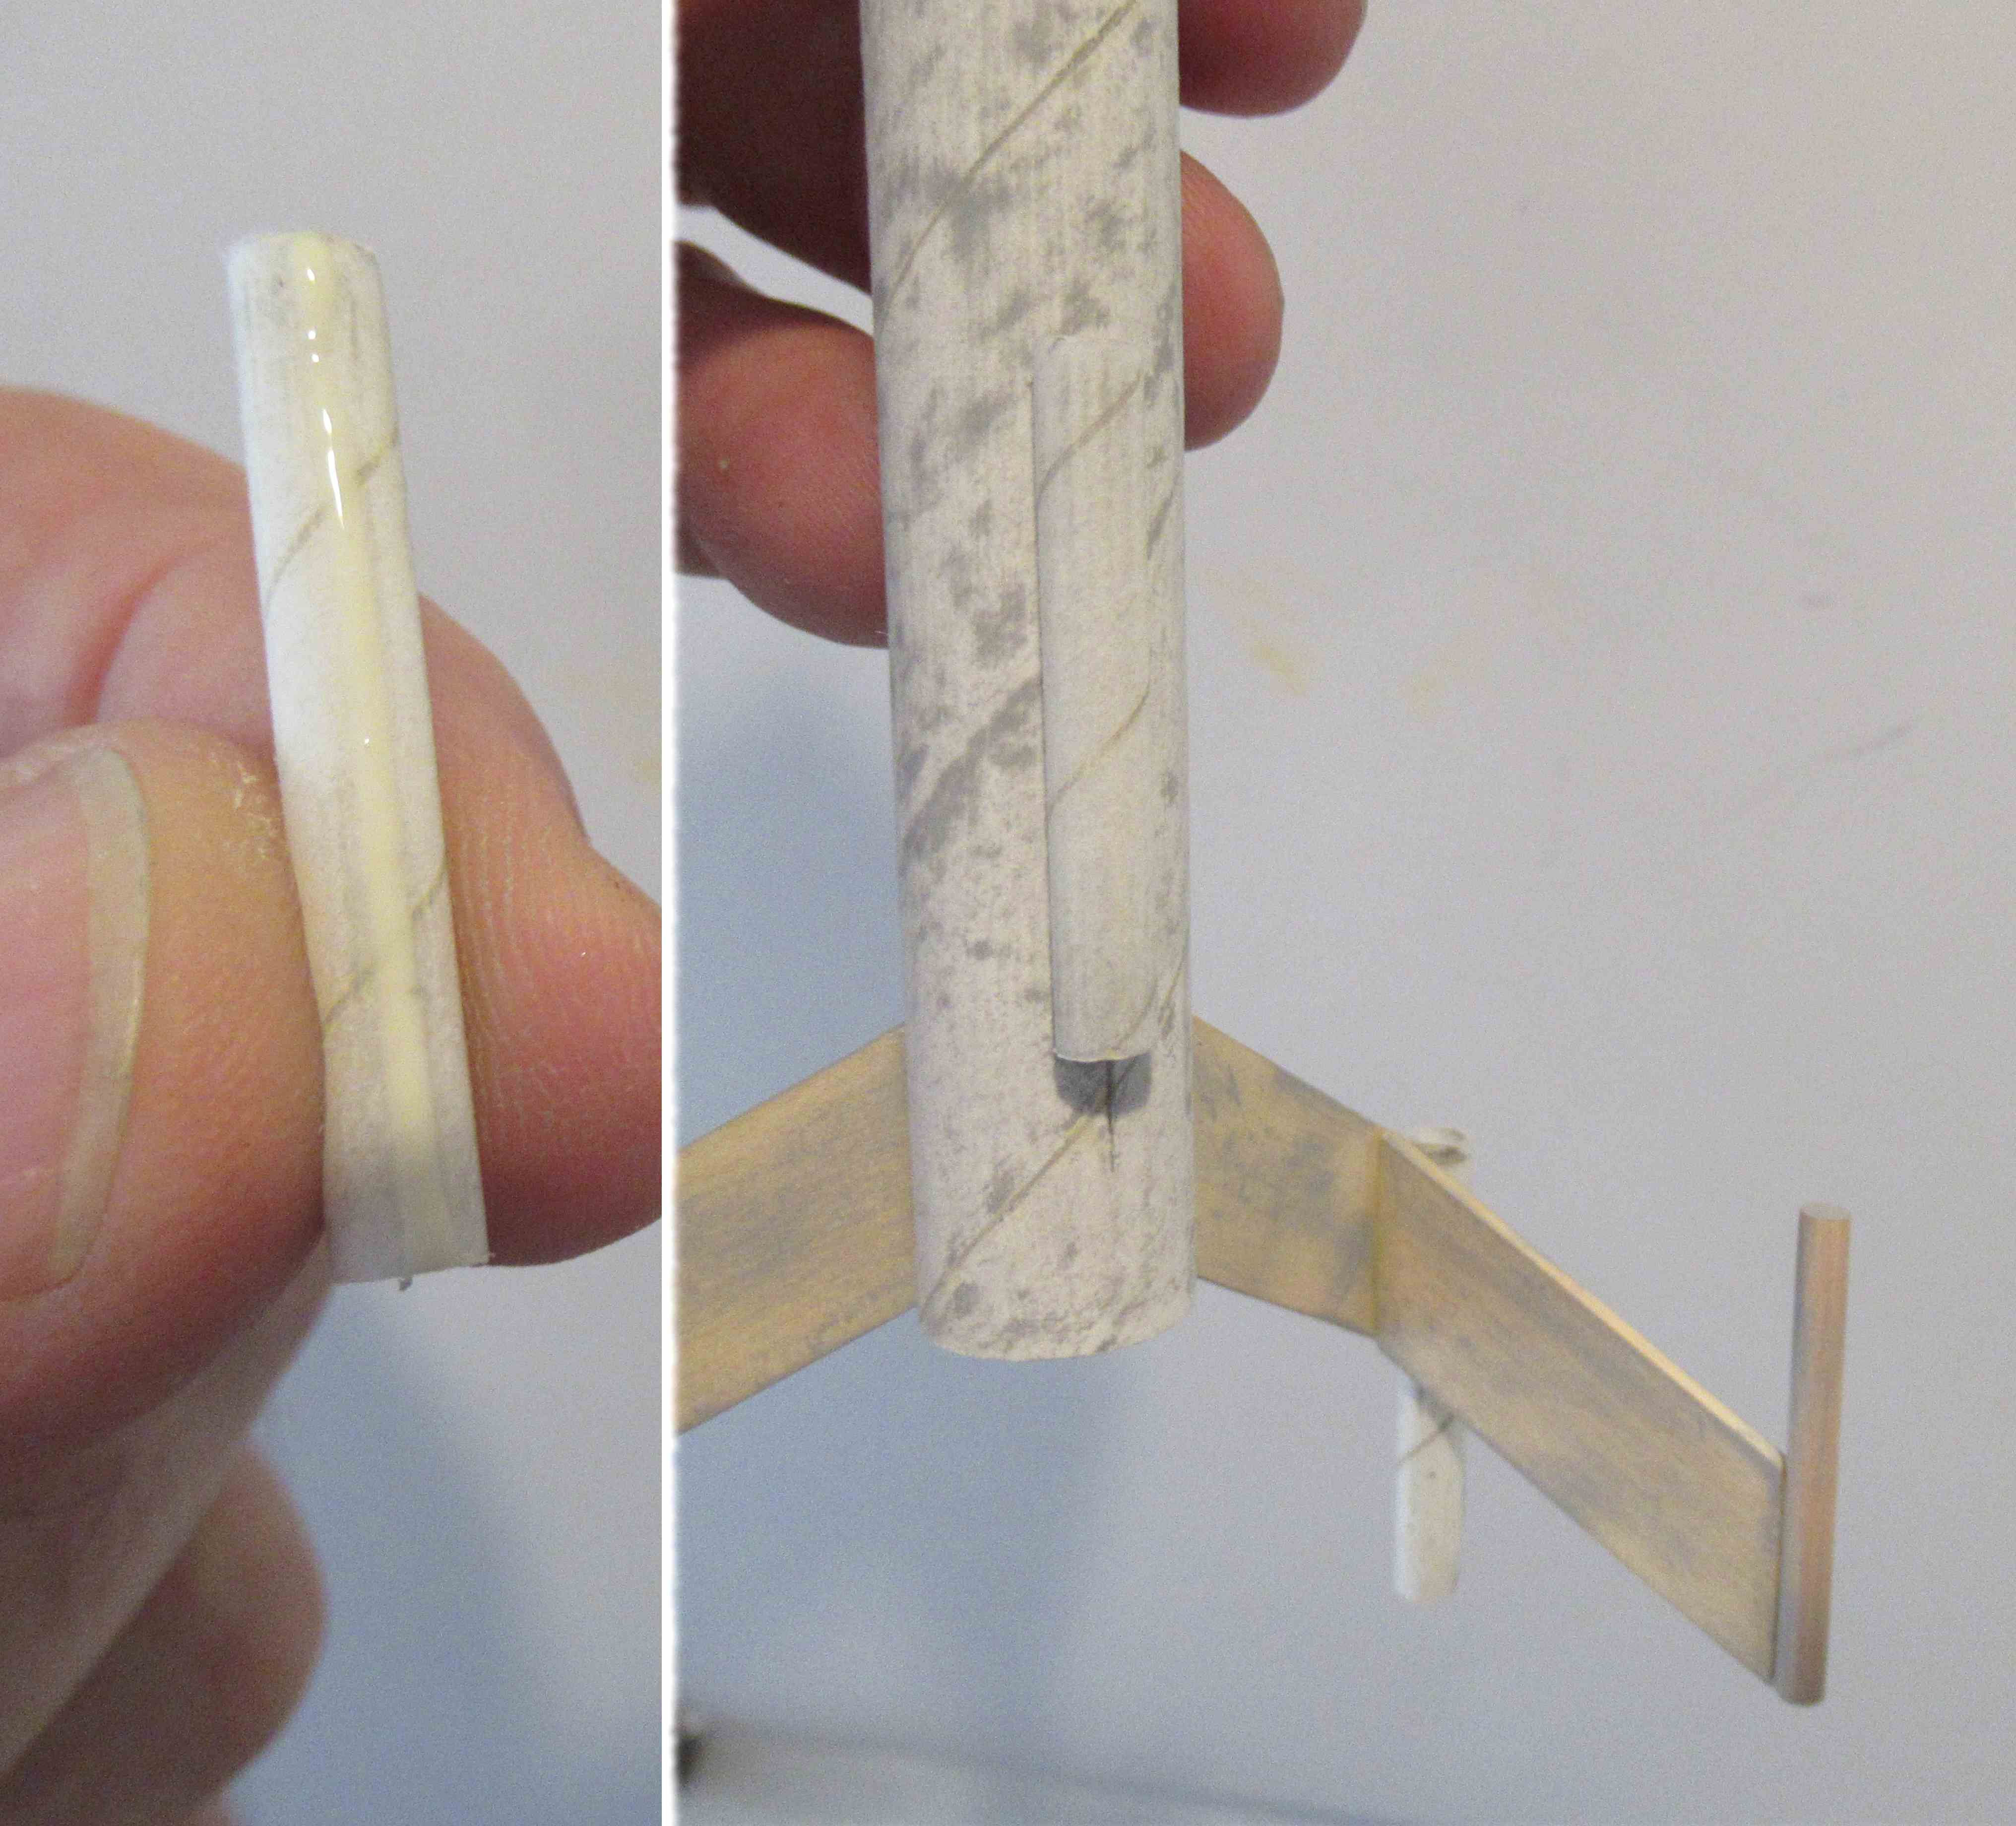
You can get a better fit against the body tube.
I wrapped some 220 grit around a dowel to make the flat root edge curved.


On the left, the curve has been sanded.

The right side picture shows the new root edge fit against the body tube.


You might have noticed the pre-painting of the areas inside and under and T pieces. If glued together it would be hard to get white paint to cover the hidden surfaces.

Saturday, August 22, 2026

Estes Cosmic Interceptor Build, Part 8, Fitting The Fin Pieces


When fitting the O brace part with the angled end against the N part, it came up short in the back.
I cut new longer O pieces using some of the leftover balsa.
While dry fitting the S brace, the O piece was glued on. 

The O piece was a hair wide. Masking tape was applied to protect the S brace while the overhang was sanded down.

Here's the finished O piece, fitting tight against the M and N pieces of the wing.

The wing is then glued together on a flat surface with weights.

Friday, August 21, 2026

Estes Cosmic Interceptor Build, Part 7, Fitting The Fin Pieces

Here's the engine mount before and after painting gloss white.

Thin masking tape strips were set over the outside edges where the short tube (Part G) will be glued.

The yellow engine block spacing tube is set in the tube to keep out the paint overspray.


With Part S set into the notches (see picture below) check the joint alignment of the L, M, N, P parts.

It took very little sanding to get a better fit. 


Here's the Part S brace in place, no glue yet.
It's amazing how strong this assembly is.

Tuesday, March 31, 2026

Estes Mini Arcas, #2441, Part 7, Fin Fill


When applying the CWF, clear that small notch above the root edge round cut out.

After sanding the dry CWF, round out the root edge cut out with a small rat tail file.


Here's the before and after CWF sand.

The small notch above the cut out aligns with the boat tail / body tube seam.


The fit of the fin root edge was very good.

The original ARCAS fins had a diamond taper. This smaller version just has a rounded leading edge. It would be very difficult to sand a diamond taper in 1/16" thick balsa.

Thursday, February 19, 2026

Estes Time Warp Build, #7321, Part 7, Gluing & Filling The Fin Tips


The fin tips and fins had the balsa grain filled and sanded.
Filler/primer and sanding followed.

I used a small diamond file to slightly open up the slots to a friction fit over the fin tabs.


The fin tips are glued on.
There is now gaps around the fin tab joint.


This joint required additional filling,
first more CWF and sanding flat with a block.

The backs of the shield tips are masked and the flat face got a shot of filler/primer and sanding with 400 grit.

Once the fins are glued onto the BT-5 cluster tubes, 
Masking will be tight to separate the black and yellow paint on the inside of the "T" fin.

I sprayed some white undercoat on just the fin tip face and the underside joint.
Notice the root edge is masked off with a narrow strip of tape.

Wednesday, February 18, 2026

Estes Time Warp Build, #7321, Part 6, Fin Fitting & Fill


The tube seams were filled with CWF and sanded to surface.

The BT-55 had a definite seam, the heavy walled BT-50 was very tight.

After the fin tips were glued together, I tried a test fit on the main fin.

I wish the fin tabs (sticking into the smaller "shield" fin) were longer so you could sand them to surface after gluing them on. With the tabs slightly recessed there is more to fill.


Laser cutting burns through at a slight angle.
Look close at the right side of the root edges.
I sanded and evened the burned edges so they would glue on perpendicular to the body tube.


The fins have laser cut "slots" running parallel to the leading and trailing edges. I decided to leave them in and fill the slots with CWF.

Why leave them in?
The rough laser cut slots would be difficult to fill and sand. The visible edges would be rough. The design is interesting enough without the open slots.
 

Wednesday, October 15, 2025

New Way Blade Runner, Part 8, Gluing On The Fins


Five fins!
The marking guide fit very well. Pencil marks were made and extended the full length of the tube.

On the right -
I used the marking guide as a height guide at the 1 1/4" mark.


The long strakes glue down the fin lines, butted up against the  top of the fins. 
For a better alignment, I used the reversed clothespins. Be careful not to glue the clamps to the fins.
To see the original post and make your own flat clamps: CLICK HERE


After the glue dried on the forward strakes,
I tried the fit of the ring tube. A perfect slip fit!

The ring tube will be glued on after the fins and strakes are painted. Otherwise, it would be very difficult to get good paint coverage with the ring glued in place.

Thursday, August 14, 2025

Centuri Skylab Build, #KB-4, Part 10, Panel Supports

This is one of the few kits where pre-cut (die-cut) balsa needs to be recut. It makes me wonder if the die-cut razor blocks was made too long. Or, maybe the extra length was needed for strength when doing that center punch?


From the instructions:
You are told to cut off 1/8" off each side of the die-cut panel supports. Then bevel the ends to a 45 degree angle.


Later on, there has to be a 1/8" space between the top of the panel support and the bottom edge of the wrap.


On the left is an early dry fit of the wrap and top of the panel support.

In the inset picture is the beveled top.

Saturday, February 22, 2025

Estes Star Seeker (Tri-Pack) Kit #0866, Part 7, Paint & More Sanding


Here's the launch lug that will slide over the launch rod.
The rear of the lug is 5/8" from the rear.


After spraying the the model with gloss white,
some fillet bubbles showed. These were filled with more glue.


After the paint dried, the launch lugs showed how rough they were. 
This required some 400 grit sanding before another coat of spray.


No masking!
Just a clean, glossy white finish, ready for decals.

Friday, February 21, 2025

Estes Star Seeker (Tri-Pack) Kit #0866, Part 6, Fin Assemblies


Keep your glue lines short - 

Set the lugs in place and make the fin edges with pencil. 
Apply some glue up to the pencil lines and place the lugs.


Here's how the lugs set when set against the fin joint.  

The wing fin assemblies are glued to a standard 120 degree three fin spacing, using just two of the pencil lines. This makes a wide "W" shape.

The "flight" launch lug is glued onto the third pencil line.

Thursday, February 20, 2025

Estes Star Seeker (Tri-Pack) Kit #0866, Part 5, Fin & Launch Lug Assemblies


The dowels are glued to the top of the upper (unmarked) fins.


Two launch lugs are glued side by side.
Make two sets. I found it easier to make glue fillets now.


On the left, I've lightly sanded the glue line for better glue adhesion. 
On the right, the dowel fins are glued with that spacing overhang on the outside.

Be sure to make two "mirrored" fins.  

Saturday, February 1, 2025

Estes Black Star Voyager Build, Part 29, Filling The Fin Halves Joint


The joint got a coat of CWF and sanding.

Notice you can't see the U support piece, it's hidden inside the joint.
I wrapped a paper towel around the vanes previously painted with the metallic black.

I carefully sprayed some filler primer only on the joint.
After that dried, it was sanded with 400 grit on a block.
I was concerned about any misalignment of the joint but after sanding, the fit was good.


A glue fillet was applied to lock the U brace piece in place.

Friday, January 31, 2025

Estes Black Star Voyager Build, Part 28, Fin Joint & Inside Brace


These fin braces will be seen, so they got a coat of CWF and sanding.
I still had to sand more, making the braces smaller to fit inside the joint. On the far left is the original fin size right off the balsa sheet. The brace next to it is a bit smaller for a concealed fit.

Like the inside of the fin surfaces, the outside face was blackened with the felt tip, brush pen.

I didn't use much glue, any more would make a mess trying to position this tricky fit.


The brace was pressed into place using the side of my tweezers.

Thursday, January 30, 2025

Estes Black Star Voyager Build, Part 27, Fin Joint & Inside Brace


The U support pieces have to be tapered to fit inside the fin half joint.


Notice in the inset drawing - 
The outside corners aren't really seen, set down inside the joint edge.


Here's the piece dry fit before sanding in the tapered sides. 
It fits too high, outside the the fin half joint.


I marked the fin sides so I could see what was being sanded off.


That black inked edge gives you a visual guide to keep the angle even.
The left side picture shows the sanded angle about halfway through.

On the right is after more sanding, just a bit of the black remains.

Friday, January 24, 2025

Estes Black Star Voyager Build, Part 24, Fitting The Fin Halves

The instructions have you glue the rear fin half on,
Then glue on the upper half (and hopefully match up with) the low fin.

I've got to give John Boren props for the design. It's an amazing assembly but needs some fine tuning before gluing down the root edges.


As careful as I was assembling the halves, I didn't get a perfect fit.

With the upper fin half taped down to the body tube, I held the lower half to meet and touch the upper half. It needed adjustments.


The angle of the bottom half should to be lowered, sanding with emphasis on the front end of the assembly, ahead of my thumb. 
This tipped down the front and made for a better joint at the juncture of the two halves.


I still had to make some sanding block adjustments until this outside end joint was fully closed.
You should fit the fin pairs separately. As you fit two halves, pencil mark sets 1, 2 and 3 on their inside surfaces to keep track. 

There is good reason why this is a Skill Level 5!

Saturday, January 18, 2025

Estes Black Star Voyager Build, Part 18, Fitting The Fins


The leading edge width of the lower fin assembly was wider than the upper fins.

On the right I sanded the lower edge width to match the uppers.


On the left, you can see where I sanded into the balsa to adjust the width. This will have to get a recoat of CWF and smooth sanding.


Before the vanes are glued on,
The root edges are sanded to fit around the BT-60 tube body.

Wrap some 220 grit around the tube and sand using a up and down motion. Be sure the assembly is in line with the tube.

Do your fine fitting with a wrap of 400 grit.


Here's a good fit of the lower fin unit.


And a good fit of the upper fin assembly.