The slight raised molding seams on the nose cone can be scraped down using a knife blade.
TIP: Use the back of the blade (dull side) like a cabinet scraper. Why dull the sharp side of the blade when the back can knock down the high spots?
Note I said "high spots". You shouldn't shave into the trough, recessed areas of the mold seam. If you scrape down below the curvature of the cone you'll see "flats" when the paint is applied.
After scraping the raised seams, sand smooth with 400 grit.
The remaining recesses should be filled. If they are deep you can use Squadron Putty or medium CA glue.
If the seams remain shallow, the filler/primer should fill them.
Getting the center out of the nose cone eyelet took some time.
I punched small slots using the tip of my knife blade until it could be pressed out.
On the right side picture -
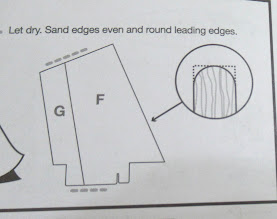
TIP: Those jagged edges should be smoothed out using fine needle files. Left rough it could wear through the shroud lines and shock cord.
The instruction illustration shows wood glue on the sides of the fin. Too much glue will squeeze out and leave you with a mess to clean up.
On the left -
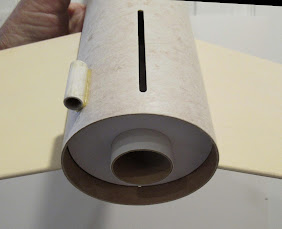
Showing the glue bead I applied. It's probably less than most builder's would use. The rest of the gluing will be done along the outside root edge fillets.
This is a very strong mount -
1. The TTW tabs are locked, butting against the flat face of the first and third centering rings.
2. The notch in the fin interlocks onto the center centering ring notches.
3. The engine mount was already well glued inside the main airframe tube.
Some builders might want to upgrade the parts. Using the recommended engines, the engine mount and fin can assembly are plenty strong.
As the fins are being glued in place,
Sight across the rear to be sure they are in line. Here you can see how the farthest fin is not in line with the closest fin. Make all adjustments before the root edge glue sets up.


