Monday, June 4, 2012

Semroc Goblin Build Part 1 Parts

This build is a classic, a Semroc reissue of the Estes Goblin kit #702-K-55.
I remember getting one as a free kit about 1971. It was later added to the catalog line up in 1972. The price was $2.50.

It featured a long nose cone, square block fins and a goofy black decal sheet. I remember thinking how much thicker and stronger the BT-55 body was compared to my other BT-20 and BT-50 models.
Back then I never flew mine with the new D engines. I used the EM-2050 engine adapter with 18mm engines.
This Semroc kit comes with an 18mm adapter.

Semroc calls this one part of the Magnum Series. The word "Magnum" was used by Centuri to describe their D engines. I don't remember Estes ever calling the D engine birds with the Magnum moniker.

Parts are all first quality.
The split 2050 centering ring is the cleanest straight cut I've ever seen in a model rocket kit.
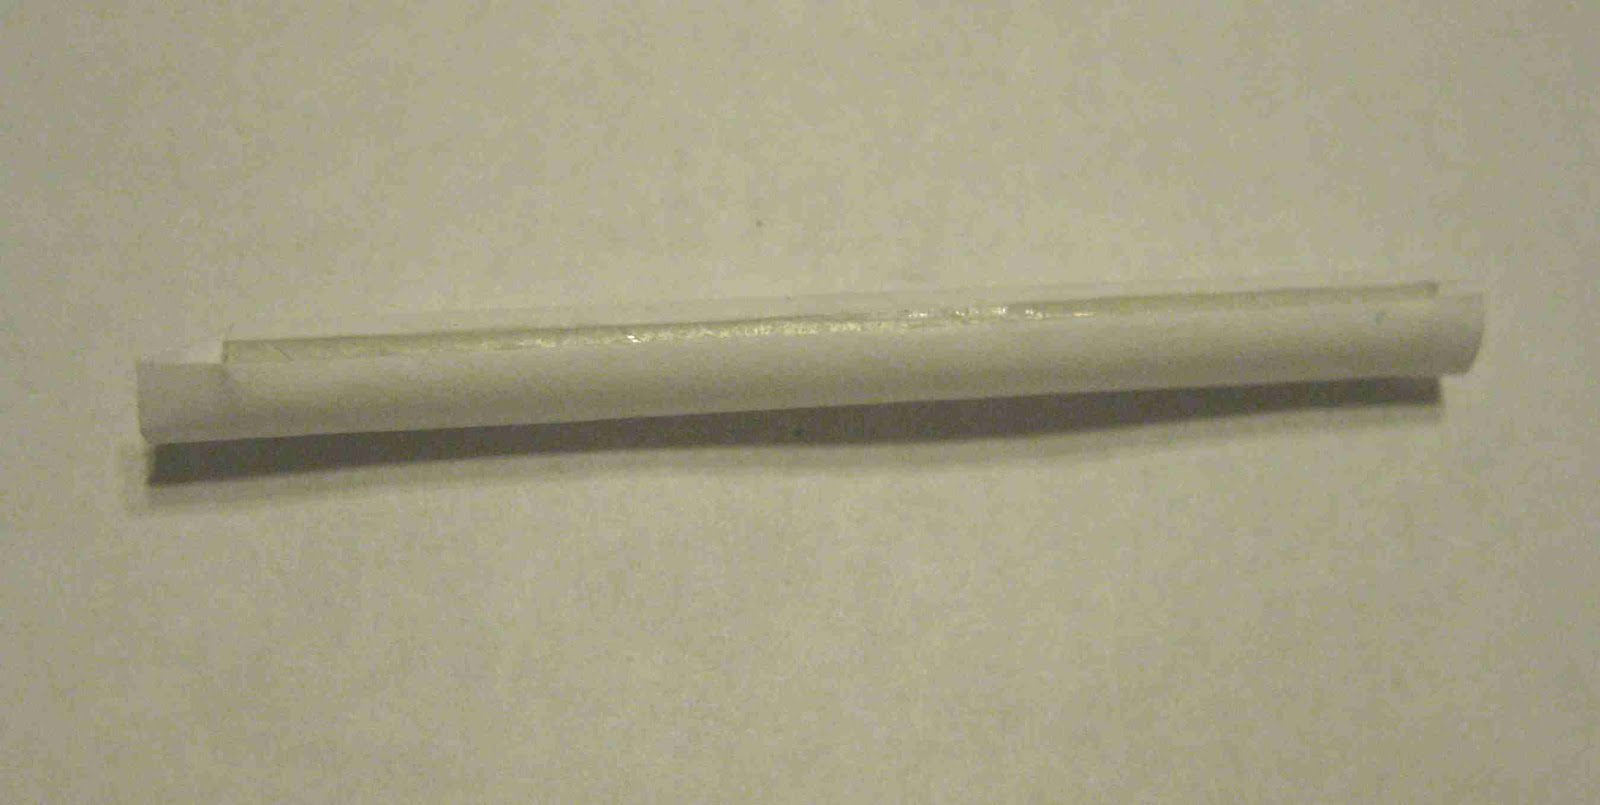
The launch lug is 3/16" diameter X 3" long.
The original Estes kit used a 1/8" X 1 1/4" long or the LL-2A. Semroc has you glue the lug on in one piece. The Estes kit had the lug cut in two and was glued at the top and bottom of the BT-55.

The AR-5055 engine mount centering rings are a thick card stock in the Semroc kit. The older Estes rings were more like the 2050 wound rings in the enclosed 18mm engine adapter.


The decals look great!
They are printed close together on the small sheet. This'll require some careful cutting.

Sunday, June 3, 2012

Space X Falcon Build Part 9 TIP: Gluing In the Baffle Plate

TIP: I learned a valuable trick on this build - How to install a single baffle plate deep in a body tube.
Normally, I'd glue a baffle plate onto a coupler and slide the plate/coupler assembly into the tube.

I wish I knew this technique when I tried to install a single centering ring in the upper portion of the QModeling XP Raptor! That ring flipped and spun while I tried to get the edges of the ring tight against the BT-55 tube. Very frustrating!

As shown below, a simple roll of copy paper will set the baffle plate straight in with full contact all the way around the inside of the body tube.


The instructions have you roll a paper cylinder about 1" in diameter.
I made mine about 1 1/2" wide. I thought it would give me more control when sliding the plate in place.


Here's the plate sitting of top of the rolled cylinder before sliding it into place.


The plate is started into the tube end and pressed up to the 4" mark drawn on the paper cylinder.

(I installed this baffle plate before the second attempt at the body wrap.)

This is where the Space X kit build ends.
It's very rare for me not to finish a model. But, after all the problems with the wraps I was dissapointed and threw in the towel.

R.O.C.K. Launch, June 2, 2012

After a few days of big rain, the burn ban was lifted in the Orlando area.
The R.O.C.K. group hasn't flown for a few months because of it and many came ready to fly.
With Brian handling launch duties it was a smooth running operation.


Greg Welch brought one of his EBAY purchases.

That's an original COASTER SUPER JET engine, pre-cursor to the old Centuri Mini-Max engines. The printed casing said: Static fire of 35 lbs. thrust!


We had a few classic clones today.
Tom Dennon flew his ORBITAL TRANSPORT with the "first flight" recommended B6-4 engine.
The orbiter seemed to hang suspended gliding into the wind.
Beautiful build, beautiful flight.
On the left of Tom's O.T. is my Quest TOMAHAWK flown with a C6-5. It showed a little wiggle on the way up.

Tom had done some upgrades on the launchers. It don't get much better!


Kirby showed what happens to an Estes MEAN MACHINE flown on a D12 - with a seven second delay!
The rain had softened up the ground a bit.
Even with the nosed in landing there was no buckling or bending of the BT-60 tubes!

Kirby pulled out the three inches of (core sampled) dirt and flew it again, this time with a shorter delay.


Ken Cooper brought his new SKYLON.

The Skylon is the U.K.'s entry intoa reusable Hydrogen spacecraft. You can always count on Ken to bring models built with extra care from design to flight.


That's Tom Dennon's Mother, Jean Ivery.
Shes' flying a Quest BIG BETTY with a C6-5 in honor of her Mother Betty.

To the left of Jean's rocket is my CD SPOOL.
The Spool is a favorite, especially the fast spin on the recovery.

Kirby flew his new Quest PLANET PROBE twice with C6-0s.


My also flowns:
Centuri VULCAN clone on a Estes B6-2. No tail wag at all during boost. The angled lug seems to get it off the rod on a straighter path.
Hot Rod Rockets BELL BOTTOM with an A3-4t. This indestructible models finally shows signs of wear. The Kevlar line burned through at the engine block.
FlisKits MMX HONEST JOHN. The nose cone ejected but the streamer didn't. From thirty feet back it's hard to follow but I did see this one through launch, ejection and landing. No damage. Estimated altitude 100'. Estimated attitude 200'.

Keep an eye out for the R.O.C.K. launch shots from Roger Smith on http://www.rocketreviews.com/
The new jonrocket.com trailer was open for business and open for recovery of one streamer recovery model.

Saturday, June 2, 2012

Space X Falcon Build Part 8 Cord Prep

Both sides of the Kevlar and elastic shock cord get tied loops.

The "baffle" plate has a small hole to the outside of the larger holes.
At one time, I would guess the smaller hole was supposed to be a Kevlar anchoring point.


The Kevlar is looped through two of the larger holes on the plate.

NOTE: The baffle plate keeps the parachutes nearer the front end of the rocket during boost. A single baffle plate still requires flameproof wadding to protect the parachutes.

Space X Falcon Build Part 7 Nose Shroud Line

If the kit has one "gotcha" this is it.

You are directed to tie a knot in the thin white cord. The knot is supposed to hold this line inside the nose cone behind the hole near the top.
The hole is way too big for a shroud line knot. You could double or even triple the knot and it will still slip through the hole!

I made a "block" out of thick cardboard and tied the string through and around the block.


Here's how the block was epoxied into the nose cone later in Step 10.

Friday, June 1, 2012

Space X Falcon Build Part 6 Launch Lug

The instructions would have you simply glue the launch lug on the cut recess on the body wrap.
I decided to cover the translucent lug with white paper.

The paper was cut slightly longer than the supplied lug and pre-curled with a dowel in my palm.

The paper was adhered with a glue stick. The overhanging edge is sanded off with 400 grit on a block.

Note there is a open area at the seam. This gives a little better gluing area against the curve of the body tube.

Space X Falcon Build Part 5 Body Sticker

Another new body wrap sticker was sent out by the kit manufacturer.

From Gus' tutorial:
Measure and mark the center of the printed side of the wrap just at the top and bottom.

The backing is lifted off while tearing it at the mid point along a strait edge.

Move the backing sheet away from the center line of the wrap so about 1/4" of the sticky surface is exposed.

Double check the body tube to be sure the pencil line is straight. You can use your aluminum angle.


Lay the 1/4" wide open area of the body sticker on the body tube matching up the tick marks on the sticker with the straight line on the body tube.

It'll take a few tries to get it right on the top and bottom.


Lift the backing on one side only and slowly apply the wrap smoothing it out as you go. Take it SLOW!
After one half of the wrap is down, remove the backing from the remaining half and slowly roll it around the tube.

The picture shows how it all lined up at the seam.

This is how the wrap should have gone on.
What I didn't show here was a tearing of the wrap when I tried to do a very slight repostitioning. This wrap sticker grabs hard and quick!

Space X said they'd send out a replacement tube with the wrap already in place. 
What they sent was crooked, wrinkled and unusable.