I wrapped some 400 grit around a 1/4" launch lug and ran it up and down the length of the standoff. I should have also done this on the top side of the standoff before gluing on the lug.
TIP: If you ever need to sand a curve into the bottom of a standoff to better fit the body tube, sand with a smaller diameter tube than what you are gluing it on to. You'll get a better fit.
It does really remind me of the Estes X-Ray.
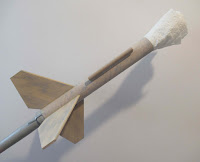
A painting wand (dowel with a glued on engine casing) is slipped into the engine mount. At the open top, a rolled up paper towel will keep paint out of the tube.
I didn't use the six separate red shroud lines included in the kit. I used the more recent three long "loop" method. It's difficult to get six separate lines evenly tied and attached to the plastic adapter loop.
I also added a snap swivel.
The parachute was stored in a small zip bag with the snap swivel out the top. This prevents any tangles.


Hi, Chris,
ReplyDeleteThat's very interesting. I do the very same "zip bag with snap swivel outside" parachute storage method!
Enjoying this build series. Looks like you are having fun with it.
Hi Ed,
DeleteI don't like tangles in the chute lines. I also use the zip bags to store small parts during a build.