Sunday, June 7, 2020

Estes Doorknob, #9720 Build, Part 10, Overspray & More Masking


I had a little over spray.
This was easily removed with a damp Mr. Clean sponge. Go light with the sponge - it can dull the paint.


TIP: Remove the pencil marks with a white eraser.
Don't use an eraser on the back end of a pencil. A pink eraser will leave pink marks.


Here's the marked Scotch tape masks dividing the nose cone into quarters.

The tip of the nose cone remains white.
This is the upper mask separations.

To get clean corners, the bottom blocks were masked and sprayed.
The bottom is masked off, then the upper orange blocks are masked and sprayed.
You could do all the masking at once but I find better results doing a two-step process.


One black fin.
The fin taper showed up well on the finished model.

Saturday, June 6, 2020

Estes Doorknob, #9720 Build, Part 9, Phosphorescent Orange


Trust me - DON'T USE THIS PAINT!

I've had mixed success with Krylon. I had terrible results with this.
It's hard to find day-glo orange paint. I found this at Michael's and bought two small cans.


On the left is the first mask for the day-glo orange.

The paint went on very rough and spattered. Usually flat paints go on pretty smooth.
I tried some light sandpaper to smooth it out before the next coat. THE PAINT CHIPPED OFF!

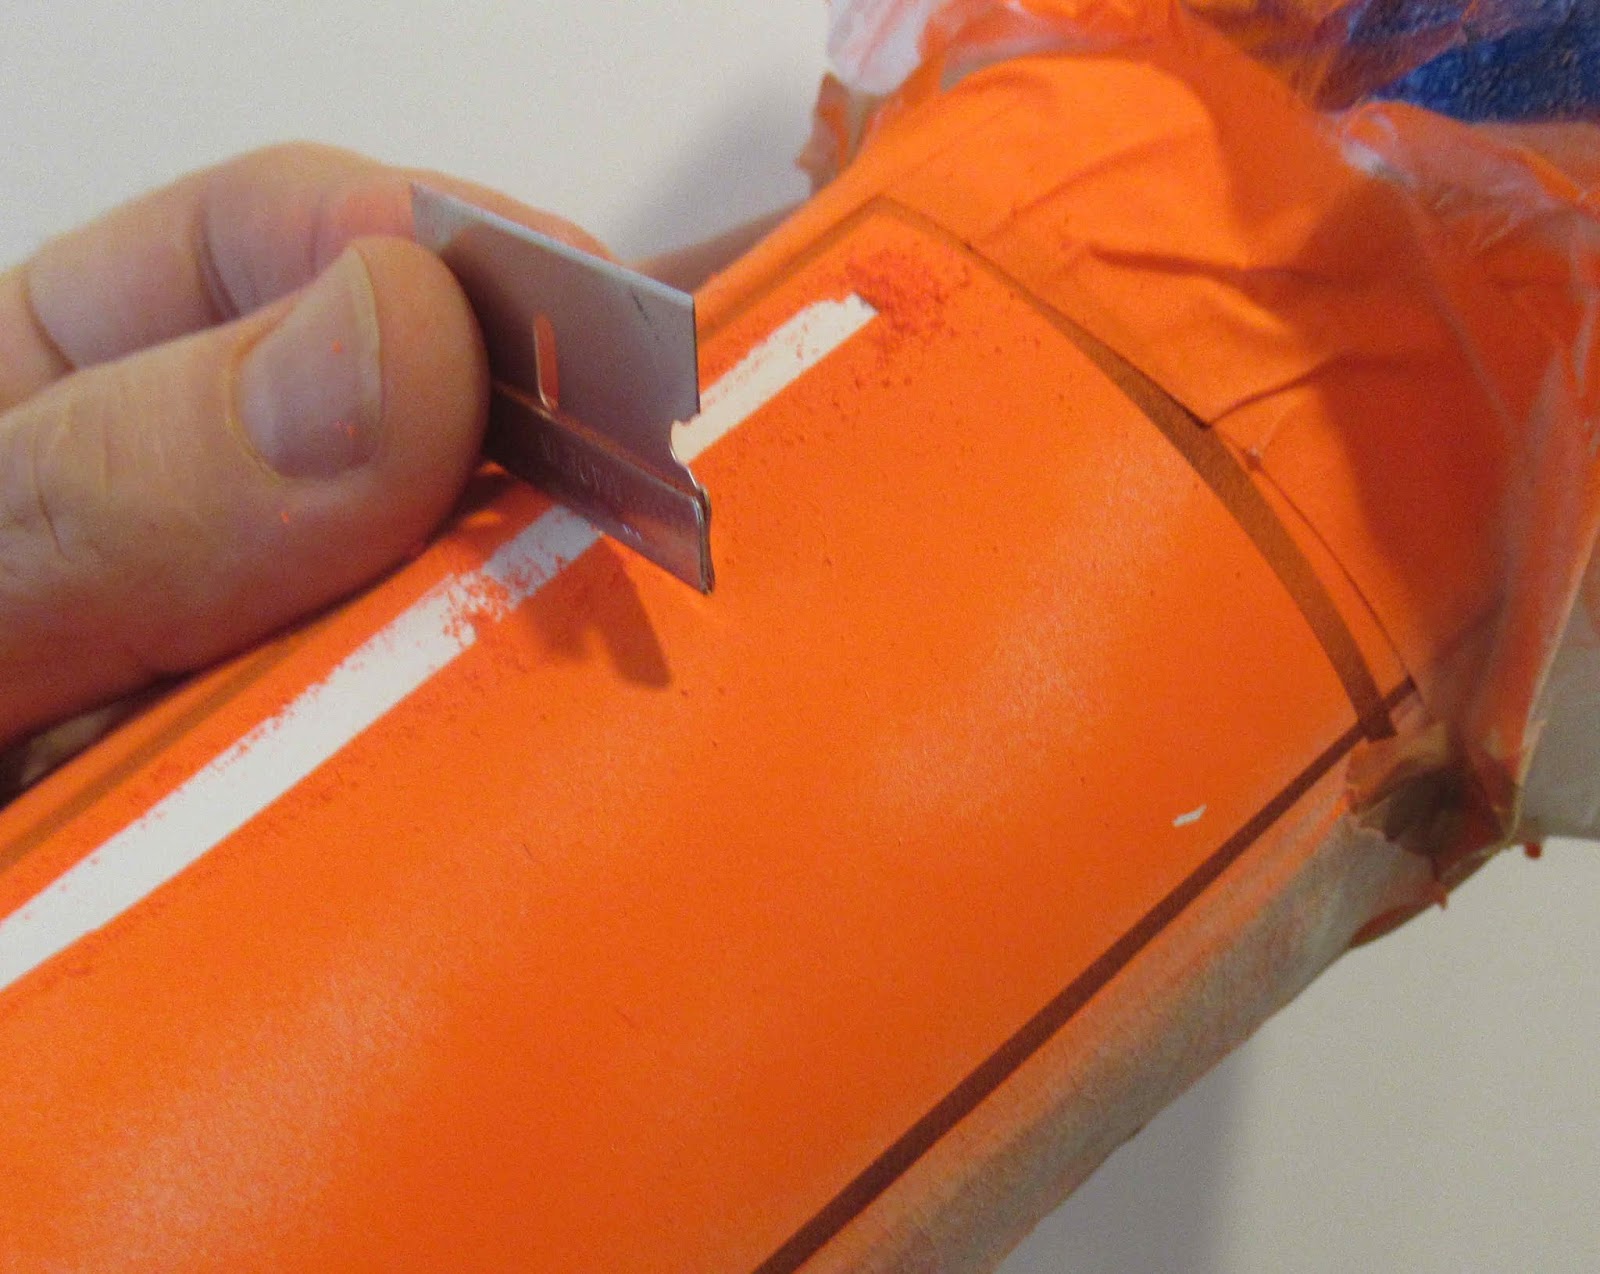
I used the back of a single edge razor blade to remove the paint. I didn't scrape it off, just pressing the smooth back of the blade chipped off all the paint! What a mess.

The same masking tape was still used again. The paint came off a little too easily.
I tried to find another brand of day-glo orange with no luck.

On a whim, I compared the Ace Hardware Store Rocket Red to the crappy Krylon orange.
There was no difference in color. The Ace Rocket Red is more of an orange - look at the comparison next to the can caps!
I ended up using the Ace Rocket Red on the model.

Friday, June 5, 2020

Estes Doorknob, #9720 Build, Part 8, Paint Prep


To make the painting wand -
I didn't have a used 29mm motor casing, so I wrapped and taped a strip of cardboard around a dowel. This was friction fitted into the engine mount as a handle for spray painting.


After the first coat of gloss white, light sanding follows.

Look at the reflection - I've lightly sanded off just the top beads of the rough first coat. No need to sand all the way to surface, just dull the paint.

A second heavier final coat followed.

Here I'm using a piece of paper to find the center between the fins.
A pencil mark is made at the leading edges of the facing fins. Fold the paper in half, mark the center.

The paper is set back on the model and pencil marks are made on the body tube for the paint masks.


Lightly extend the center pencil marks all the way down the tube.

Thursday, June 4, 2020

Old NARAM 24 Picture


Chas Russell sent me a picture from NARAM 24.
On the NAR website the location was listed as Orlando, but the flying field was actually in Kissimmee on East Highway 192.

I had just moved to Orlando a few months before and was entertaining at the Sea World Florida Festival complex. In walks Jeff Flygare and Bob DelPrincipe of Centuri. Jeff was the "Consumer Relations Manager", Bob was a designer and artist for Centuri. While I didn't fly anything at this NARAM, I stopped by the field to visit.
From left to right: Jeff Flygare, Bob DelPrincipe, Al Porzio and me.

I knew there were big changes going on with the Damon owned companies. While catching up with Bob he said under his breath: "You probably made the right choice by going with music over a rocketry career."
Around this time, Centuri operations were downsizing and may have already moved to Estes. If you mailed an order to Phoenix AZ, the box may have been sent from Penrose!

Estes Doorknob, #9720 Build, Part 7, Engine Mount & Fin Gluing


The top engine mount centering ring got a glue fillet applied drop-by-drop using two Q-tips taped to a dowel.

Place a drop of glue onto the Q-tip, set the drop of glue onto the centering ring/body tube joint and smooth the glue with the Q-tip.


On the left is the first dry fitting of the fin. Notice the slight gap at the root edge.


On the right is the same fin after fitting to remove the gap.


The root edge tabs needed a very slight sanding to shorten them.
It didn't take much sanding. There were two root edge surfaces that needed a small reduction.


All four fins are glued in place.

You can see the the wood glue fillet around the lowest centering ring joint.

Wednesday, June 3, 2020

Estes Doorknob, #9720 Build, Part 6, Lug and Engine Mount Gluing


The launch lugs are glued onto the body tube.
Note they are not centered between two fins but are glued to the right side of a fin slot.


The fin slots and tube ends were masked off before shooting it with filler/primer.


The fin slot must line up with the slotted middle centering ring

As shown in the "INSTALL ENGINE MOUNT" instruction step -
Slide in the engine mount. Use the fin to position the mount in the main air frame tube.

Slide in a fin, the horizontal slot in the fin tab must interlock with the slot in the middle centering ring.

Position the engine mount using two fins, one each on opposite sides.
With the engine mount in the correct position, apply a glue fillet to the lowest centering ring inside the bottom. Don't glue the fins on yet!

Tuesday, June 2, 2020

Estes Doorknob, #9720 Build, Part 5, Nose Cone & Body Tube Seams

TIP: Always check the nose cone eyelet. With the eyelet removed there can be rough mold lines. These rough lines can wear and possibly cut through the shock cord.

This picture shows the before (rough) and smooth (after).


Lightly smooth any rough mold lines with a small flat file.
The body tube had a rare "double" seam. The clear glassine top wrap had shrunk into the lower seam gap! I marked it with a pencil to show it.

In the past people have wrote about removing the clear wrap, I wouldn't recommend doing this. You'll end up with more work trying to fill twice as many seams!

I did use the pencil to press and indent the shrunken seam where it was deepest.

Note the normal seam below the pencil line.


The normal seam was filled with CWF.
The wider (shrunken in) double seam also got some CWF filler and sanding.
In the picture to the right, the seam at the top and bottom is the shrunken glassine seam.
Between that is the normal body tube seam.