

This was one of those home print decals that didn't give a good opaque coverage. With the nose cone in place you can really tell the difference between the two blacks.
On the left is a single layer decal, on the right is a two layer. There is a big difference. Sometimes home print decals don't cover over white paint.
Lay down the first decal and let fully dry overnight.
To apply the second decal -
Soak the decal, wet the first decal already set on the tube. The surface is wetted down so the second overlay decal can easily slide into position.
As you are positioning the second overlay decal, simply line up the ink lines on the decal underneath. It's easier than it sounds.

I only had to double the two wrap around decals. The two Mini-Brute bugs looked fine.

Here's the shock cord ties.
The nose cone screw eye got the Duncan Uni-Knot.
The Kevlar / Elastic shock cord got interlocking overhand knots.

There was some clear decal overhanging the top of the body tube. When the decal is completely dry, you can shave off the edge with a razor blade.
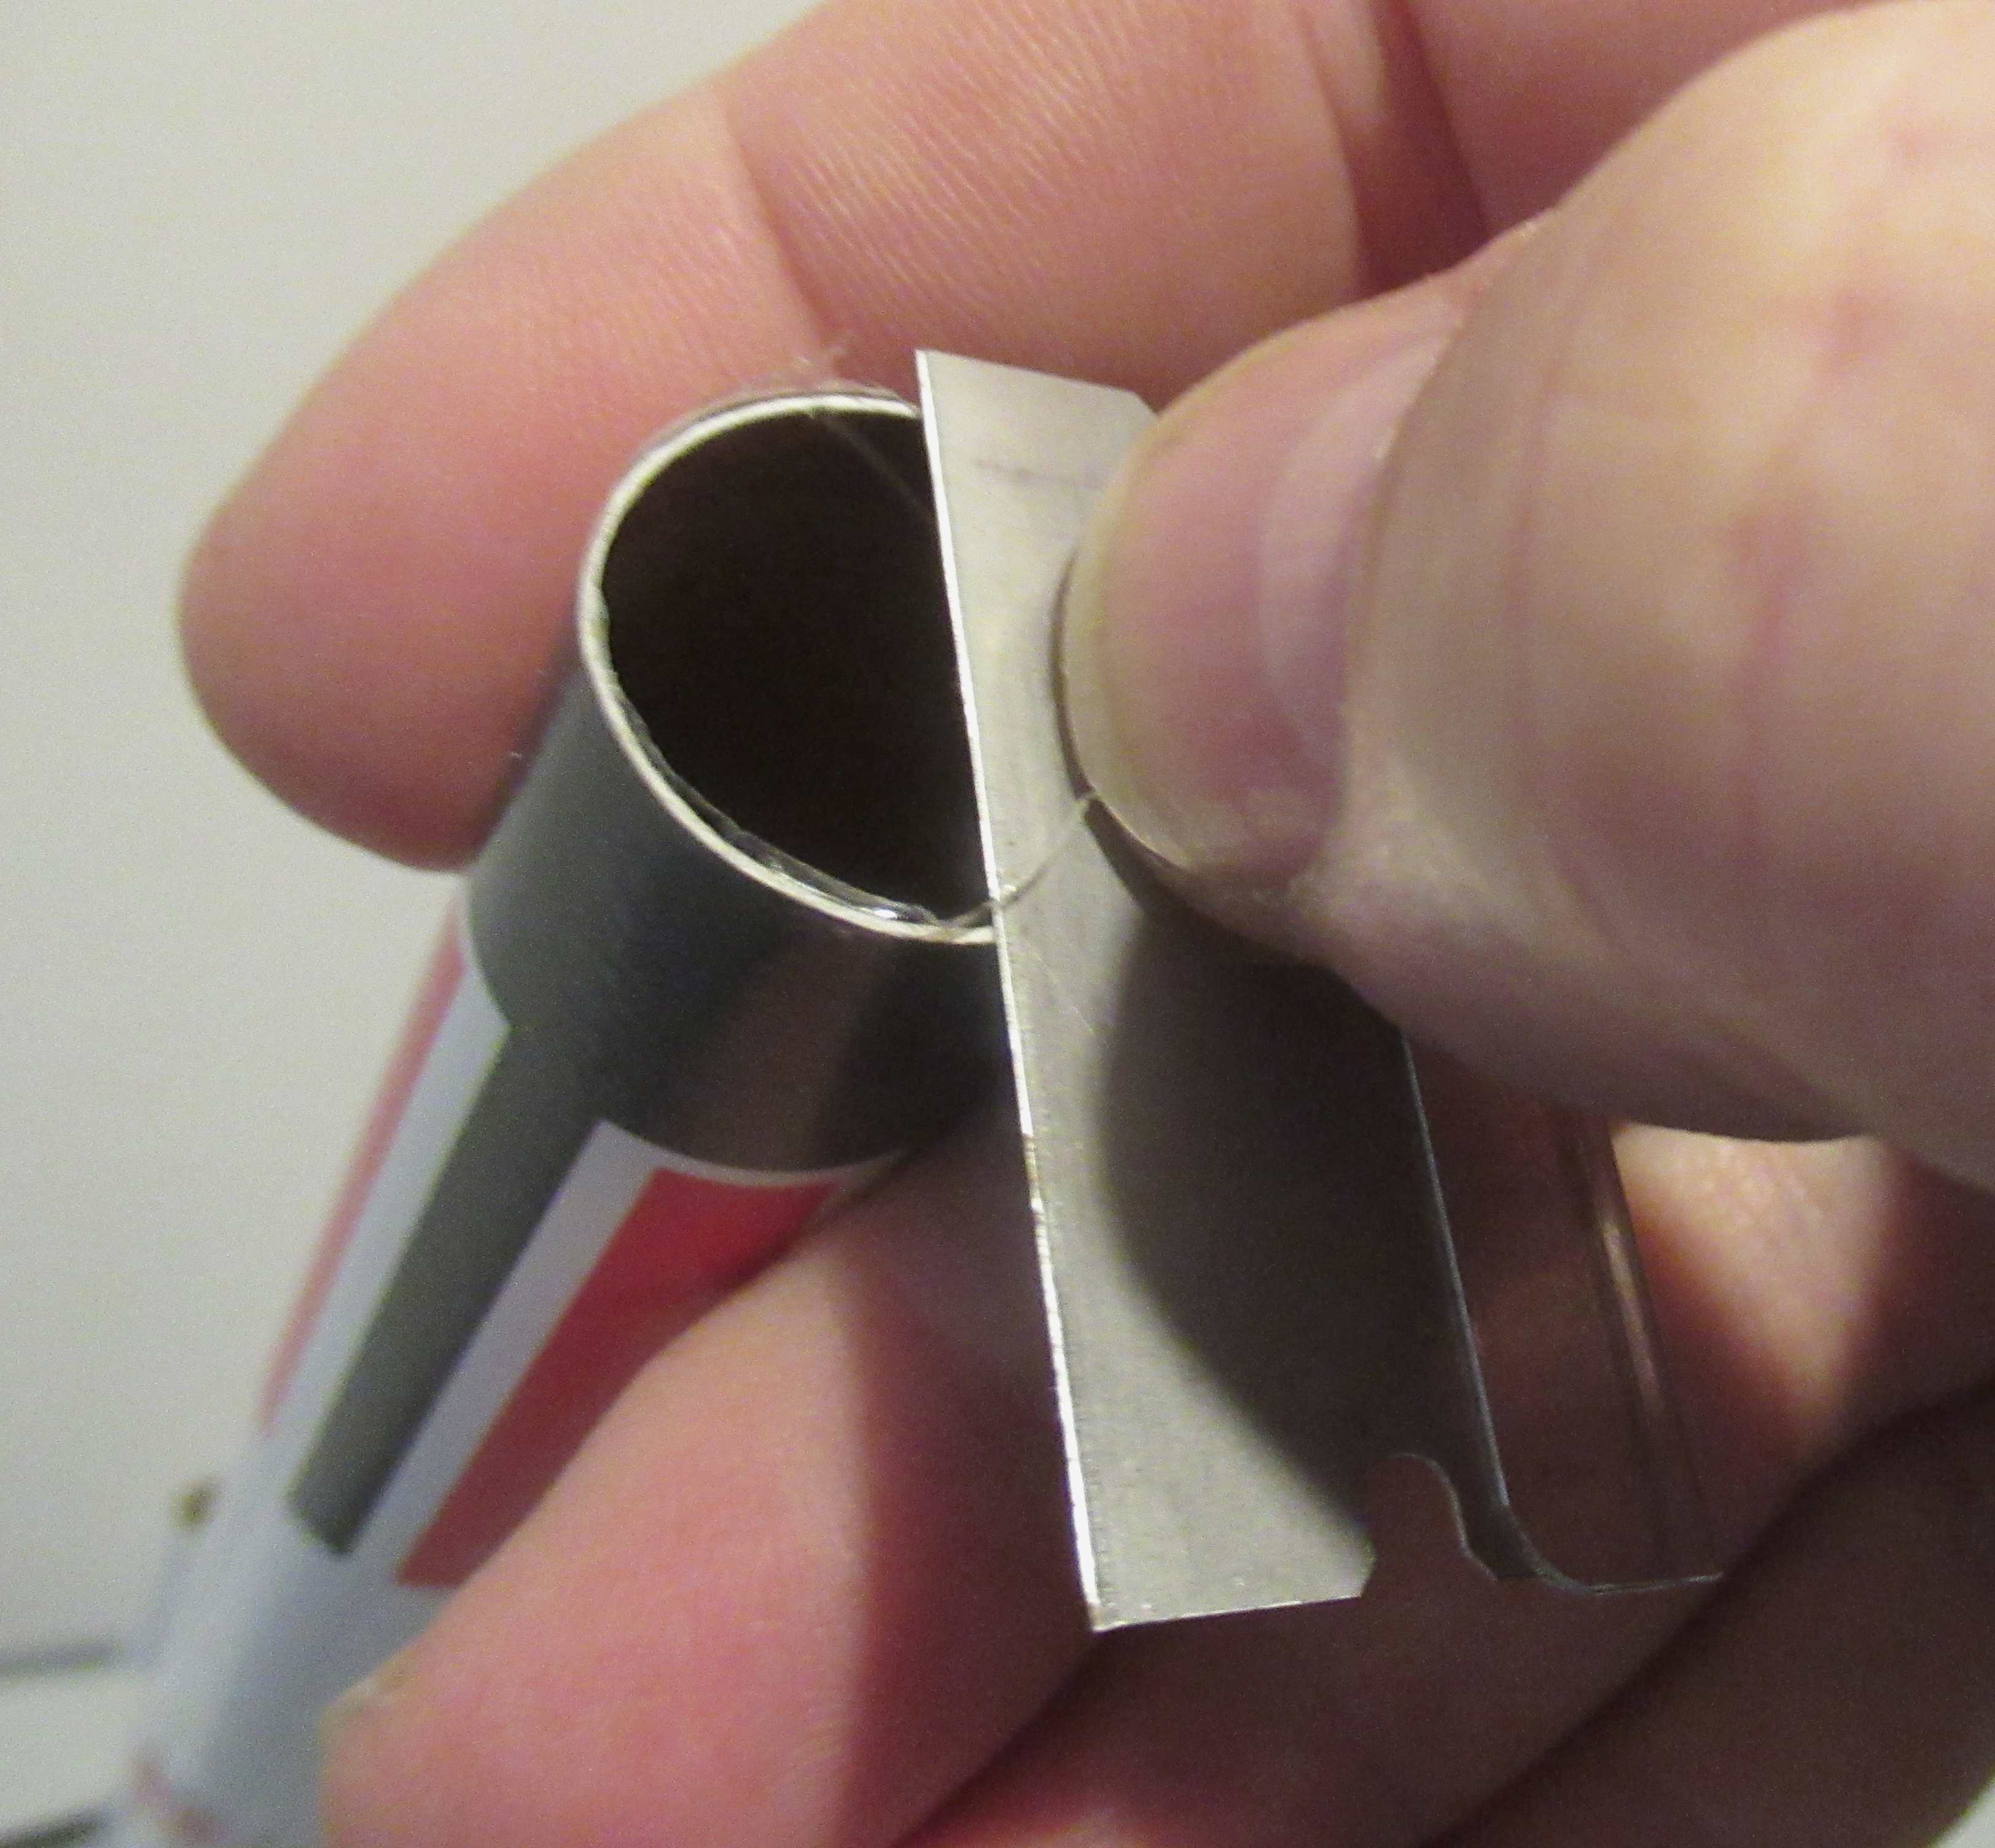
Use a "sawing" back and forth motion when cutting off the clear overhang.
Apply some clear acrylic Future on the exposed edge so it won't peel back. I don't overall clear coat models, just decal edges like this.


The tube edge got some Sharpie to blacken up the white paint.
Chris, do you print the second set a little bigger ,like 1 or 2% to cover the first decal?
ReplyDeleteHi Bill,
DeleteThe first and second (overlay) decal are the same size. It's not a huge decal and they aren't thick. I don't notice any short fits in the second decal.