

The V tip of the two wing pieces leave a small gap at the fuselage notch.
Looking at the back, the wing overhangs the rear of the fuselage.
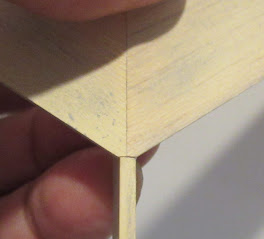
By slightly sanding the "V" tip,

it closes the small gap at the front and moves the wing forward. The back of the wing is now even with the tail end of the fuselage.

I drew a pencil line down the center of the canard for gluing alignment.

The dowel is glued into the notch at the front end of the fuselage.

Check the instruction drawing below -

On the left is how the tip plates will glue onto the outside edge of the wing.
On the right - I sanded the outside wing edge to get the tip plate to the correct angle.


Here's what I was going for -
This illustration is from the instructions in the countdown checklist. It probably should have been brought up in Step 20.
I do like your suggestion of sanding a "flat" at the front of the wing assembly such that the wings will rest neatly into the notch in the fuselage (something that's often done on built-up balsa glider models with swept wings that fit within a fuselage notch).
ReplyDeleteThe text for step 15 does indicate that you need to sand a bevel on both the wing root edge and wing tips. The illustration for the step does indicate the same -- though it only specifically points this out for the right wing (it is implied that you do the same with the left wing too).
The caption on the illustration for step 20 states "both tip plates point straight up" (which makes sense given what's stated in step 15 as well as the T-8 countdown illustration).
One thing that did cause some concern (for me) is that the glider can flop around a bit (being that it simply hangs from the hook on the nose). I'm thinking that some glider supports could help (sort of like what you find on the Orbital Transport -- but much simpler, such as short lengths of lengths of balsa strip stock).