Monday, June 29, 2020

Semroc Andromeda Chrome Wrap Fix, Tips, Part 2


Here's the original Estes instruction illustration showing the spacing of the chrome bands.

The low wrap is 1 1/2" above the centering ring joint. The second wrap goes 1/4" above that.
On the left, the first wrap is in place, using the top edge of a masking tape wrap for a reference line. Why use a tape wrap? Getting a sticky wrap to meet up at the start point never seems to happen on the first try. The tape wrap gives you a straight around the tube reference.

After the first chrome wrap is set, a 1/4" wide masking tape strip was set above the lower wrap.
The upper chrome wrap is set down above the tape strip.


Here's the final decal art using the widest black band decal from the first three draws.

This decal print is available as a PDF if you are a Patreon blog supporter.


Here's the overlay decals on top of the chrome trim.
This is the same technique I've used in the past to "print" over chrome.

The width of the vertical bar wrap worked and is even all the way around. Sometimes things work out, it just takes me a year and a half to fix it.

Sunday, June 28, 2020

Semroc Andromeda Chrome Wrap Fix, Tips, Part 1

My Semroc Andromeda was a pre-production kit, given to me to help produce the instructions. I got the kit at NARAM 60, almost two years ago.
I built the kit without problems as I did the line drawings. All went great, until I applied the (laser burned) chrome wrap. The black striping was cut a little to deep. I couldn't transfer the wrap onto the model without it breaking up into many strips.
The model sat finished, without the chrome wrap for quite a while. I finally got around to making a wrap yesterday and applying it tonight.
I've used this technique before when a printed chrome piece was needed.

I drew up three roll bar rectangles. The middle set was drawn to the width of the kit supplied wrap. Past experience has taught me to make a few more, one a bit narrower and a third wrap a little wider. The width difference was almost 1/16".
This gives me some room to play with and adjusts for tube diameter and paint thickness.
These were printed up on to clear decal paper.

I first cut Monokote chrome trim piece to the width of the wrap supplied in the kit. It turned out to be about 1/16" short! Maybe the third, wider decal wrap will fit.

A second test piece of chrome trim was cut to allow a slight overlap. When a  chrome wrap overlaps itself, it's very hard to see the seam.
Notice in the above picture, a wrap of masking tape is set around the tube for a straight, around the tube reference line. The upper side of the tape is 1 1/2" from the top of the centering ring.

When rolling on the chrome piece, leave most of it on the backing. Try not to touch the sticky underside.
Roll the chrome on, smoothing out any trapped air as you go. Keep the bottom edge of the chrome wrap on the top of of the tape.

More tomorrow-

Estes M.A.V. #7283, Finished


For a "Beginner" kit, this one has a lot of interesting features.
Lots of detail and enough assembly for a beginner to have a good feeling of accomplishment.
I installed the pre-assembled 18"parachute. Is that too large for a 12" tall rocket? Probably not - the fins could break on a hard landing.

Saturday, June 27, 2020

Estes M.A.V. #7283, Build Part 6, More Stickers!


The hatch stickers are clear, fingerprints will show if you touch the back sticky side.

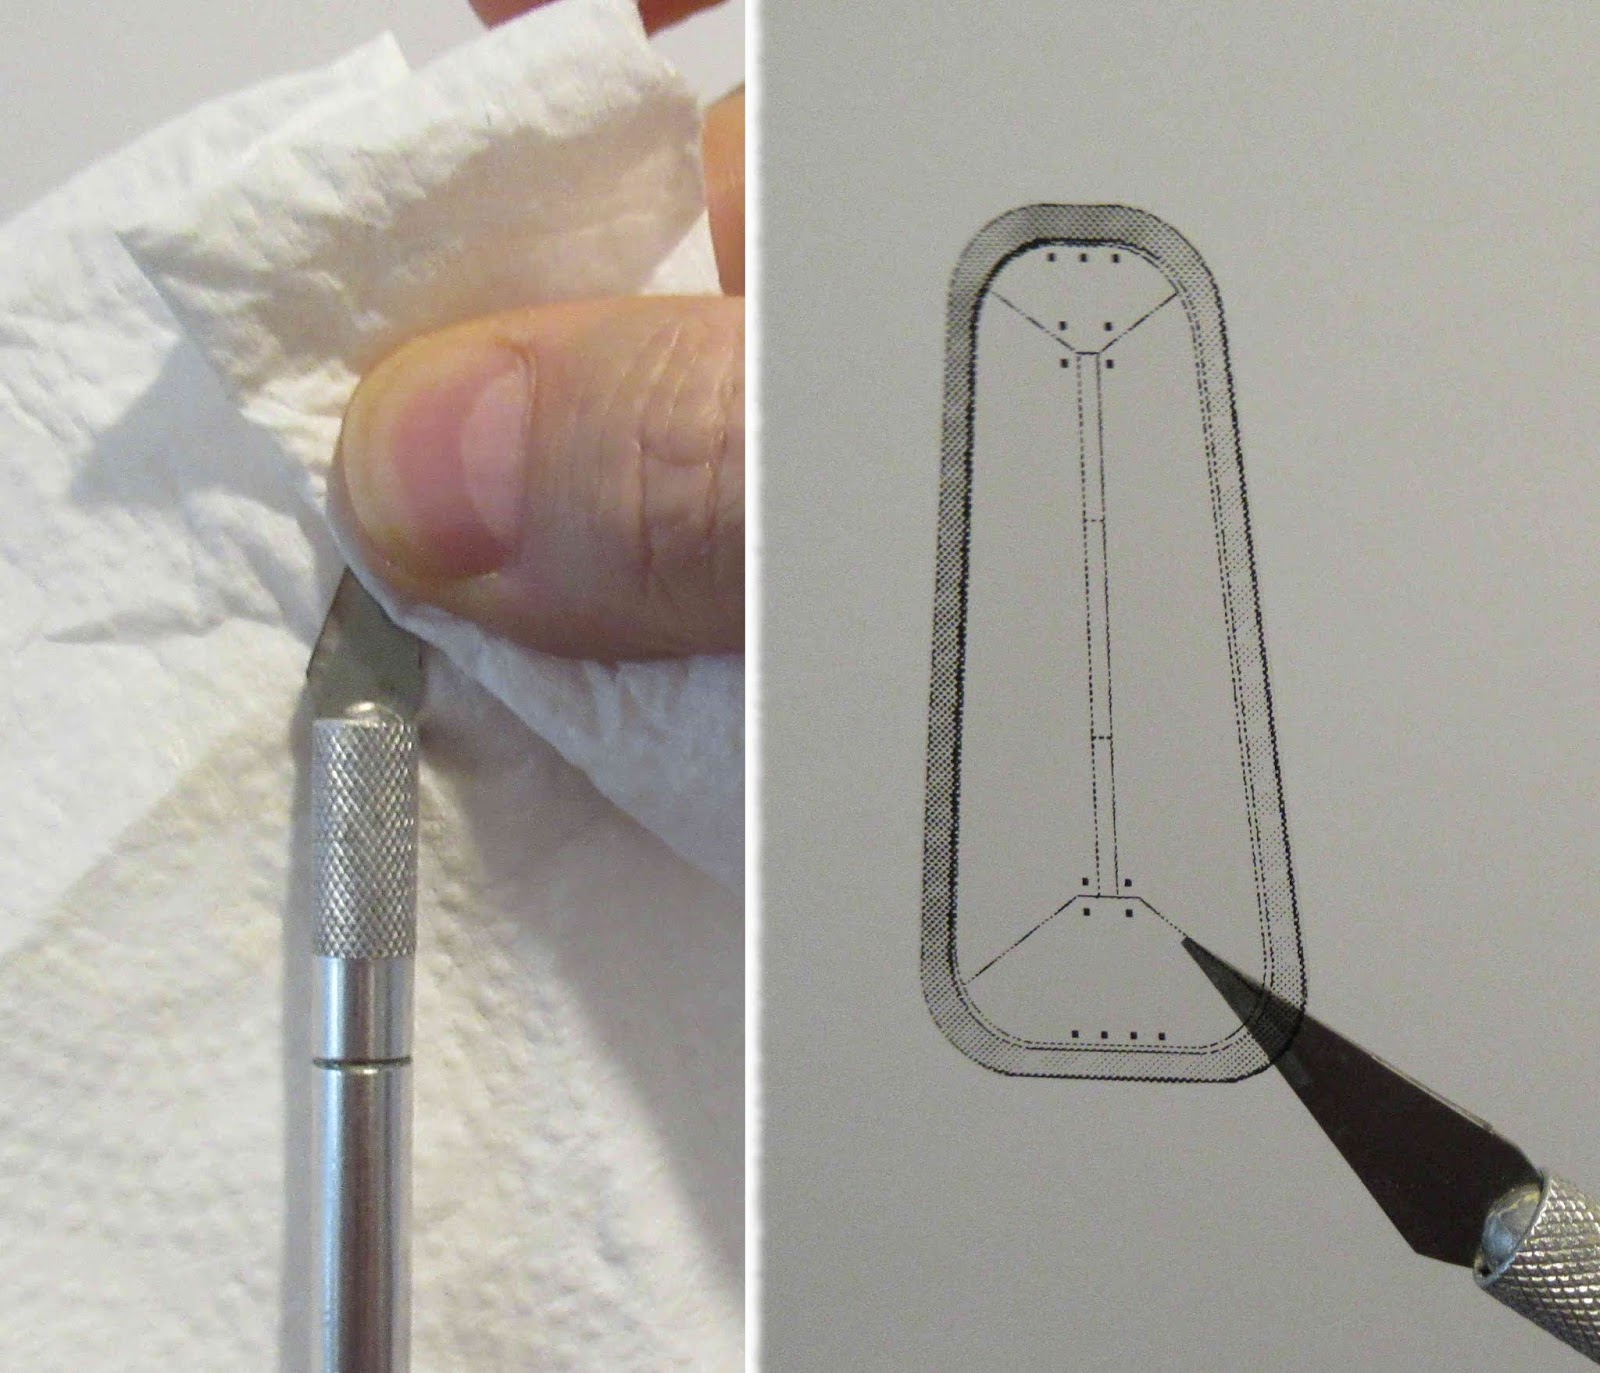
Hold and position the stickers with the tip of your knife blade.
Before placing the sticker on the knife, wipe off the blade to be sure it is clean.


On the left, is a placed sticker using a wrap of masking tape for height and pencil marks for the centers.

On the right, the fins and retainer ring are in place. The hatch stickers centered pretty well.
Over the launch lug is a clear reinforcement sticker.
The plastic launch lug strip was glued in place and feels strong. It probably doesn't need the reinforcement, I went ahead and used it anyway.

I marked the center of the sticky square with some pencil tics. The pencil marks were centered over the lug strip and the sides pressed in place.


With the pencil marks rubbed off, you can't even see the clear sticker!
It's there -

Friday, June 26, 2020

Estes M.A.V. #7283, Build Part 5, Stickers!


GOTCHA: The instruction shows but doesn't say it - You've got to place the launch lug strip somewhere between two fins.
The illustration shows the launch lug strip set between two fins, but this is a beginner model kit and could be more explicit.


The hatch stickers are centered between the fins.
The die cutting is a little wide for me, the fold shows the separation cut.
I cut the hatch stickers out on the border lines.
I was concerned the stickers might grab before they could be centered. I needed some reference points.
I found the center by cutting a piece of paper the width of the area between the slots. Folded it in half and marked the center.
The center mark was transferred to the fin can at the top and bottom.

A strip of masking tape 7/16" tall was wrapped around the bottom for a bottom edge reference.

Thursday, June 25, 2020

Estes M.A.V. #7283, Build Part 4, Fin Can


The instructions show tube type plastic cement. I used brush-on liquid cement.

The fin can halves were pressed together dry.
The internal joints were brushed with the liquid cement while holding the joints closed and tight. Just the internal joints and at the top and bottom of the fin can got brushed on glue.


The fins slide into the bottom of the slot and are pressed up, locking them in place.
TIP: You really don't have to glue these fins in place. With the fins off you could easily fit this rocket in your range box. Slide in and lock the fins in place with the retaining ring at the flying field

On the left, the black ring isn't screwed all the way up yet. Notice the little bit of the slot still showing.

On the right, with the ring tight the fins are locked in place! They can't move up or down.
You could glue the fins in place but why? If a fin were to break, you've got a much easier fix.

Fill & Finish Questions From TRF, Part 2

Here's the fill and finish process I use:
Filling the grain and tube seams:
1. Thinned Elmers Carpenter's Wood Filler (CWF) from the orange lid tub.
1A. On balsa: Sand leaving a very slight beige skin of CWF on the surface with 400 grit.
If you see the "pink" balsa showing through you may have sanded too much.
Tubes get the CWF sanded to surface pretty much all is removed leaving the CWF in the seams.
2. Fairly thick spraying of Duplicolor Filler/Primer
2A. Sand filler/primer to surface with 400 grit.

Spray Painting:
3. Gloss white undercoat light spraying
3A. Lightly sand any rough spots with 800 grit. Look close at surfaces in direct light and smooth out leftover any 400 grit scratches.
3B. Second gloss white undercoat, heavier sprayed if first undercoat is good.
The heavier final coat is tricky. Heavy enough to really cover, not so much as to create drips.
4. Let dry for a minimum of 48 hours, longer if you can still smell the paint.
Plastic nose cones and plastic parts require longer drying times!
Mask and follow with secondary colors.

I hope that answers your questions. I would never say: "It's my way or the highway."
Everybody has a different method. This is what works for me.

Here's a bunch of posts about filling balsa and tube seams:
Previous Post about some BAD filler: