Sunday, November 7, 2021

Quest Lil' Grunt Build #Q5014, Part 7, Bolt Wrap & Streamer Attachment

The bolt wrap sticker on the nose cone shoulder is difficult to set down in a straight line with a perfect end match. By the time you go around the nose cone to meet the other side, your "visual" set line is usually off. 

TIP: Lay down a thin strip of masking tape to use as a edge guide for the sticker. Wet the sticker. The clear border edge of the sticker was set next to the side of the masking tape for a perfect end match.

The 1/4" wide shock cord is tied to the nose cone loop with 3" of the loose end extended from the nose cone. The 3" extension leads to the streamer attachment.

The flat elastic is fed through the grommet on the streamer and secured with an overhand knot. Cut the end at an angle to feed it through the small hole. The instructions say to use a double knot, but the streamer seems very secure with the single overhand knot. That grommet is pretty small.

Saturday, November 6, 2021

Upcoming Designer Series Kit?


From the Rocketry Forum,
"Pappy" found an interesting new design on the Estes website - 

The model is on the Designer Signature page: CLICK HERE

Comments followed: 
From BarGeezer: "Might be a new version of the USS Atlantis."
From TigerHawk: "I’m thinking it’s a cross between a Icarus and Federation."

I haven't seen this design before - I don't know if it is an upcoming kit or not.

Quest Lil' Grunt Build #Q5014, Part 6, Star Stickers

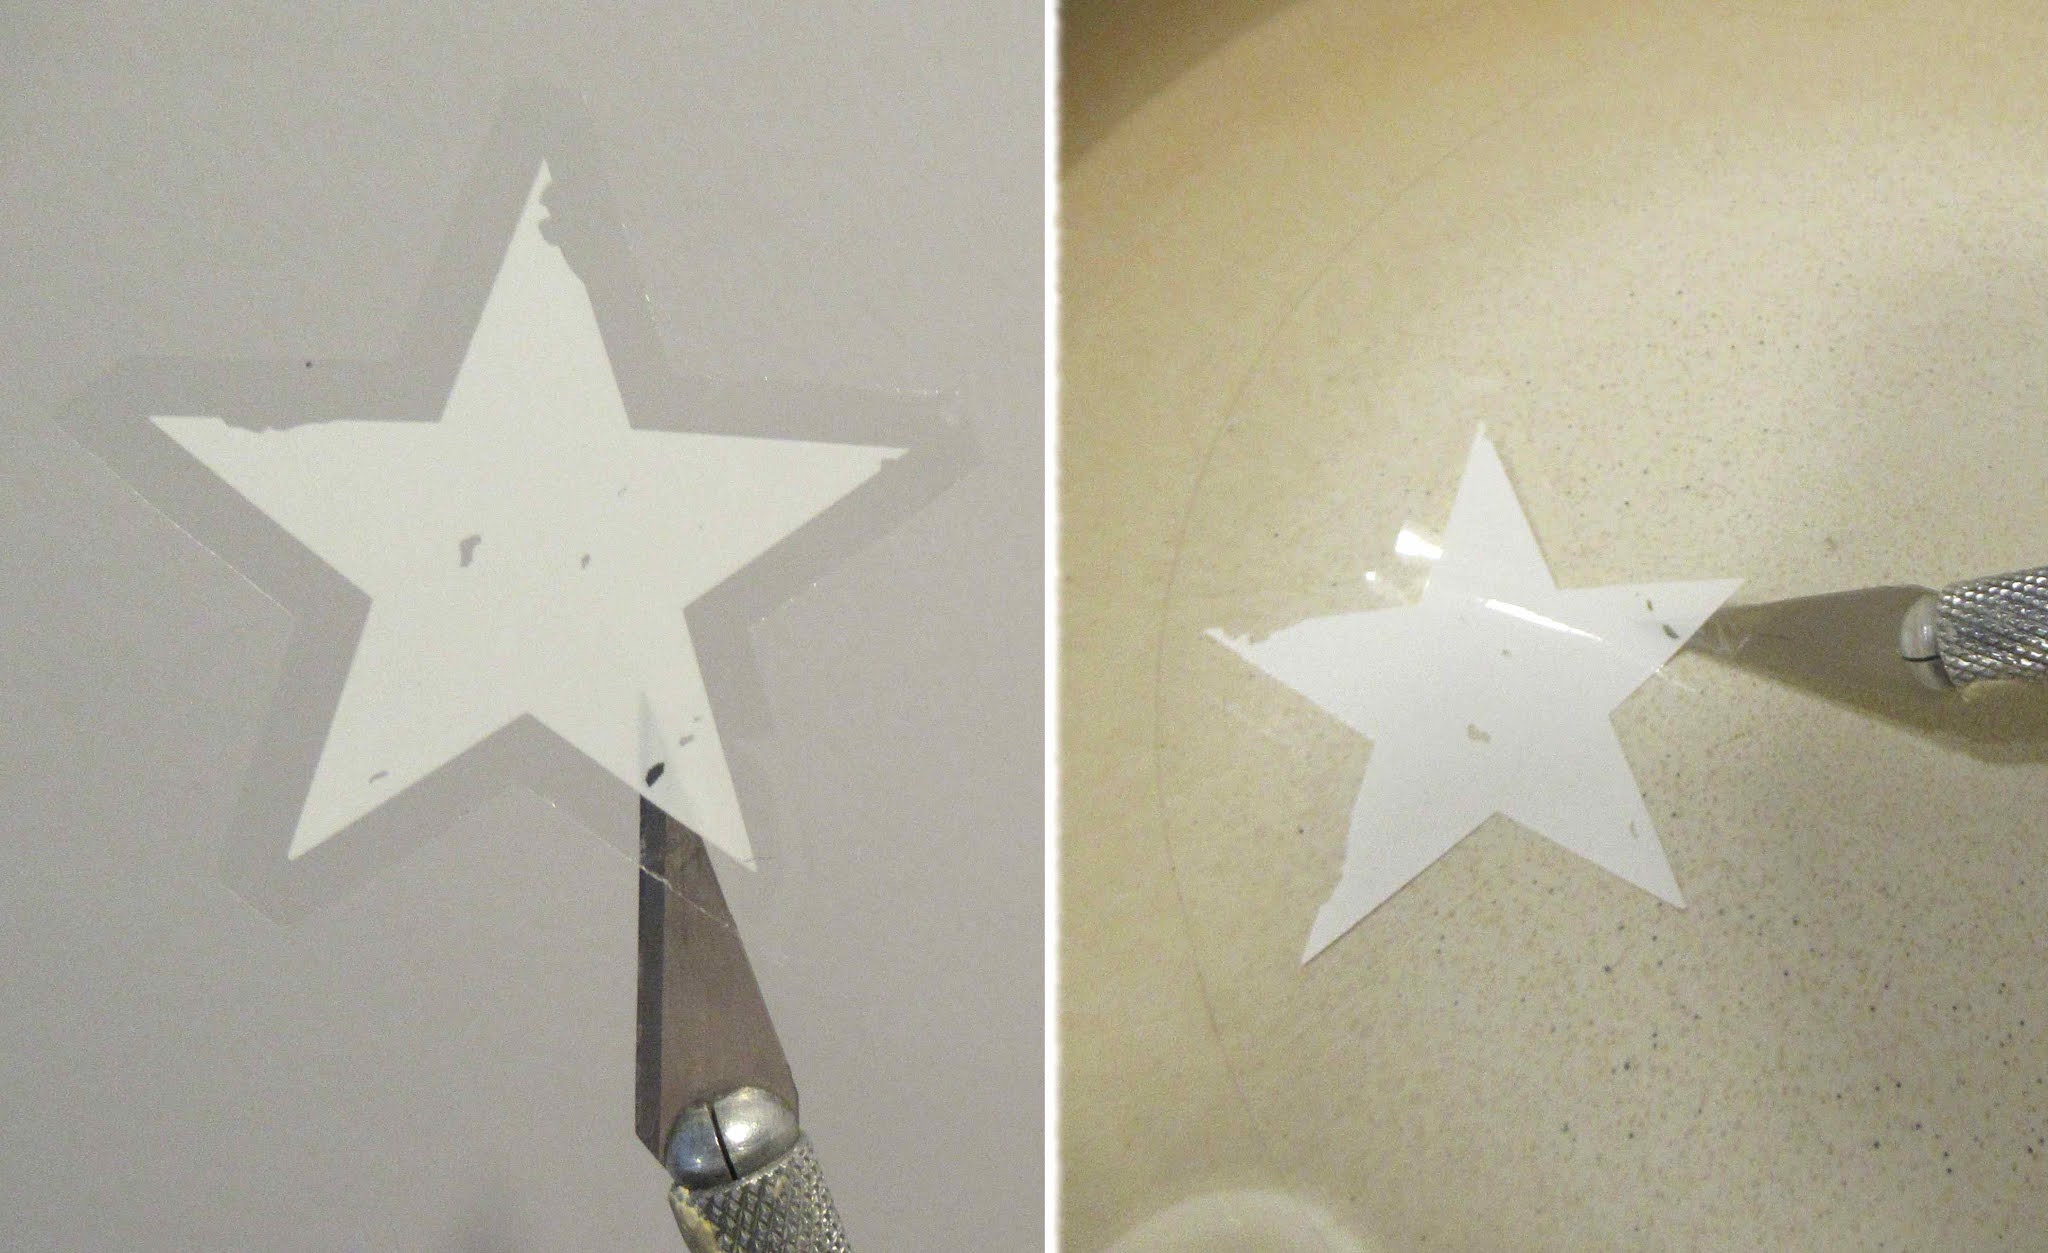
Try to keep oily fingerprints off the back of the stickers. Clean and wipe off your hobby knife blade and wash your hands before lifting a sticker.
Fingerprints will show up, locked under the clear plastic on your finished model! 

Lift the sticker with the clean blade trying not to touch the sticky backside.

Dip the sticker under water. The wet sticky side will allow lifting and repositioning.
For years I doubted that dipping a plastic print sticker in water would help with positioning. I was wrong - It works!

Wet the area on the rocket where the sticker will be set. With the back of the sticker also still wet, set it onto the model.
Lift and position if needed. After a few tries, if it starts to get too sticky you can re-dip in the water.

Notice the horizontal line of the star. It should be parallel to the shelf or tabletop if the model were standing on the fin tips.
TIP: The stars all have the same print "damaged" edges. The other stars should be rotated so the rough edges seem different on all fins.

Friday, November 5, 2021

Quest Lil' Grunt Build #Q5014, Part 5, Paint and a Question


With the shortages, I couldn't find a good Olive Drab paint at the hobby shops in Orlando. I ordered some Tamiya online. It's a small can but should be enough for this one rocket.

Here's my dilemma - 
The stickers are printed on shiny clear plastic. 
How would a shiny sticker look on a flat finished model?

The Tamiya paint cap lid is shiny plastic. On the model the paint ended up a satin finish.

Painting the nose cone wasn't a problem.
I went with Rusto #7271 Silver Metallic.

The metallics are some of the few Rustoleum spray paints I still use with good results. You've got to spray the metallic silver in very thin coats. It will run if layed on too thick.
This metallic is great for sport models as it has noticeable metallic specs - not a great choice for scale models where Silver is called for.


I thought an acrylic clear coat could gloss up the flat olive drab paint to match the shine of the stickers. A gloss finish would also help with better adhesion. 
It did brighten the sheen but not to a full gloss finish.
Well, it's a compromise.

Maybe - after the stickers are applied I can spray a dull coat to even out the main body to an overall matte finish.

Thursday, November 4, 2021

Quest Lil' Grunt Build #Q5014, Part 4, Grain Fill & White Undercoats


This is a show build for Quest, they requested basswood fins.

On the left is the 1/8" thick balsa that came with the Mean Green kit. On the right is the basswood copy for the display build.
There's not much grain in basswood but I still give it a coat of CWF and sanding. It also got a shot of filler/primer and more sanding.

The instructions don't mention it, I did round the leading edges of the fins.

Here's the fins glued on and fillets applied.
White undercoats followed.

I wrapped some 400 grit around a Q-tip for some round cushioned sanding (and no sharp bend sandpaper scratches) in the fillet area.


I didn't have any used 24mm engine casings to use on a painting wand dowel.
Use just over one full wrap of corrugated cardboard around an 18mm casing makes a better fit in the engine mount.


After sanding with some old 400 grit - 
I'm ready for a second shot of gloss white undercoat.

Wednesday, November 3, 2021

Quest Lil' Grunt Build #Q5014, Part 3, Tube Marking

The fin marking guide from the instruction sheet didn't meet up when wrapped around the tube.
I first made up a marking guide by wrapping a strip of copy paper around the tube and marking the overlap point with a pencil.
This was evenly folded into thirds.

It worked okay, but - folding in thirds isn't usually as accurate as folding into fourths.
I ended up going to payloadbay.com and to "Tools". I printed up a three fin marking guide.
To get to the fin marking guide Tool: CLICK HERE

The box says the tube is 1.97" diameter but the marking guide fit was too tight. 
I printed up a second guide setting the diameter to 1.98". This one fit better and will be used on the other upcoming 50mm Quest/Enerjet builds.

The body tube seams were filled with CWF and sanded. 
Notice the fin height and launch lug position are already marked in pencil. This gives me a reference when the glue areas are scraped (to remove the filler primer) later on. 

The inset picture shows the upper lip of the tube that got a wipe of CA glue applied with a Q-tip.

Monday, November 1, 2021

Quest Lil' Grunt Build #Q5014, Part 2, Engine Mount


Like the smaller Quest kits,
The Kevlar line is tied to the 1/4" elastic shock cord with a simple overhand knot.

This is a bit different though, the Kevlar is doubled and the two loose ends are tied to the elastic.


It's not easy getting all the ends even,
hold them together and cut all three lines at once with a wire cutter.


The centering rings got some relief punches for engine hook movement and a small hole for the Kevlar to pass through.

The fit was too tight around the engine tube - 
I did some scraping with an X-Acto blade to open up the diameter.


Here's how the Kevlar loop end is attached to the engine mount.
After the line is drawn tight, it is pressed into the wet glue fillet under the top centering ring.