

This looked to be something different.
I found a The Launch Pad "Parts Pack" instruction booklet with most parts on Ebay.
A vendor may have bought old TLP instructions and pieced together tubes, centering rings and sheet balsa. Or -
This may have been a early transition kit produced by TLP.

I wrote down the recommended engine designations after looking them up on the old Launch Pad website.

If you were to make the model from scratch (no pre-made tubes) the instructions explain how to roll them from manila paper or cardstock.
The main body is made up from smaller segments, joined by DIY couplers. The kit I bought included a two longer body tubes and a standard coupler. The vendor assumes you will use the body tubes.


Here's the nose cone "witches hat". You have to transfer the measurements and cut it out of cardstock.
The supplied parts included a BT-80 Alpha style plastic nose cone.
A pointed cap is rolled from cardstock and glued to the top to lengthen the plastic nose cone. The extension give the nose cone a more correct profile. Seams and joints are filled and smoothed over.
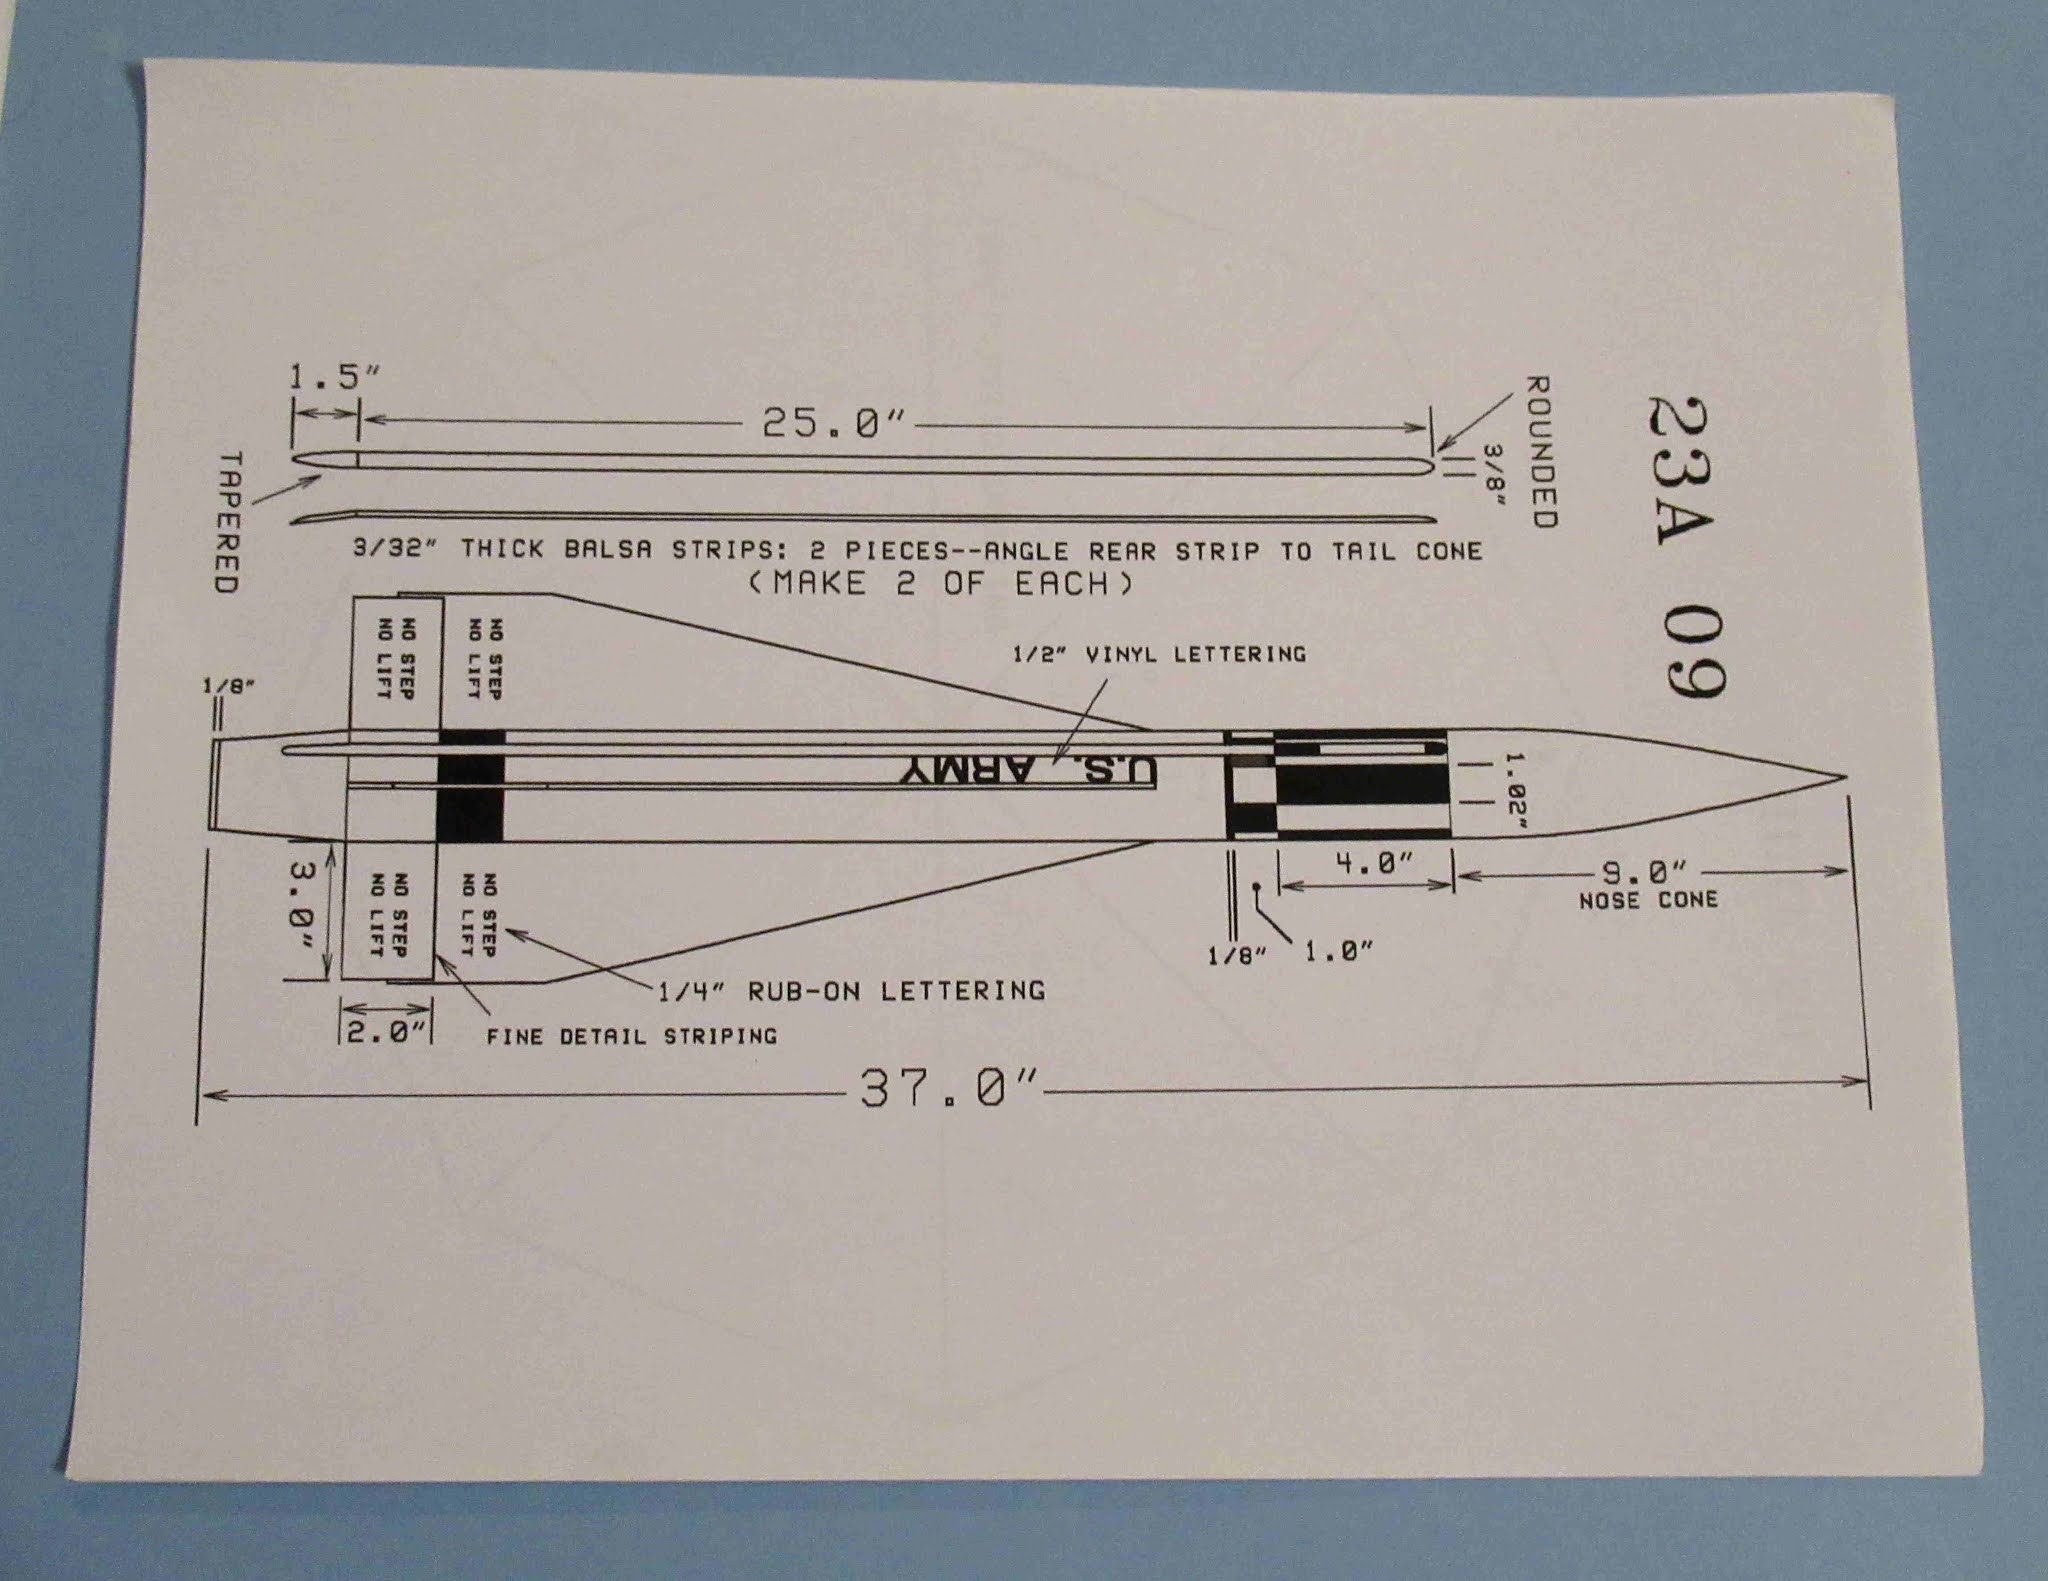
This detailed page shows the conduit shaping and decal placement. Decals aren't included in the TLP kits. A disappointment to some builders as kit face cards imply full markings.
The witches hat is why I linked myself to Launch Pad kits that only had rounded noses. I stink at paper transitions. I can't wait to see how you do it. Maybe it will give me the confidence to do one, sounds I come across a TLP kit somewhere.
ReplyDelete