
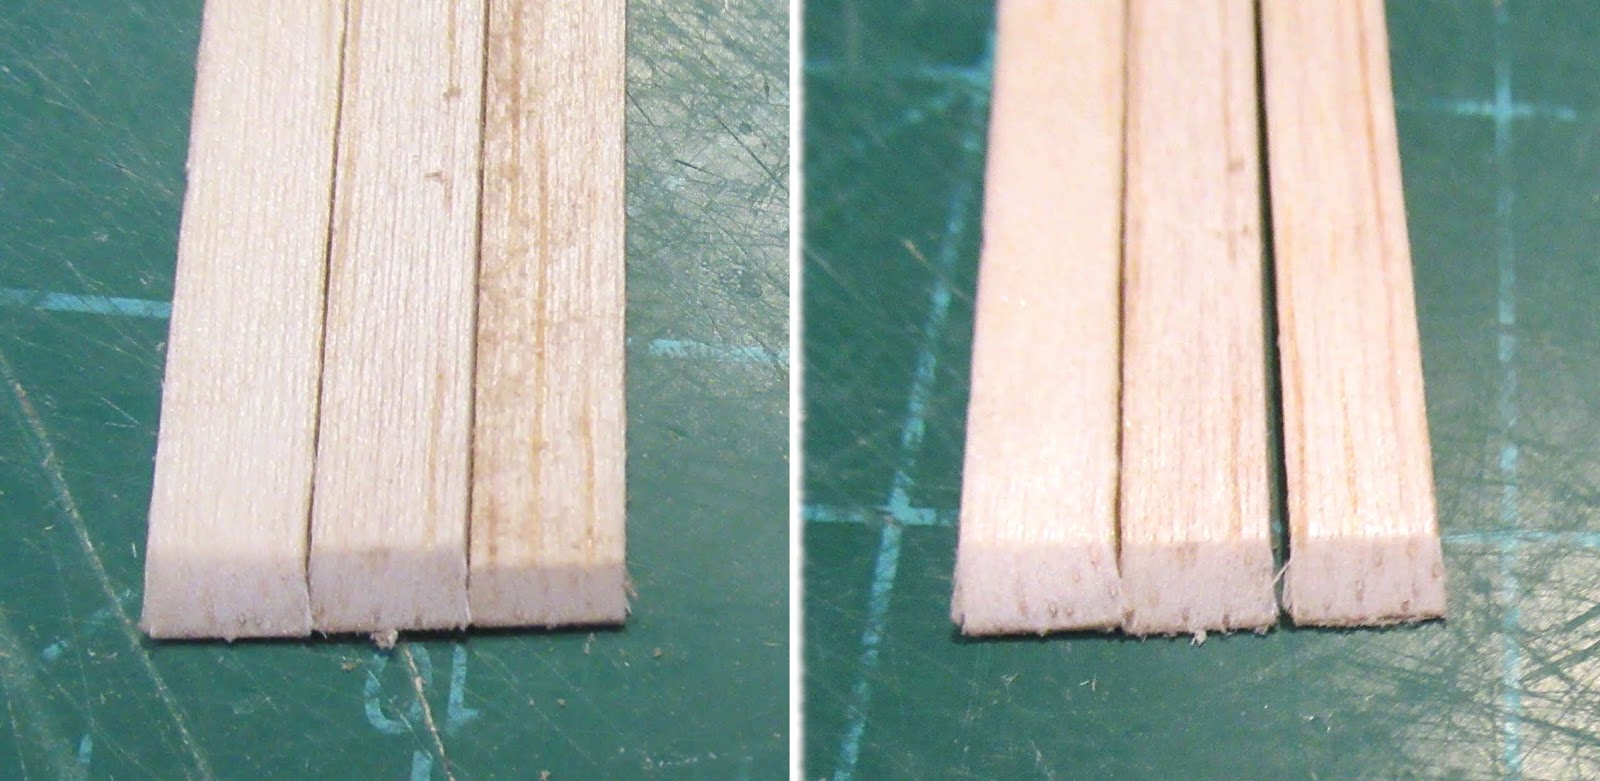
You first sand a taper on the ends. Set them side by side to make sure the angle is consistent. In the first picture, the third tunnel angle isn't wide enough. The second picture shows the fix.

The bottom face of the tunnel should be contoured to match the curve of the body tube.
TIP: You could sand it over the body tube, but I like to sand these contours over a smaller diameter tube. Here I'm using an engine casing. I get a better fit when sanded over a smaller diameter.
The lower picture shows a pretty good fit on the model. Fillets will cover up any gaps.

Check the ends to see if you got a good arc across the top.
The curve was evened out with a few passes over the used engine casing.

Here's the top after shaping - good to go for filling the balsa grain.
Do you have a trick for keeping the piece of wood perfectly straight and aligned to the sanding tube as you move it back and forth? I've struggled mightily with that. Gets worse as the piece of wood gets longer.
ReplyDeleteWhen possible, I've taken to putting the wood on the bench, and then running the sanding tube back and forth over the wood, tilted so that only the end of the tube is touching and sanding. But if the piece of wood doesn't lay flat, this doesn't work. Just fought this on a build I'm doing now, with only partial success.
Hi Neil,
ReplyDeleteNo real trick, I try to sand in as straight a line as I can. Try to keep the tunnel length on the same line as the tube.
I haven' used your method of wetting the tunnel on the bench. I have used the end of the casing, though.
I had the same issue Neil had when building my QCC Explorer. I couldn't keep things straight, no matter how hard I tried.
DeleteAn easy trick would be holding a piece of aluminum angle tight to your body tube, and sanding your part using the edge of the angle as a guide! How could your part be shaped any straighter? I would, however, cover the angle with a stretch of masking tape where it will meet the part's surface. The tape will act as a bit of cushioning and protect the balsa from staining.
DeleteHi Overeasy,
DeleteThat is a great idea! That and covering the angle with tape so it doesn't scar the balsa.