Wrap some 400 grit around the large 3/16" diameter end and sand a concave dip into the edge.
The picture on the right shows a dry test fit.
The cannon assembly should end up even with the back end of the extension piece. Note the line of glue on the 3/16" rear lug.
View from the back to double check the orientation off the assembly.
The instructions have you glue the launch lug 3" up from the rear end of the model. This may have something to do with the C/G considering the 1/2 oz. of clay in the nose.
I glued my launch lug so it will be covered by the long rectangle piece. Look close and you can find it in the picture.
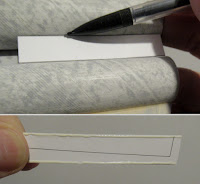
It took a few tires to get the card stock piece in the correct position and angle. Once it was set down dry, pencil lines were traced on the outside edges.
I use very little glue along the edges for initial bonding. Fillets were added after this dried. That thin line on the inside laminate was left over from a earlier 110 lb. stock print. It'll be inside and not seen.
Here's the card stock rectangle glued in place with the launch lug hidden underneath.


No comments:
Post a Comment