

The cut ends should be cleaned up.
On the left you can see the rough cut end.
Start by turning a sharpened dowel or pencil to round out and expose any rough edges.

Lightly sand off the raised edges using some 400 grit on a block.
Then lightly sand the edges at an angle to remove any remaining rough corners.
Repeat on the remaining other 12, 1/8" lugs.
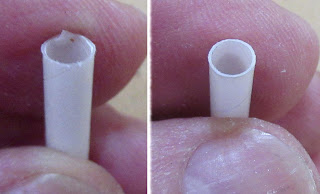

On the left is a before -
On the right is a cleaned up launch lug.
Repeat on the final 3/16" diameter actual flight launch lug.
To fill the seams, all the lugs got a coat of CWF and sanding followed by filler/primer and sanding. Yep - I'm a detail guy. I fill the seams in the launch lugs.
Why clean up launch lug ends? On this model, I don't want any launch rod "hang-ups" with the 3/16" lug that goes over the rod. Those 13 small simulated nozzle lugs were cleaned up and seams filled to look better on the finished model.
No comments:
Post a Comment