
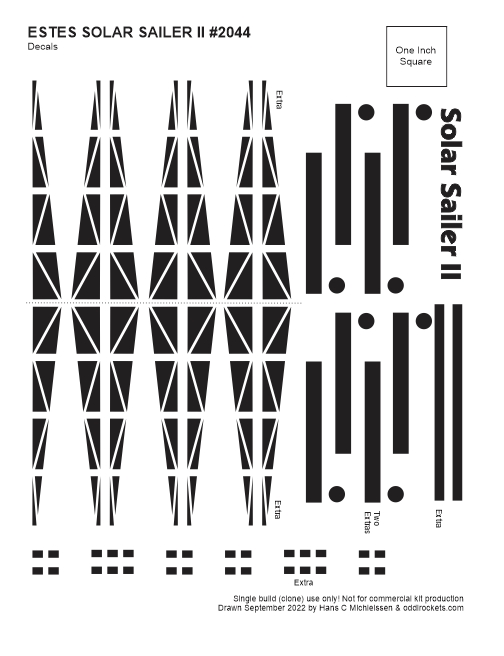
The Girder/Truss decals fit fine. I added an extra set to the sheet.
On the first try, the bar and dot fin decals were drawn only facing one way! I went back and corrected things so they will properly mirror each other on facing fins.
The black lines on the lower right were too long going around the BT-50 tube. Those were shortened to 3 1/4".
The rectangles on the bottom are probably too close together. I used them anyway. Clones are close, but never exactly like the original.

If you'd like to build a Solar Sailer II, the decals and fin patterns are available to Patreon supporters.
Email me at oddlrockets@bellsouth.net and ask for the Solar Sailer II PDF.
I was surprised the black ink looks pretty dark. Home print black decals aren't usually this opaque when set down over white paint.
You'll have to cut the girder decals close to the black print. There isn't much space around the sides with the decal in place.
I used a piece of masking tape to show me where the center line was. This helps with the visual spacing of the two decals.

Here's both sides of the girder decals.
The original kit would have you cut the boxes into three separate pieces of two, three and two. These were shown spaced out wider than I applied them.
I set the boxes down as one long decal. Center the three box group under the center space on the girder decals.
No comments:
Post a Comment