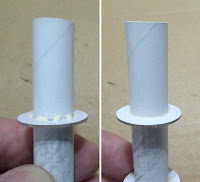
I followed the ring position measurements closely. More on this coming up -
If the ring has a good friction fit, I won't set a ring of glue on the tube as shown in the instruction drawing.
I'll slide the ring into position -
Then add a glue ring and smooth out the glue making a fillet.
I used one of the 1 1/4" long launch lugs (not glue yet) to double check the ring position before applying any glue to the ring/tube joint.
The lug is even with the end of the BT-5 tube. Slide the ring until it butts up against the lug end - then apply glue to the other side of the centering ring joint.
Notice the lug seams were filled already with CWF and filler/primer.
The vanes are glued on the pencil lines on the forward side of the engine. Fillets were smoothed with a Q-tip.
I added pencil lines to the face of the centering ring to make alignment easier.
I skipped every other vane leaving space to make the initial glue fillets easier.
The vanes are close together and getting a smoothing fingertip in there is tight.
Go light on the glue and use a Q-tip if it is too tight.


No comments:
Post a Comment