
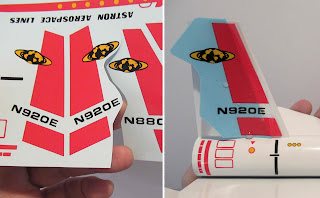
On the left is the decal illustration from the instructions. Notice how the Orbiter rudder decal (left picture, right side) juts into the open space of the rear tube decal.
TIP: When cutting out the decals, don't make any sharp inside corners. Round out any inside cuts as shown on the right.
Sharp corner cuts invite tears in the thin decals.
Be sure to rub some water onto the tube surface and leave wet before transferring decals onto the model. The wet surface allows for repositioning.
Here's another example of decal overlap on the sheet. Again, use rounded cuts.
TIP: On this application - Start the slide off from the straight front edge with the longest straight cut.
 Down the body of the Orbiter is the name decal. Note the position of the flipped over straightedge.
The small tip (left red side) lines up in a straight line. The rear (right side) taper turns up a bit.
No comments:
Post a Comment