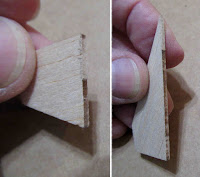
These should be squared up with a block or you won't have a good root edge bond.
This shows the edge sanding about halfway through the sanding. Keep sanding until the burnt edge is nearly gone.
A squared up engine block can fit better against the upper bend of an engine hook.
Sometimes a low engine mount centering ring is set flush with the end of the main airframe tube. Square it up and the joint will be less noticeable on the finished model.
Flip over the hook and put the cut end at the top of the mount.
The inset picture shows the bent end of the mount after hitting it with a metal file to roll off the sharp corners. This makes engine insertion easier.


"The finger tab was cut off because I'm a big boy."
ReplyDeleteLove it.
@ Lonnie,
ReplyDeleteHa! Same thought here! Never really cared for the extended hooks.
Aside from being somewhat unsightly (in my opinion), not being able to stand some rockets upright, or interfering with some model rocket stands, there's also the concern (especially with the 13mm motors) that the finger tab may extend into the efflux of the motor -- which may result in off-center thrust.
ReplyDeleteHi Naoto,
DeleteTrue - A few years back, the finger tab on the 13mm engine hook was larger and did deflect the thrust.
Also agree using a file to round off the sharp corners from a safety standpoint -- sharp corners as well as burrs from cutting are injuries waiting to happen.
ReplyDeleteHi Naoto,
DeleteI found the cut hook corners rough and would scratch the engine casing when I slid them in. Rounding them off makes a smoother insertion.
Hi Chris, I'm glad to see you building this one on the blog; I'd spotted it in the catalogue recently and was considering it as a potential reintroduction to rocketry after a >10 year break, that I might fly from a small field.
ReplyDeleteI have a question about the fin sanding. Did you A) sand the "step" right off, reducing the overall width of the fin, or B) sand a straight line from leading edge corner to trailing edge corner, reducing the width but also potentially changing the angle at which the fin fits to the body tube?
I thought it might have been B), but I still can't tell even after looking at the images on a big screen!
Hi Laurence,
DeleteThe answer is probably closer to "A".
I just sanded with a block until the root edge was flat and most all of the burnt edge was clean. Just enough was sanded off without changing the width too much.
On two piece fins you usually have to sand the root edge flat (again) after gluing the two pieces together.