

NOTE: The file folder stock is thicker, but really soaked up the spray paint. It took some sanding between coats to smooth it out.

I embossed the dashed fold lines using the tip of a butter knife and metal straight edge.
The initial folds were made by pinching the embossed lines over the edge of an engineers scale ruler. Go slow and check the alignment over the ruler edge at the top and bottom before running your fingertips down the fold line.
On the left you can see the fold lines. Check the Jim Z's instructions to see the fold directions.
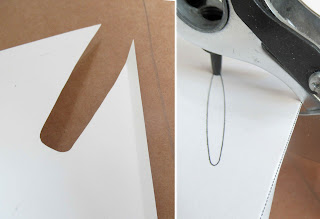
The launch lug ovals are different. I can never get my knife blade to cut around the tight oval ends.
I turned my rotary punch to the smallest tube. The folded wing sides had to be sharply bent for the punch to reach to oval ends.
On the left are the top and bottom punched holes.
It's much easier to connect the curve with a new knife blade.
Hi, Chris, That's a great technique on those oval cuts. Very reminiscent of similar processes used in woodworking. Most internal cuts done with scrollsaws, sabresaws, coping saws, and keyhole saws are accomplished by drilling starter holes, then "sneaking" up on the cut lines with the saw blade.
ReplyDelete